
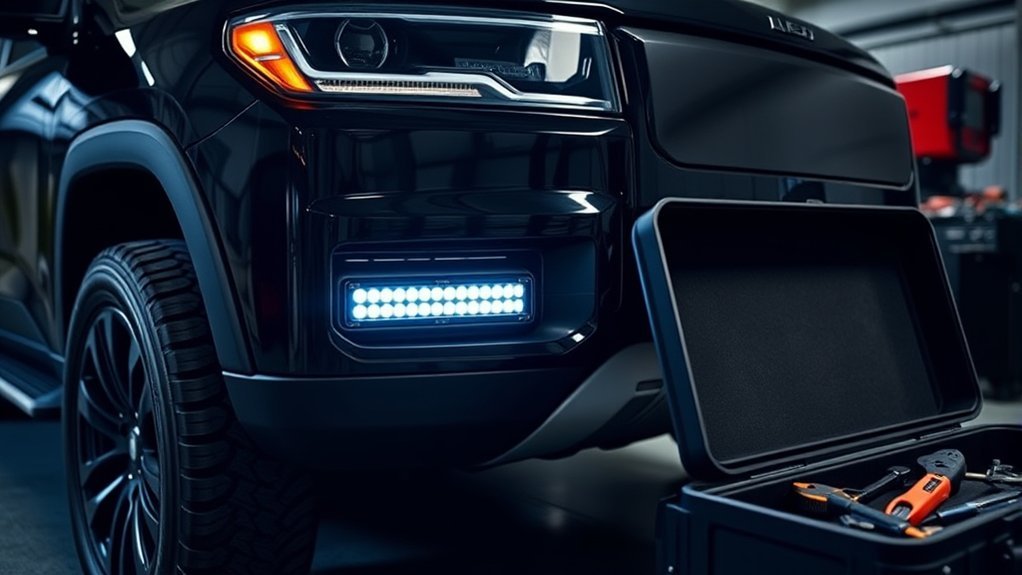
Installing an LED light bar boosts your vehicle’s visibility and safety. Start by gathering essential tools like a socket wrench, wire cutters, and a drill. Select a suitable mounting location and securely attach the bar using brackets. Next, route and connect the wiring, ensuring all connections are insulated. Test functionality before finalizing your installation. To maintain peak performance, regularly check connections and clean lenses. For detailed steps and tips, continue to explore further.
Understanding the Benefits of Installing an LED Light Bar
When you install an LED light bar, you’re not just enhancing your vehicle’s appearance; you’re greatly improving its functionality. One of the key LED advantages is their incredible brightness, often delivering up to 20,000 lumens, which considerably enhances visibility during nighttime driving or off-road adventures.
You’ll also benefit from their energy efficiency, as they consume less power than traditional halogen lights, reducing strain on your vehicle’s electrical system.
Moreover, with a lifespan of 30,000 to 50,000 hours, LED light bars minimize replacement frequency and costs. Their focused beam pattern improves road illumination, enhancing safety and reaction times in low-light conditions.
Plus, many models are waterproof and shockproof, ensuring durability across diverse terrains and weather conditions. When you follow proper installation tips, you can maximize these benefits, transforming your vehicle into a powerful tool for both work and play.
Essential Tools and Materials for Your Installation
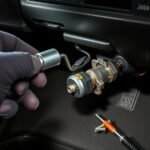
To successfully install your LED light bar, you’ll need a set of essential tools and materials.
Start with a socket wrench set and wire cutters, along with a complete wiring kit that includes relays and connectors.
Don’t forget to gather safety gear to protect yourself during the installation process.
Required Tools Overview
Before starting your LED light bar installation, gathering the right tools is crucial for a smooth and efficient process. Your tool selection should include a socket wrench set for tightening hardware, wire cutters for trimming excess wire, and a drill for creating mounting holes.
A wire crimping tool guarantees secure electrical connections, while zip ties keep your wiring organized. Use sheet metal screws to secure brackets without damaging your vehicle’s body.
A fine-tooth saw may be necessary for modifying grills or brackets to accommodate your light bar. Finally, a multimeter or voltage meter is critical for testing electrical connections, confirming proper installation techniques, and guaranteeing safe operation of your new light bar.
Essential Wiring Components
After gathering the necessary tools, focus on the wiring components that will guarantee a reliable electrical setup for your LED light bar.
Using the right wiring gauge is vital, as it makes certain the wires can handle the current draw without overheating. Here are essential components you’ll need:
- Wiring harness: Make sure it matches your light bar’s power requirements.
- Relay: This acts as an electrically controlled switch, allowing direct power from the battery without overloading your vehicle’s system.
- Connector types: Opt for self-soldering heat-shrink connectors for a strong, weather-resistant connection.
Don’t forget to securely ground the black wire to the chassis for a safe path for excess electricity.
These components will guarantee a seamless installation process.
Suggested Safety Gear
While installing an LED light bar, having the right safety gear and tools is essential for a smooth and secure process.
Start by donning protective gloves to shield your hands from sharp edges and potential injuries. Safety glasses are equally important; they guard your eyes against flying debris during drilling or cutting.
Essential tools for your installation include a socket wrench set, wire cutters, crimping pliers, and a drill. Don’t forget a voltage meter to verify electrical connections.
Electrical tape is vital for insulating exposed wires, preventing short circuits. Finally, zip ties will help you secure wires neatly, avoiding damage from moving parts.
With the right gear, you’re set for a safe and efficient installation.
Step-by-Step Guide to Mounting Your LED Light Bar
To mount your LED light bar effectively, start by selecting a suitable location that guarantees proper wire routing and doesn’t obstruct any vehicle components.
Once you’ve secured the light bar using appropriate brackets and bolts, make sure to aim it correctly for peak performance.
Finally, connect the wiring harness and route it through the chassis, ensuring all connections are secure and functional.
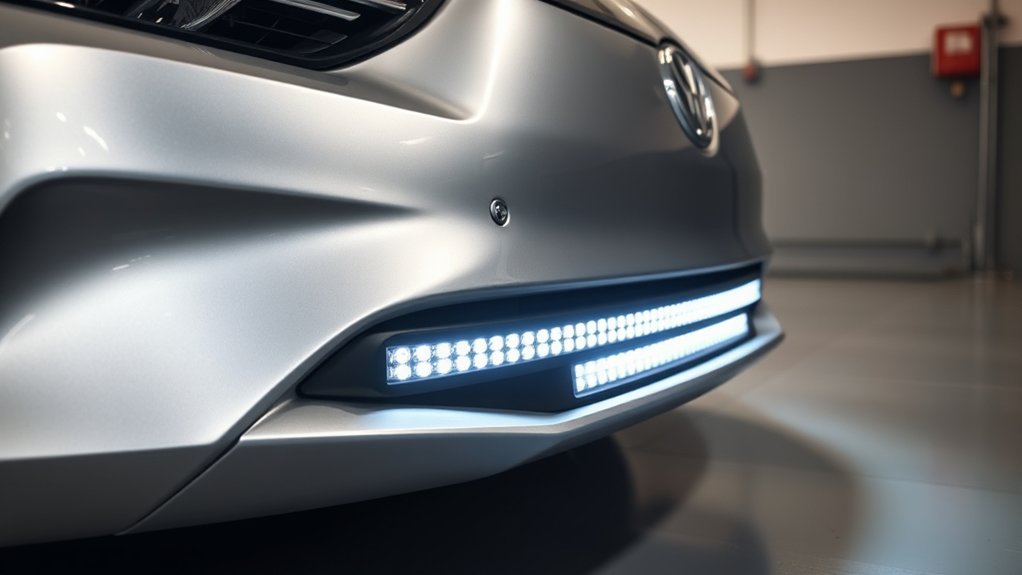
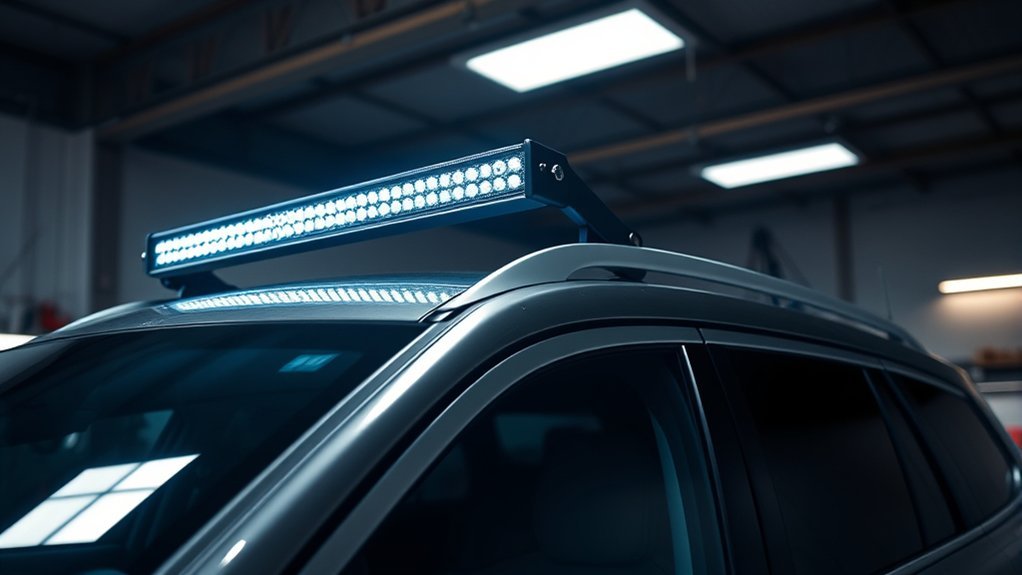
Selecting Mounting Location
Selecting the right mounting location for your LED light bar is essential for maximizing visibility and guaranteeing functionality. Here’s what to take into account:
- Evaluate mounting options, like roof mounts for higher visibility or bumper mounts for a sleek look.
- Verify the location allows for proper wire routing, avoiding contact with moving parts or heat sources.
- Confirm that the mounting surface is sturdy enough to support the light bar and brackets without compromising vehicle integrity.
Using mock-up positioning can help you check alignment and confirm that brackets fit securely with existing attachments.
Prioritize visibility considerations while guaranteeing that your installation maintains the vehicle’s performance and integrity. A well-chosen location enhances not just aesthetics but operational efficiency too.
Securing Light Bar
Once you’ve chosen the ideal mounting location, securing the LED light bar becomes the next essential step in the installation process.
First, use appropriate mounting brackets, like tube clamp brackets, that align with your vehicle’s structure. Confirm the alignment with bolt holes during a mock-up. Securely attach the brackets to the chosen location, using longer bolts if necessary, but be careful not to over-tighten, as this can cause damage.
Next, align the LED light bar with the mounted brackets and fasten it with the provided hardware. Double-check the stability and level of the installation.
Finally, perform a thorough check to verify all components are securely mounted for peak performance. These installation tips will help guarantee a successful setup.
Wiring Connections Explained
Wiring connections are essential for ensuring your LED light bar functions effectively and safely. Follow these wiring techniques for a seamless installation:
- Securely attach the red power wire to the positive battery terminal and the black ground wire to the negative terminal or a suitable grounding point.
- Use a wiring harness with a relay to protect your vehicle’s electrical system from high-current loads.
- Connect the switch inside the vehicle for easy access.
Run the wiring through the chassis, avoiding heat sources and moving parts, using zip ties to secure it.
After completing all connections, utilize a multimeter for troubleshooting tips, ensuring the circuit works correctly before finalizing. This will guarantee your LED light bar performs efficiently.
Essential Wiring Steps for Your LED Light Bar
To successfully install your LED light bar, you’ll need to follow a few essential wiring steps that assure proper functionality and safety. Begin by connecting the positive wire from the LED light bar to the vehicle’s battery’s positive terminal, assuring a secure connection to handle the power requirements. Next, attach the negative wire to the vehicle’s chassis or the negative battery terminal for a proper ground connection.
Utilize a relay in your wiring techniques to manage the high-current operation, linking it to the battery for effective power management. Carefully route the wiring harness through the vehicle’s chassis, protecting it from heat and abrasion. Finally, always verify the connections with a multimeter to ascertain there are no shorts or faulty connections before finalizing the installation.
| Step | Action |
|---|---|
| 1. Positive Connection | Connect to battery positive terminal |
| 2. Negative Connection | Connect to chassis or negative terminal |
| 3. Relay Installation | Incorporate relay into wiring harness |
| 4. Wire Routing | Protect wiring from heat and abrasion |
| 5. Connection Verification | Use multimeter to check for shorts |
Let’s Get Your LED Light Bar Wired Up Right
To wire your LED light bar correctly, you’ll need to focus on the essentials of the wiring harness, including the relay connection process and proper grounding techniques.
Each component plays an essential role in ensuring a reliable and safe installation.
Let’s break down these critical steps to get your setup running smoothly.
Wiring Harness Essentials
A reliable wiring harness is essential for connecting your LED light bar to your vehicle’s electrical system, guaranteeing safe and efficient power distribution.
When choosing your harness, consider the following:
- Wiring color codes: Familiarize yourself with the standard codes to avoid mistakes during installation.
- Wiring gauge selection: Select an appropriate gauge to handle your light bar’s power requirements, preventing overheating or failure.
- Secure routing: Route wiring through your vehicle’s chassis, avoiding heat sources and moving parts to enhance longevity.
Always connect the black ground wire to the negative terminal and the red power wire to the positive terminal.
Before finalizing your setup, test connections with a multimeter to verify everything functions correctly and efficiently.
Relay Connection Process
Connecting the relay correctly is essential for guaranteeing your LED light bar operates efficiently and safely. Start by identifying the appropriate relay types and relay ratings for your setup, as these determine compatibility with your light bar’s power requirements.
Connect pin 30 to the positive battery terminal, pin 87 to the light bar’s power input, and pin 86 to the switch that activates the relay. Don’t forget to secure pin 85 to the vehicle’s chassis for a solid ground connection, critical for proper relay function.
Using a pre-wired relay harness simplifies the installation process and minimizes the risk of incorrect connections. Finally, secure the relay with tape and zip ties and test the functionality to guarantee everything works seamlessly.
Grounding Techniques Explained
Proper grounding is essential for your LED light bar installation, as it prevents electrical issues and guarantees a reliable power supply.
Here are some grounding methods to take into account:
- Securely connect the negative input to your vehicle’s chassis for a safe path for excess electricity.
- Use a multimeter to check for continuity and verify the ground point is free from corrosion or paint.
- Route ground wires away from moving parts and heat sources to enhance durability.
How to Test Your LED Light Bar for Proper Functionality?
To guarantee your LED light bar functions correctly, start by checking all wiring connections for security and correct routing, keeping them clear of moving parts and heat sources. Next, reconnect the vehicle’s battery and turn on the switch to power the light bar. Watch for flickering or non-functioning sections. Use a multimeter to measure voltage at the light bar connections, verifying it receives the appropriate voltage per the manufacturer’s specifications. Inspect the relay and fuse connections within the wiring harness for any damage.
Here’s a quick reference table for your functionality testing:
| Step | Action | Notes |
|---|---|---|
| 1 | Check wiring connections | Verify security and correct routing |
| 2 | Power on the light bar | Look for flickering |
| 3 | Measure voltage with a multimeter | Confirm manufacturer’s specifications |
| 4 | Inspect relay and fuse | Check for damage or blown parts |
What to Do If Your LED Light Bar Isn’t Working?
If your LED light bar isn’t working, the first step is to verify the power connections. Make sure the positive and negative wires are securely connected to the battery, and check if the switch is functioning properly.
Here are some additional troubleshooting techniques to evaluate:
- Inspect the wiring for fraying or loose connections that could disrupt electrical flow.
- Use a multimeter to test the voltage at the light bar’s connectors, ensuring it receives appropriate voltage.
- Confirm the ground wire is securely connected to the vehicle’s chassis; a poor ground can cause common issues.
If the light bar still doesn’t work, check for defects in the bar itself or test it with a different power source.
Top Maintenance Tips for Your LED Light Bar
Maintaining your LED light bar is essential for guaranteeing ideal performance and longevity. To maximize light bar durability, establish a maintenance schedule that includes regular cleaning. Use a soft cloth and mild soap to wipe down the lenses, preventing dirt and debris buildup that can reduce light output.
Every six months, inspect the wiring and connections for signs of wear or damage to guarantee safe operation. Applying a protective sealant designed for automotive lights can shield your light bar from UV rays and harsh weather, preventing fading and degradation.
Additionally, check that the mounting hardware is secure; loose brackets or bolts can cause vibrations that affect stability. Finally, store your vehicle in a garage or under cover when not in use to protect the light bar from environmental elements that accelerate wear and tear.
Following these tips will help you enjoy consistent performance from your LED light bar.
Choose the Right Wiring Option for Your LED Light Bar
Choosing the right wiring option for your LED light bar is essential for guaranteeing ideal functionality and safety. Start by performing compatibility checks to select a wiring harness designed specifically for your vehicle’s electrical system.
Selecting the appropriate wiring harness for your LED light bar is crucial for optimal performance and safety.
Here are some key considerations:
- Use a harness with a relay for vehicles without relay-controlled lights to protect your electrical system.
- Connect the black ground wire to the negative battery terminal and the red power wire to the positive terminal to avoid electrical malfunctions.
- Opt for reliable connectors, like ATP or DT connectors, to handle higher current draws.
If you’re utilizing existing wiring, be sure to disconnect the old lighting circuit from the battery first.
Then, carefully connect the new light’s power and ground wires to the corresponding wires of the old circuit.
With the right wiring options in place, you’ll guarantee your LED light bar performs efficiently and safely.
Safety Tips for Installing Your LED Light Bar
Proper wiring sets the stage for a successful LED light bar installation, but safety measures are equally important to guarantee a smooth process. Before you start, always disconnect the vehicle’s battery to prevent electrical shocks and short circuits. Park your vehicle on a flat surface to confirm accurate mounting and alignment of the light bar.
Here are some essential installation precautions to follow:
| Safety Gear | Precautions |
|---|---|
| Insulated gloves | Protects against electrical hazards |
| Safety glasses | Shields eyes from debris |
| Flat surface | Confirms proper alignment and stability |
Additionally, avoid over-tightening hardware to prevent damage, and check for any obstructions behind the mounting area to avoid damaging both your vehicle and the light bar. Prioritizing these safety tips will lead to a successful and enjoyable installation experience.
Frequently Asked Questions
Can I Install an LED Light Bar on Any Vehicle?
Yes, you can install an LED light bar on most vehicles, but check vehicle compatibility and follow specific installation guidelines for maximum performance. Confirm your vehicle’s electrical system supports the added load for safety and reliability.
How Long Does the Installation Process Usually Take?
You’d think installing an LED light bar is a quick task, but installation time varies. Depending on project complexity, it can take anywhere from 30 minutes to a few hours. Patience is key here!
Do I Need Special Permits for Using an LED Light Bar?
You might need permits depending on your location and light bar regulations. Check local laws to verify compliance, as some areas require specific permits for installation or use of light bars on public roads.
Can I Use My Light Bar During the Day?
Yes, you can use your light bar during the day, but make certain it complies with legal regulations. Proper daytime visibility is essential; excessive brightness might attract unwanted attention or lead to potential fines. Stay informed!
What Are the Common Causes of LED Light Bar Failures?
If your light bar’s flickering like it’s stuck in the ‘80s, common issues include faulty wiring, blown fuses, or poor connections. Use these troubleshooting tips to identify and resolve the problem quickly for peak performance.
Conclusion
Now that you’ve installed your LED light bar, imagine the powerful beams slicing through the darkness, illuminating your path like a lighthouse guiding a ship to shore. With your setup complete and properly wired, you’re ready to tackle any adventure. Remember to keep up with maintenance to guarantee those bright lights shine consistently. Safety first, so always double-check your wiring and connections. Enjoy the enhanced visibility and confidence your new LED light bar brings to every journey!


Leave a Reply