
Carburetors supplied the air-and-fuel mixture for generations of gasoline engines. They are no longer common in new road vehicles, but they still matter in classic cars, racing applications, motorcycles, aircraft, generators, lawn equipment, and other small engines. Understanding how a carburetor works can help you diagnose hard starting, rough idle, hesitation, flooding, and poor fuel economy without replacing parts at random.
Quick Answer
A carburetor is a mechanical fuel-metering device for a gasoline engine. It uses airflow and pressure differences to draw fuel into the intake air, then relies on separate starting, idle, cruise, acceleration, and enrichment circuits to keep the engine running across different speeds and loads.
Key Takeaways
- A carburetor meters both airflow and fuel, but it does not maintain one “perfect” mixture under every condition.
- The float, needle and seat, jets, venturi, throttle, choke, accelerator pump, and enrichment circuits must work together.
- Hard starting, black smoke, hesitation, and rough idle can come from the carburetor, but they can also come from ignition, vacuum, fuel-pressure, or engine problems.
- Cleaning and tuning must follow the exact engine or carburetor manual; many settings are not universal or externally adjustable.
- Fuel injection generally provides easier starting, better automatic compensation, and more precise emissions control, while carburetors remain valued for simplicity and period-correct restoration.
What Is a Carburetor and Why Is It Important?
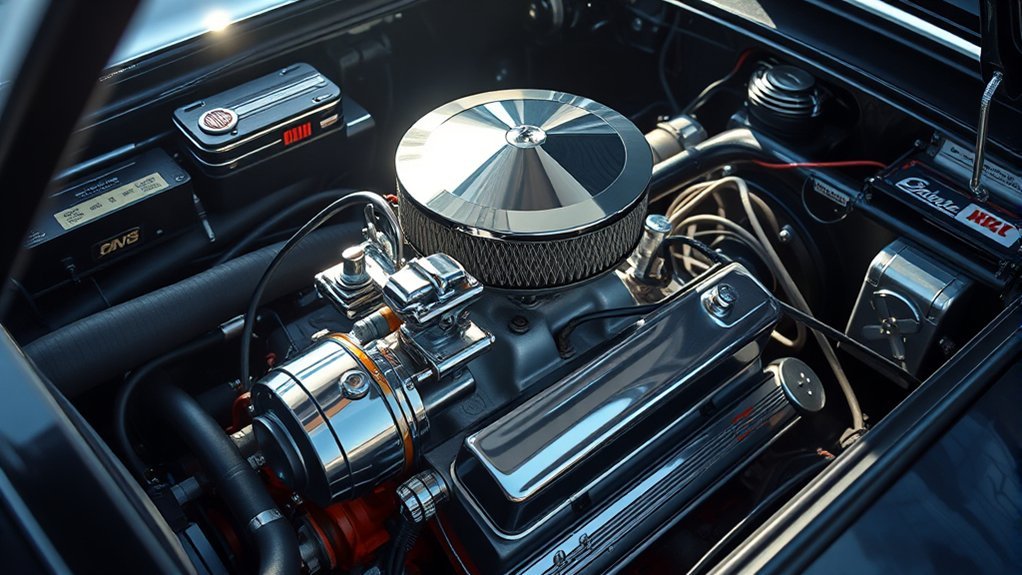
A carburetor is a mechanical device that controls the air entering a spark-ignition engine and adds the fuel needed for combustion. It normally sits between the air cleaner and the intake manifold.
The engine does not need the same mixture at all times. A cold engine needs extra fuel to start. A warm engine needs a controlled idle mixture. Acceleration may require a brief extra shot of fuel, while heavy load may require a richer mixture than steady cruising. A carburetor uses several passages and circuits to meet these changing demands.
A carburetor is not just a tube that mixes air and gasoline. It is a group of mechanical circuits that must meter fuel during starting, idle, cruise, acceleration, and heavy load.
Correct metering affects starting, throttle response, drivability, fuel use, exhaust emissions, spark-plug condition, and engine temperature. A mixture that is too rich can foul plugs, waste fuel, dilute engine oil, and create black exhaust smoke. A mixture that is too lean can cause hesitation, surging, overheating, backfiring through the intake, or engine damage under heavy load.
Carburetors were once standard on gasoline-powered road vehicles. Electronic fuel injection later became dominant because it can use sensors and an electronic control unit to adjust fuel delivery for temperature, altitude, load, engine speed, and exhaust feedback.
How Does a Carburetor Work?
A basic float-type carburetor works through the following sequence:
- Fuel enters the bowl. A float moves a needle against its seat to maintain the specified fuel level.
- The engine draws in air. Air passes through the carburetor throat when the intake valves open and the pistons move through their intake strokes.
- Air speeds up through the venturi. The narrower passage increases air velocity and changes pressure around the fuel-discharge area.
- Fuel moves through calibrated passages. Jets, metering rods, emulsion passages, boosters, or discharge nozzles control how much fuel joins the air.
- The throttle controls engine airflow. Opening the throttle plate allows the engine to draw in more air-and-fuel mixture.
- Special circuits correct the mixture. The choke assists cold starting, the idle circuit operates at small throttle openings, the accelerator pump covers rapid throttle movement, and an enrichment circuit supplies extra fuel under heavy load.
Note: Diesel engines do not use a conventional gasoline carburetor. They compress air and inject fuel into the cylinder or prechamber at high pressure.
The Historical Significance of Carburetors in Automotive Engineering
Carburetion developed alongside the first practical gasoline automobiles in the late 19th century. Early systems included surface-type devices that encouraged fuel to evaporate into passing air. Later spray-nozzle and float-controlled designs improved fuel delivery as engines became faster and more powerful.
Mercedes-Benz’s historical archive identifies Wilhelm Maybach’s spray-nozzle carburetor as a major step in early automobile development. Better fuel atomization and more stable metering helped gasoline engines become practical for increasingly demanding road use.
Carburetors continued to evolve through improved float systems, accelerator pumps, automatic chokes, multiple barrels, vacuum-operated secondaries, metering rods, power valves, and emissions-control features. Updraft, sidedraft, and downdraft layouts allowed engineers to package them around different engines and intake systems.
Electronic fuel injection spread through passenger vehicles during the 1980s and 1990s as manufacturers pursued better cold starting, automatic compensation, diagnostics, fuel economy, and emissions control. The exact transition date differed by manufacturer, model, country, and vehicle class.
Key Components of a Carburetor Explained
| Component | What It Does | Common Trouble Clue |
|---|---|---|
| Air horn | Directs filtered air into the carburetor. | Dirt, loose hardware, or a damaged air-cleaner seal. |
| Venturi and booster | Create the airflow signal that helps discharge and atomize fuel. | Poor response if the carburetor is dirty, damaged, or badly sized. |
| Float bowl | Stores a small, controlled supply of fuel. | Sediment, corrosion, leakage, flooding, or fuel starvation. |
| Float, needle, and seat | Control fuel entry and maintain the specified bowl level. | Fuel dripping, flooding, dry bowl, or inconsistent operation. |
| Idle circuit | Meters fuel when the throttle is nearly closed. | Stalling, rough idle, or no response to an adjustable mixture screw. |
| Main jets and metering system | Control fuel during cruise and higher airflow. | Surging, weak power, excessive fuel use, or black exhaust. |
| Accelerator pump | Adds a brief fuel shot when the throttle opens quickly. | Bogging or stumbling during sudden acceleration. |
| Power enrichment circuit | Adds fuel under heavy load or low manifold vacuum. | Lean full-load operation or an overly rich cruise mixture if faulty. |
| Throttle plate | Controls how much mixture the engine can draw in. | Binding, incorrect idle opening, or worn shaft bushings. |
| Choke | Restricts starting air or otherwise enriches the cold mixture. | Hard cold starting, loading up, black smoke, or poor warm running. |
Venturi Effect Mechanics
The venturi is a narrowed section of the carburetor throat. As the engine draws air through it, air velocity increases and pressure changes near the booster or fuel outlet. The fuel bowl is vented so a pressure difference can move fuel through the metering passages and into the airstream.
The venturi does not work alone. Bowl fuel level, jet size, air bleeds, booster shape, engine vacuum, throttle position, and airflow all influence fuel delivery. A carburetor that is too large for an engine may have a weak metering signal at lower speeds, while one that is too small may restrict high-speed airflow.
Role of Jets and Metering Circuits
Jets are calibrated restrictions that help determine fuel flow. A main jet usually affects cruise and higher-load operation, while the idle circuit uses smaller passages when the throttle is almost closed.
Some carburetors use replaceable jets. Others use metering rods, removable air bleeds, fixed passages, electronic feedback controls, or a combination of these parts. A small-engine carburetor may have an adjustable high-speed needle, but many automotive carburetors do not have an external high-speed mixture screw.
Emulsion passages mix air with fuel before discharge. This helps break the fuel into smaller droplets and shapes the fuel curve as airflow changes.
Float, Needle, and Seat
The float rises and falls with the fuel in the bowl. Its movement operates a needle that opens or closes against a seat. The specified fuel level is critical:
- Too high: The engine may run rich, flood, leak fuel, or drip from the boosters.
- Too low: The engine may hesitate, surge, lose power, or run out of fuel under load.
- Excessive fuel pressure: Pressure may overpower the needle and seat even when the float adjustment is correct.
Throttle, Choke, and Accelerator Pump
The throttle plate controls airflow into the engine. The choke assists cold starting by enriching the mixture. Depending on the design, the choke may be manual, electric, hot-air operated, or linked to another automatic mechanism.
When the throttle opens suddenly, airflow can increase before the main system begins delivering enough fuel. The accelerator pump fills that brief gap. A damaged pump diaphragm, dried seal, blocked discharge nozzle, or incorrect linkage can cause a sharp hesitation.
Different Types of Carburetors and Their Functions
Carburetors can be grouped in several ways. These categories overlap, so a unit may be a fixed-venturi, downdraft, four-barrel carburetor at the same time.
| Classification | Examples | Purpose or Characteristic |
|---|---|---|
| Venturi design | Fixed venturi; variable venturi; constant-depression | Describes whether the throat area stays fixed or changes with engine demand. |
| Airflow direction | Updraft; downdraft; sidedraft | Describes how air travels through the carburetor and how the unit is packaged. |
| Barrel count | One, two, four, or more barrels | Adds airflow capacity or staged operation for larger and higher-output engines. |
| Secondary operation | Mechanical or vacuum secondary | Determines how additional barrels open as the engine needs more airflow. |
| Fuel-level system | Float type; diaphragm type; pressure carburetor | Matches the fuel-control method to the engine and its operating environment. |
A small utility engine may use a simple single-barrel carburetor. A classic performance engine may use a four-barrel downdraft unit with an accelerator pump, replaceable jets, a power valve, and mechanical or vacuum secondaries. Some motorcycles use variable-venturi or constant-depression designs for smoother metering across changing airflow.
When to Use Carburetors: Pros and Cons
Carburetors remain a sensible choice when originality, simplicity, rules, parts compatibility, or an existing engine design makes them appropriate. They are common in classic-vehicle restoration, some racing classes, older motorcycles, and small gasoline engines.
| Advantages | Disadvantages |
|---|---|
| Mechanical operation can be understood and serviced without engine-control software. | Mixture control is less adaptive to temperature, altitude, load, and fuel changes. |
| Rebuild kits and tuning parts are available for many popular classic and performance models. | Cold starting, warm-up, hot restarting, and long storage can require more attention. |
| The system can preserve the original appearance and operation of a historic vehicle. | Fuel can evaporate from an open bowl and leave deposits during storage. |
| Many designs allow mechanical changes to jets, rods, pumps, secondary opening, and enrichment. | Incorrect tuning can increase fuel use, emissions, plug fouling, overheating, or engine wear. |
| A basic carbureted engine may continue running without a complex electronic control system. | Diagnosis still requires care because carburetor symptoms overlap with ignition and mechanical faults. |
Use the carburetor specified for the engine or a replacement that has been properly sized and calibrated. A larger airflow rating does not automatically produce more power. An oversized carburetor can weaken the fuel-metering signal and reduce low-speed response.
Carburetors vs. Modern Fuel Injection: A Comparison
| Feature | Carburetor | Electronic Fuel Injection |
|---|---|---|
| Fuel control | Mechanical pressure signals, jets, passages, valves, rods, and diaphragms | Electronic control of injector timing and fuel quantity |
| Cold starting | Depends on choke, fuel condition, and correct adjustment | Automatic temperature-based enrichment |
| Altitude correction | May require jetting or calibration changes | Normally corrected through pressure and airflow sensor data |
| Diagnostics | Visual inspection, gauges, measurements, and symptom testing | Scan data and fault codes supplement mechanical testing |
| Emissions control | Limited precision, especially during warm-up and changing conditions | Can use oxygen-sensor feedback and precise transient corrections |
| Service style | Mechanical cleaning, rebuilding, and calibration | Electrical, electronic, software, pressure, and injector testing |
Fuel injection does not eliminate all fuel-system problems, but it can make more precise corrections across a wider range of conditions. A carburetor remains attractive where mechanical simplicity, originality, or racing rules matter more than automatic adjustment.
Carburetors also remained in major motorsport long after road vehicles had moved to injection. The NASCAR Cup Series changed from carbureted engines to electronic fuel injection in 2012.
Signs Your Carburetor Is Failing: Key Symptoms to Watch
A symptom can point toward the carburetor, but it does not prove that the carburetor is the cause. Check basic ignition, fuel quality, air supply, vacuum integrity, compression, and fuel pressure before making major calibration changes.
| Symptom | Possible Carburetor Cause | Check Before Blaming the Carburetor |
|---|---|---|
| Hard cold starting | Choke not closing, empty bowl, blocked starting passage | Fuel age, cranking speed, ignition strength, starting procedure |
| Hard hot starting | Flooding, high float level, heat soak, fuel percolation | Battery condition, ignition module or coil heat failure, fuel pressure |
| Black exhaust smoke | Choke stuck closed, high fuel level, leaking needle, excessive pressure | Restricted air filter, contaminated oil, ignition misfire |
| Rough idle or stalling | Blocked idle circuit, incorrect mixture, throttle-shaft wear | Vacuum leaks, ignition timing, spark plugs, valve condition |
| Hesitation on acceleration | Weak accelerator-pump shot, low bowl level, lean transition circuit | Ignition advance, fuel delivery, throttle linkage |
| Backfire through the intake | Lean mixture or inadequate accelerator-pump delivery | Ignition timing, crossed plug wires, sticking valve, lean vacuum leak |
| Fuel leaking or dripping | Damaged gasket, stuck float, leaking needle and seat, excess pressure | Cracked hose, loose fitting, damaged fuel line |
Warning: Stop the engine immediately if gasoline is leaking, pooling, dripping into the intake, or spraying from a fitting. Do not restart it until the source has been repaired and spilled fuel has been safely removed.
Before You Clean or Adjust a Carburetor
At a Glance
| Time Required | About 30–60 minutes for inspection and external cleaning; two hours or more for removal and rebuilding |
| Difficulty | Beginner for inspection; intermediate to advanced for disassembly, float setup, and calibration |
| Tools Needed | Correct service manual, safety glasses, gloves, screwdrivers, wrenches, approved cleaner, drain container, shop towels, compressed air if permitted, and model-specific measuring tools |
| Cost | Roughly $10–$30 for basic cleaner and supplies; rebuild kits and replacement parts may cost $20–$150 or more |
Warning: Work on a cold engine outdoors or in a well-ventilated area. Keep cigarettes, heaters, pilot lights, grinders, relays, and other spark sources away. Wear eye protection, catch drained fuel in an approved container, and isolate the battery or spark-plug lead as directed by the equipment manual. Gasoline is highly flammable and its vapor can affect the eyes, skin, lungs, and nervous system. See the NIOSH gasoline safety guidance.
Fuel Note: Use only fuel approved by the vehicle or equipment manufacturer. The EPA states that E15 must not be used in model-year 2000 and older cars or in nonroad equipment such as lawnmowers and chainsaws. Check the current EPA E15 guidance and the equipment manual before filling a carbureted engine.
Easy Maintenance Tips for Your Carburetor
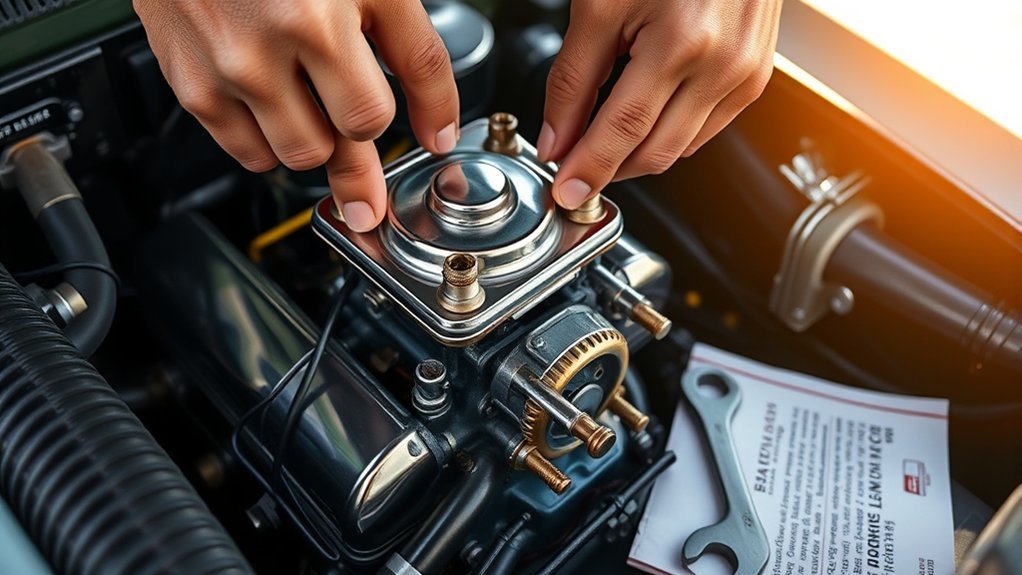
Regular Visual Inspections
Start with simple checks before removing or adjusting anything:
- Confirm that the air filter is clean, correctly installed, and properly sealed.
- Inspect fuel hoses, clamps, fittings, plugs, bowl gaskets, and throttle-shaft areas for leakage.
- Check that the throttle and choke move freely through their full travel.
- Look for loose mounting nuts, damaged vacuum caps, disconnected hoses, and cracked gaskets.
- Make sure the choke fully opens after the engine warms.
- Check fuel pressure against the carburetor manufacturer’s specification.
- Inspect the fuel bowl for dirt, water, corrosion, or varnish when the design allows safe access.
- Verify that linkage springs are installed in the correct holes and are not stretched or bent.
A restricted air filter can create a rich condition. A vacuum leak can create a lean condition. Both may be mistaken for an internal carburetor fault.
Cleaning and Rebuilding Steps
Follow the exact manual for the carburetor or engine. The sequence below is a general overview, not a replacement for model-specific instructions.
- Record the original setup. Photograph hoses, linkage, springs, electrical connectors, choke parts, and screw positions before removal.
- Prevent accidental starting. Disconnect the battery or secure the spark-plug lead away from the plug, as required by the manual.
- Stop and capture the fuel. Close the fuel valve or use an approved line clamp where permitted. Catch fuel in a suitable container.
- Remove the carburetor carefully. Avoid bending linkage, stretching springs, or allowing dirt into the intake manifold.
- Disassemble over a clean tray. Keep small parts organized. Note jet locations, gasket orientation, float direction, and screw positions.
- Clean approved parts. Use a cleaner that is safe for the metals, plastics, coatings, and seals in that carburetor. Wear eye protection.
- Do not enlarge calibrated passages. Do not force drill bits or steel wire through jets. Manufacturer guidance may permit compressed air, a wooden pick, or another non-damaging method.
- Inspect for wear. Check the float, needle and seat, throttle shaft, choke shaft, accelerator-pump parts, jets, threads, casting, and sealing surfaces.
- Install the correct rebuild kit. Replace disturbed gaskets, seals, O-rings, and specified wear parts with components made for the exact carburetor and approved fuel.
- Set the float as specified. Use the manufacturer’s measurement point and orientation. Do not assume that the carburetor should be inverted unless its instructions say so.
- Reassemble without over-tightening. Soft castings, jet slots, mixture-screw tips, and gasket surfaces are easy to damage.
- Check for leaks before driving or loading the engine. Confirm free linkage movement, correct choke operation, stable fuel level, and dry fittings.
Briggs & Stratton’s carburetor rebuilding guidance recommends controlling spilled fuel, documenting linkage locations, wearing safety glasses, replacing damaged parts, and avoiding wire that can damage calibrated openings.
Pro Tip: Change only one calibration area at a time and record every adjustment. If you alter float level, idle mixture, jets, accelerator-pump delivery, and secondary operation together, you will not know which change helped or created a new problem.
Proper Adjustment Techniques
Do not begin by turning screws at random. Use this order:
- Identify the exact carburetor. Record its manufacturer, model, list number, casting number, or engine application.
- Obtain the correct specification. Find the required idle speed, float level, fuel pressure, choke setting, and initial mixture position in the vehicle, engine, or carburetor manual.
- Correct other faults first. Check ignition timing, spark quality, compression, vacuum leaks, air filter, fuel quality, fuel volume, and fuel pressure.
- Warm the engine fully. Make adjustments only under the conditions required by the manual, with the choke fully open unless instructed otherwise.
- Set fuel level before mixture. Incorrect float level can make every later adjustment misleading.
- Set curb idle to the specified speed. Use an accurate tachometer. The correct value is application-specific; 600 to 1,000 rpm is not a universal rule.
- Adjust serviceable idle-mixture screws evenly. Make very small, equal changes while watching engine speed, vacuum, exhaust readings, or another specified measurement.
- Recheck idle speed. Mixture changes can alter rpm, so return the idle speed to specification and repeat as needed.
- Test the engine under the proper load. Check operation in gear, with accessories on, or under governed load when the service procedure requires it.
- Leave fixed or tamper-resistant systems alone. Do not modify sealed emissions calibrations or drill jets without a lawful, measured, application-specific reason.
On suitable Holley street carburetors, the manufacturer’s idle-mixture procedure uses equal screw positions, tiny adjustments, a warm engine, and manifold vacuum to find a stable setting. That procedure should not be copied blindly to carburetors with different idle systems.
Understanding Carburetor Adjustments for Optimal Performance
Carburetor tuning works best when performed in a logical order. Each circuit overlaps with the next, so an error in fuel pressure or float level can look like a jetting, choke, or idle-mixture problem.
Idle Speed and Mixture
The idle-speed screw controls how far the throttle remains open at idle. A serviceable idle-mixture screw controls fuel, air, or an emulsified mixture depending on the carburetor design. Turning a screw inward does not have the same effect on every design.
Use the manual to determine whether the screw meters fuel or air. Seat a mixture screw only lightly. Tightening it against its seat can form a ridge or damage the tapered tip.
Choke Adjustment
A cold engine needs enrichment, but the choke must open as the engine warms. A choke that opens too soon may cause cold stalling. One that remains closed can cause black smoke, plug fouling, poor fuel economy, fuel dilution in the oil, and rough warm operation.
Check the choke plate, pull-off or vacuum break, fast-idle cam, electric heater, hot-air passage, linkage, and adjustment marks according to the carburetor design.
Float Level and Fuel Pressure
Float level and fuel pressure work together. Raising the fuel level can richen several circuits and increase the chance of flooding. Lowering it can cause hesitation or starvation. Excessive pump pressure may force fuel past an otherwise good needle and seat.
Adjust an externally adjustable float only by the manufacturer’s procedure. Some designs are checked with the engine running; others are measured during disassembly. Never loosen a fuel-level fitting on a hot engine unless the service procedure expressly allows it and all fire precautions are in place.
Accelerator Pump and Enrichment
The accelerator pump should begin delivering fuel as the throttle starts to move, but its linkage, nozzle size, cam, stroke, and clearance are carburetor-specific. Too little fuel can produce a lean stumble. Too much can create a rich bog.
Power valves, metering rods, economizers, enrichment needles, and similar parts add fuel under load. Their selection may depend on manifold vacuum, engine demand, spring calibration, or mechanical position.
High-Speed and Main Metering
Do not look for a high-speed adjustment screw unless the manual confirms that one exists. Automotive carburetors commonly use main jets, rods, air bleeds, or enrichment restrictions that require disassembly or specialized measurement.
Road testing alone cannot always identify a dangerous lean condition under full load. A wideband oxygen sensor, exhaust analyzer, chassis dynamometer, spark-plug inspection performed correctly, and other measurements may be needed for performance tuning.
Altitude, Temperature, and Fuel
Air density falls as altitude increases, which can make a fixed carburetor calibration richer. Temperature and humidity also affect air density and fuel vaporization. An engine tuned near sea level may need a manufacturer-approved high-altitude adjustment when used far above its original calibration range.
Modern pump fuel may differ from the fuel available when a classic carburetor was designed. Ethanol content, volatility, storage time, hose material, seals, and fuel pressure can all affect operation. Follow the engine and fuel-system manufacturers’ limits rather than relying on a universal fuel recommendation.
Rich vs. Lean Carburetor Symptoms
| Condition | Possible Signs | Possible Causes |
|---|---|---|
| Too rich | Black smoke, fuel odor, fouled plugs, poor economy, rough warm running, fuel dripping | Closed choke, high float level, excessive pressure, leaking needle and seat, oversized jets, restricted air filter |
| Too lean | Hesitation, surging, intake backfire, hot operation, weak power, hanging idle | Blocked passage, low bowl level, weak fuel supply, vacuum leak, undersized jet, incorrect altitude calibration |
These signs overlap with ignition and mechanical problems. A misfiring cylinder can send unburned oxygen into the exhaust and mislead an oxygen sensor. A vacuum leak can cause a lean idle even when the carburetor is clean. Confirm the root cause before changing calibration.
A Practical Carburetor Troubleshooting Order
- Confirm that the engine has the correct, fresh fuel.
- Inspect the air filter and intake path.
- Check battery condition, cranking speed, spark plugs, ignition output, and timing.
- Inspect every vacuum hose, carburetor mounting gasket, and intake-manifold connection.
- Measure fuel pressure and verify that the bowl receives enough fuel.
- Observe choke operation from cold start through full warm-up.
- Check for external fuel leaks or booster dripping.
- Verify float level using the correct procedure.
- Test the idle and accelerator-pump circuits.
- Clean or rebuild the carburetor only after the external checks support that decision.
- Make calibration changes one at a time and record the result.
When to Clean, Rebuild, Replace, or Seek Professional Help
- Clean it when passages contain light deposits, the exterior linkage is dirty, or stale fuel has left removable residue without damaging parts.
- Rebuild it when gaskets leak, the needle and seat are worn, the accelerator-pump diaphragm has failed, the float is damaged, or normal service parts have deteriorated.
- Replace it when the casting is cracked, corrosion has destroyed calibrated passages, shafts or bores are severely worn, threads are stripped, or the correct repair parts are unavailable.
- Seek professional help when fuel leaks persist, the vehicle must meet emissions requirements, specialized machining is needed, full-load calibration is involved, or the engine continues to run lean, backfire, overheat, or flood after basic service.
The Evolving Role of Carburetors in Modern Engines
Carburetors have largely disappeared from new road-going cars and light trucks, but they have not disappeared from engine culture or service work.
- They preserve the original design and appearance of classic vehicles.
- They remain common on many older motorcycles and pieces of outdoor power equipment.
- They are used in racing applications where regulations, tradition, cost, or tunability favor them.
- They provide a useful mechanical demonstration of airflow, pressure, atomization, and fuel metering.
- Popular performance designs continue to receive replacement parts, rebuild kits, and tuning support.
Fuel injection is usually the better choice for a modern production vehicle because it offers precise control and automatic correction. A carburetor remains appropriate when the engine was designed for it, the system is maintained correctly, and the owner accepts the extra attention it may require.
Frequently Asked Questions
Why did cars have carburetors?
Carburetors gave early gasoline engines a practical mechanical way to meter fuel into intake air. They could be manufactured, adjusted, and repaired with the technology available at the time, and they supported decades of improvements in power, drivability, and vehicle production.
Why do modern cars not need carburetors?
Modern cars use electronically controlled fuel injectors. The engine computer can adjust fuel delivery using information about temperature, airflow, pressure, throttle position, engine speed, and exhaust oxygen. This improves starting, automatic compensation, diagnostics, fuel control, and emissions performance.
What was the last car to use a carburetor?
There is no single worldwide answer. The result changes depending on whether “car” means a passenger car or includes light trucks, which national market is being discussed, and whether the date refers to production or final sale. The often-repeated claim that the 1995 Ford F-150 was the last carbureted car is incorrect because that model used fuel-injected gasoline engines.
What are five common signs of a carburetor problem?
Common clues include hard starting, rough idle or stalling, hesitation during acceleration, black exhaust smoke, and visible fuel leakage. These symptoms can also come from ignition, vacuum, air-filter, fuel-pressure, or internal engine faults, so diagnosis should come before adjustment.
Can you clean a carburetor without removing it?
External linkage and some accessible deposits can often be cleaned without removal. A blocked internal jet, contaminated bowl, worn needle and seat, damaged pump diaphragm, or deteriorated gasket usually requires disassembly. Spraying cleaner into the air horn cannot repair worn or damaged parts.
How often should a carburetor be cleaned?
There is no universal interval. Follow the equipment manual and clean the carburetor when inspection or testing shows contamination. Fresh approved fuel, a clean air filter, correct storage, and regular engine maintenance can reduce deposit formation.
Is converting a classic engine to fuel injection worthwhile?
A conversion may improve starting, automatic altitude correction, drivability, and data logging. It also adds cost, wiring, sensors, fuel-pressure requirements, and installation work. Restoration originality, local emissions rules, engine condition, intended use, and the quality of the conversion kit should guide the decision.
Conclusion
A carburetor is a carefully calibrated mechanical fuel system, not merely a simple mixing chamber. Its venturi, bowl, float, jets, throttle, choke, accelerator pump, and enrichment circuits must work together for clean starting, stable idle, smooth acceleration, and safe full-load operation.
Begin troubleshooting with fuel quality, ignition, airflow, vacuum integrity, fuel pressure, and choke operation before adjusting the carburetor. When cleaning or rebuilding is necessary, control gasoline safely, use the correct manual and repair kit, preserve calibrated passages, and change one setting at a time. That method protects both the engine and the original character that makes carbureted vehicles and equipment worth maintaining.
Sources
- Mercedes-Benz Group: The Predecessor Companies, 1886–1920 — early automobile history and Maybach’s spray-nozzle carburetor.
- NASCAR: Transition to Electronic Fuel Injection — confirms the Cup Series change from carburetors in 2012.
- Briggs & Stratton: Carburetor Rebuild and Overhaul — removal, cleaning, inspection, rebuilding, and safety practices.
- Holley: Setting Idle Mixture and Speed — application-specific idle adjustment principles.
- U.S. Environmental Protection Agency: E15 Fuel Registration — vehicles and nonroad engines in which E15 may not be used.
- NIOSH Pocket Guide: Gasoline — gasoline flammability, exposure routes, symptoms, and protective guidance.







Leave a Reply