

Changing transmission fluid can help preserve smooth shifting, cooling, lubrication, and hydraulic operation, but there is no universal procedure for every vehicle. Automatic transmissions, continuously variable transmissions (CVTs), dual-clutch transmissions, and hybrid transaxles may require different fluids, tools, fill temperatures, and service methods. Confirm the exact requirements for your model before loosening a plug or removing a pan.
Quick Answer
To change transmission fluid safely, identify the exact transmission, obtain the manufacturer-specified fluid and service procedure, support the vehicle correctly, drain and measure the old fluid, replace only serviceable filters and seals, refill carefully, and set the final level using the required fluid-temperature and engine-running procedure.
Key Takeaways
- Follow the maintenance schedule and service instructions for your exact model year, engine, drivetrain, and transmission.
- Do not assume a generic fluid, fill quantity, torque value, socket size, gasket, or sealant will work.
- A routine drain-and-fill normally replaces only part of the total fluid held in the transmission and torque converter.
- Some sealed transmissions require a scan tool, special adapter, narrow temperature range, or professional service.
- Slipping, warning lights, large metal pieces, or a strong burnt smell may require diagnosis rather than a routine fluid change.
- Never work beneath a vehicle supported only by a hydraulic jack, and recycle the used fluid through an approved collection facility.
At a Glance
| Time Required | About 1–3 hours for an accessible drain-and-fill or pan service; longer when shields, crossmembers, temperature checks, or special procedures are involved |
| Difficulty | Intermediate; advanced or professional service may be required for sealed, temperature-controlled, or dealer-only systems |
| Tools Needed | OEM service instructions, safety glasses, gloves, wheel chocks, ramps or jack stands, drain pan, correct hand tools, torque wrench, measuring container, funnel or fill pump, cleaning supplies, and any required scan tool or temperature reader |
| Cost | Common DIY pan services may require roughly $40–$150 in fluid, filter, gasket, and seals; specialty fluid, larger capacities, tools, and professional labor can increase the cost |
Verify Your Vehicle Before Changing Transmission Fluid
Begin with the vehicle’s model year, make, model, engine, drivetrain, and transmission type. Two vehicles with the same model name can use different transmissions and completely different fluids. A transmission may also change during a model year.
Use the 17-character VIN to confirm the vehicle’s identity. The NHTSA VIN Decoder can help identify basic vehicle information reported by the manufacturer. Then check the owner’s manual, maintenance guide, and manufacturer service information for the exact transmission.
Before buying supplies, verify all of the following:
- The transmission type and identification code
- The exact fluid specification, not merely a suggested viscosity or fluid color
- The normal and severe-use service intervals
- Whether the transmission has a drain plug, removable pan, and serviceable filter
- The service-fill quantity and total dry capacity
- The required gasket, O-ring, sealing washer, or approved liquid sealant
- Drain-plug, pan-bolt, filter, fill-plug, and check-plug torque values
- Whether the engine must be running during the final level check
- The fluid-temperature range required for an accurate level check
- Whether a scan tool, fill adapter, or other special equipment is required
- Whether the manufacturer permits owner service
Warning: Stop and arrange professional service when the manufacturer says not to check or replace the fluid yourself. For example, current Honda guidance for certain automatic and CVT applications specifically directs owners not to perform the procedure. Never improvise a service method for a sealed transmission.
Use extra caution with a hybrid or electric vehicle. Do not touch, disconnect, support the vehicle against, or route tools near orange high-voltage cables and components. When transmission service requires work near a high-voltage system, follow the manufacturer’s shutdown and verification procedure or use a qualified technician.
Why You Should Change Your Transmission Fluid

Transmission fluid may lubricate gears and bearings, operate hydraulic controls, carry heat away from internal parts, protect against corrosion, and provide the friction characteristics needed by clutches, bands, synchronizers, or pulleys. Its exact duties depend on the transmission design.
Heat, oxidation, clutch material, fine metal wear, moisture, and other contamination can affect the fluid over time. Replacing fluid at the manufacturer’s recommended interval helps restore the correct fluid properties and removes some accumulated contamination. It does not reverse existing mechanical damage.
A routine drain-and-fill replaces only the fluid that can escape through the drain opening or removed pan. Fluid remains inside the torque converter, valve body, clutch circuits, cooler, and cooler lines. Toyota describes a typical fluid change as replacing about 30%–40% of the fluid, although the actual amount varies by transmission.
Drain-and-Fill vs. Pan Service vs. Fluid Flush
- Drain-and-fill: Fluid is drained through a plug and replaced. The pan and filter may remain in place.
- Pan service: The pan is removed so a serviceable filter or strainer, gasket, and seals can be replaced. The pan and magnets can also be inspected and cleaned.
- Fluid exchange or flush: Equipment replaces a much larger share of the fluid by circulating new fluid through the system. This is not the same as a basic drain-and-fill.
- Dry fill: The amount required after overhaul or replacement when the transmission, converter, and cooler circuits are empty. This capacity is normally much greater than the amount needed during routine service.
Use only the service method approved for the vehicle. Do not choose a flush simply because it replaces more fluid, and do not use chemicals or cleaning solvents unless the manufacturer’s procedure specifically calls for them.
Note: “Lifetime fluid” does not mean every transmission uses the same maintenance schedule. Operating conditions, towing, temperature, contamination, leaks, and manufacturer instructions still matter.
Signs the Transmission Fluid Needs Attention
Follow the maintenance schedule rather than waiting for symptoms. However, the following conditions justify checking the fluid, service history, and transmission operation:
- A transmission-fluid service or maintenance reminder
- Low fluid caused by a visible leak
- Fluid that is much darker than new fluid of the same specification
- A sharp burnt odor
- Delayed engagement when selecting Drive or Reverse
- Harsh, erratic, or unusually slow shifts
- Shuddering, vibration, or slipping
- Whining, grinding, or other new noises
- A transmission-temperature or malfunction warning
- Fluid containing large flakes, chips, or pieces of friction material
The correct fluid specification and level-setting procedure matter more than fluid color alone.
Many traditional automatic-transmission fluids are red or pink when new, but color is not standardized across all ATFs, CVT fluids, DCT fluids, and manual-transmission lubricants. Compare the used fluid with new fluid of the exact same specification when possible.
A dark appearance or burnt smell can indicate heat and oxidation, but slipping or delayed engagement does not prove that old fluid is the only problem. Low pressure, worn clutches, solenoid faults, valve-body problems, incorrect fluid, software issues, or internal damage can cause similar symptoms.
Warning: Diagnose the vehicle before routine service if it has severe slipping, no movement, a warning light, a strong burnt smell, or large metal fragments. Continuing to drive may cause additional damage, and changing the fluid is not guaranteed to correct an existing fault.
Tools, Parts, and Preparation
Gather everything before lifting the vehicle. Do not rely on generic socket sizes or fluid quantities from an unrelated guide.
Parts and Supplies
- Enough manufacturer-specified transmission fluid for the stated service-fill procedure, plus a small allowance if the level must be set through an overflow opening
- A transmission filter or strainer only if it is serviceable during routine maintenance
- The correct filter seal, pickup-tube O-ring, or grommet
- A new pan gasket, drain-plug washer, fill-plug washer, and check-plug seal as required
- The exact OEM-approved sealant if the manufacturer specifies liquid sealant instead of a gasket
- Replacement clips or fasteners for any underbody shields that must be removed
- Brake or parts cleaner that is safe for the removed metal pan, if permitted by the procedure
- Lint-free towels
- A clean, sealable container for used fluid
Tools and Safety Equipment
- Safety glasses and fluid-resistant gloves
- Wheel chocks
- Vehicle-rated ramps or a floor jack and properly rated jack stands
- The correct sockets, bits, extensions, and hand tools
- A calibrated inch-pound or foot-pound torque wrench covering the required range
- A large drain pan
- A graduated measuring container
- A long funnel or transmission-fluid fill pump
- A plastic scraper when gasket removal is permitted
- A scan tool or temperature-reading method when required
- A level work surface and adequate lighting
Warning: Work on a firm, level surface. Apply the parking brake and chock the wheels that remain on the ground. Use only the manufacturer-approved lifting and support points. Never place any part of your body beneath a vehicle supported only by a hydraulic jack. OSHA guidance requires a raised load to be blocked or otherwise secured before work begins.
Transmission fluid, the pan, the exhaust system, and nearby components can become hot enough to burn skin. Wear eye protection because fluid may spread across the pan edge or flow outward when a plug is removed.
Pro Tip: Before opening the transmission, photograph the fluid labels, part numbers, pan, plugs, brackets, shields, and fastener locations. Record the specified torques, fill temperature, and service capacity on paper so you do not have to search for them while fluid is draining.
How to Change Transmission Fluid and a Serviceable Filter
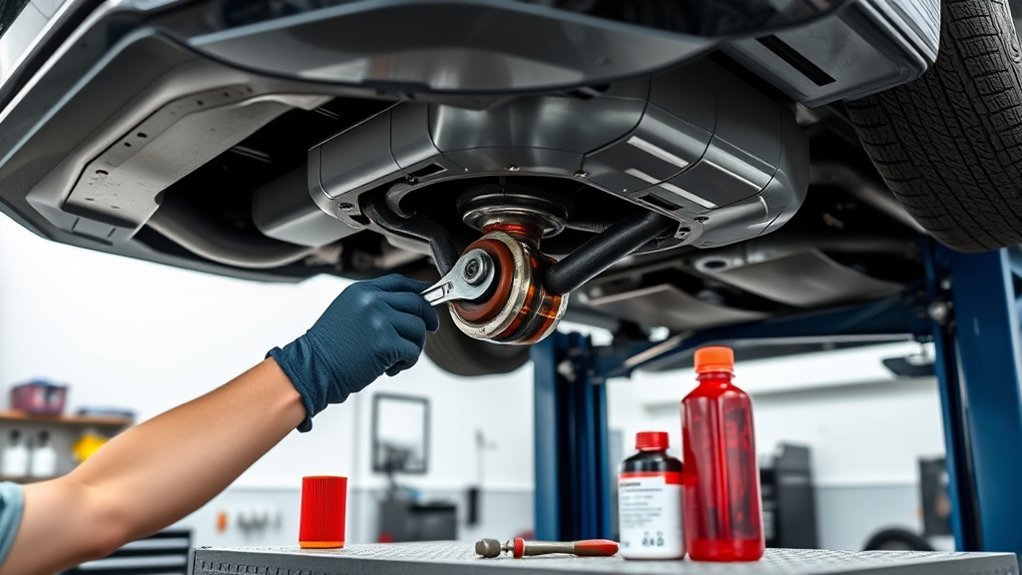
The following process covers a conventional drain-and-fill or removable-pan service only when the vehicle manufacturer permits it. The OEM procedure takes priority whenever it differs from these general steps.
- Confirm the service procedure. Verify the fluid specification, service-fill quantity, filter design, sealant or gasket, fastener torques, fluid-temperature range, and final-level method.
- Inspect the vehicle first. Look for damaged cooler lines, loose connectors, fluid leaks, warning lights, and severe operating symptoms. Correct or diagnose serious problems before routine maintenance.
- Warm the fluid only as instructed. A short drive may help fluid drain, but some procedures require a cold start or a specific temperature. Do not overheat the fluid.
- Park on a level surface. Apply the parking brake, select Park or the specified gear, shut down the powertrain, and chock the wheels.
- Lift and support the vehicle. Use the approved lift points and stands or ramps. The vehicle may need to remain level for accurate draining and filling.
- Remove shields carefully. Take off only the underbody panels, braces, or covers identified in the service instructions. Support any crossmember or component before removing structural fasteners.
- Clean around the service openings. Remove loose dirt from the drain plug, fill plug, check plug, and pan perimeter so debris cannot enter the transmission.
- Confirm that the fill plug can be removed. When the design has a separate fill plug, make sure it opens before draining the transmission. This prevents an empty transmission from being stranded with a seized fill plug.
- Position a wide drain pan. Transmission fluid may travel several inches outward and may change direction as the flow slows.
- Drain through the plug when provided. Remove the plug carefully, retain it, and replace its sealing washer if required. Allow the fluid to drain until it slows to a drip.
- Lower a pan without a drain plug gradually. Support the pan and loosen the fasteners in the manufacturer’s recommended sequence. Leave several bolts loosely installed on one side while lowering the opposite edge so the fluid drains in a controlled direction. Do not assume that the rear bolts must always come out first.
- Measure the drained fluid. Transfer it to a graduated container after it cools enough to handle safely. The measured amount is a useful initial refill reference, but it does not replace the final level-setting procedure.
- Remove the pan if required. Keep the pan level to avoid spilling the remaining fluid. Note the locations and lengths of different fasteners.
- Remove the serviceable filter or strainer. Follow the specified fastener and release method. Some filters retain additional fluid. Confirm that the old pickup seal or O-ring came out with the filter; installing a second seal over an old one can cause a suction leak.
- Inspect the fluid, pan, and magnets. A thin gray paste on a magnet can be normal wear. Large chips, sharp flakes, pieces of friction material, or heavy debris require further diagnosis.
- Clean the pan. Use the approved cleaner and lint-free towels. Clean the magnets and return them to their original positions. Do not spray solvent into the exposed transmission.
- Prepare the sealing surfaces. Remove old gasket material without gouging aluminum. Do not use aggressive abrasive discs that can remove metal or scatter abrasive particles.
- Install the new filter and seal. Lubricate the specified seal with clean transmission fluid when directed. Seat the filter fully and tighten its fasteners to the exact torque.
- Install the pan gasket or approved sealant. Use a dry gasket when specified. Apply only the exact bead size and pattern of liquid sealant required by the manufacturer. Do not add silicone merely to hold a gasket in place.
- Reinstall the pan. Start all fasteners by hand. Tighten them gradually in the specified sequence and torque them to the exact value. Overtightening can distort the pan or damage the transmission case.
- Install the drain plug. Fit the required new washer or seal and tighten the plug to specification.
- Add the initial refill amount. Use the approved fill opening and clean equipment. Begin with the measured drain quantity or the stated initial service-fill amount, whichever the OEM procedure specifies.
- Start the powertrain when instructed. Hold the brake and move slowly through each gear position, pausing for several seconds in each position. This fills hydraulic circuits. Follow different instructions when the manufacturer provides them.
- Set the final fluid level. Use the correct dipstick marks, check plug, or overflow procedure at the specified fluid temperature. Some vehicles require the engine to run, the vehicle to remain level, and a scan tool to display transmission-fluid temperature.
- Recheck all plugs and fasteners. Install and torque the fill and check plugs with new seals when required.
- Inspect for leaks. Clean spilled fluid, run the vehicle as directed, and check the pan, plugs, cooler lines, and fittings.
- Reinstall shields and lower the vehicle. Replace damaged clips and tighten all underbody fasteners properly.
- Perform a careful road test. Confirm normal engagement and shifting. Avoid hard acceleration until the final level and leak check are complete.
- Check again after the road test. Inspect for leaks and repeat the level procedure if the manufacturer requires a hot recheck.
- Record the service. Note the date, mileage, fluid specification, amount added, filter and gasket part numbers, and any debris or leaks found.
How Much Transmission Fluid Should You Add?
Do not refill every vehicle with a generic amount such as 3.5 quarts. Consult the exact service information and distinguish between these figures:
- Drain-and-fill capacity: The approximate amount removed through the drain plug.
- Pan-service capacity: The amount commonly replaced when the pan and filter are removed.
- Total or dry capacity: The amount held by an empty transmission, torque converter, cooler, and lines after overhaul or replacement.
The total capacity is usually much greater than the amount removed during normal maintenance. Pouring the full dry capacity into a transmission that still contains fluid can severely overfill it.
Use the measured drain amount as an initial reference only when the old level was believed to be correct and the OEM procedure permits that method. Always complete the specified final-level check.
How to Check the Final Transmission Fluid Level
Dipstick-Equipped Transmissions
Follow the owner’s manual for fluid temperature, engine operation, selector position, and the correct side of the dipstick. Some transmissions are checked hot with the engine running; others use a different procedure. Wipe the dipstick with a lint-free towel, reinsert it fully, and recheck.
Check-Plug or Overflow Transmissions
These units use a plug or internal standpipe to establish the level. The vehicle normally must be level, the engine may need to run, and the fluid must be within a specified temperature range. Fluid may be added until it produces the exact stream or drip pattern stated by the manufacturer.
Fluid expands as it warms. Setting the level outside the specified temperature range can produce an inaccurate result even when fluid appears at the check opening.
Sealed or Dealer-Only Transmissions
Some vehicles do not provide an owner-level check and specifically require a dealer or qualified technician. Current Honda instructions for certain CVT and automatic-transmission applications state that owners should not attempt the check or change themselves. Follow that restriction.
Warning: Both underfilling and overfilling can cause problems. A low level may draw air and reduce lubrication or hydraulic pressure. An excessive level may become aerated or foam, resulting in erratic operation and fluid discharge. Do not estimate the final level by container count alone.
Choosing the Correct Transmission Fluid
Select fluid by the exact manufacturer specification printed in the owner’s manual or service information. A label that merely says “automatic transmission fluid,” “CVT fluid,” or “universal” is not enough unless it explicitly lists the required specification and the manufacturer permits its use.
Automatic transmissions, CVTs, DCTs, and manual gearboxes depend on different friction and viscosity characteristics. Using the wrong fluid can cause shudder, harsh shifts, belt or clutch problems, poor lubrication, or internal damage.
Do not choose fluid based only on color. Dye is used for identification and leak detection, and acceptable fluids may have different colors. Do not mix fluids unless the manufacturer specifically allows it.
Note: “Synthetic” does not automatically mean compatible or superior for your transmission. The required approval or specification is more important than the marketing description.
Avoid supplemental additives unless the vehicle manufacturer publishes an instruction or service bulletin approving that product for the exact transmission. Proper transmission fluids already contain a balanced additive package designed around the unit’s clutches, seals, hydraulic controls, and friction materials.
Troubleshooting Problems After the Fluid Change
Delayed Engagement or No Movement
Shut the vehicle off and verify the fluid level using the correct procedure. Check for a major leak, an omitted filter seal, a loose filter, an open drain plug, an incorrect fill opening, or insufficient fluid. Do not continue revving the engine to force engagement.
Foamy Fluid or Fluid Coming From a Vent
The transmission may be overfilled, aerating the fluid, or drawing air through a filter pickup seal. Confirm the correct temperature-based level and inspect the filter installation.
New Leak at the Pan
Check for a pinched gasket, damaged sealing surface, incorrect sealant, distorted pan, loose fasteners, or overtightened bolts. Do not keep tightening the bolts beyond specification because that can worsen pan distortion or strip the case.
Harsh Shifts, Shudder, or a Warning Light
Confirm that the fluid meets the exact specification and that the level is correct. Scan the transmission control system for diagnostic trouble codes. Some vehicles also require a maintenance reset, adaptation procedure, or software-related service step.
Metal or Friction Material in the Pan
A light coating of fine gray paste on a magnet may reflect normal wear. Large chips, needle-like fragments, gear teeth, bearing pieces, or substantial clutch material are not routine maintenance findings. Photograph the debris and seek a transmission diagnosis before driving farther.
Tips for Long-Lasting Transmission Health
- Follow the vehicle-specific maintenance schedule or maintenance-monitor system instead of a universal mileage rule.
- Use the severe-service schedule when the manufacturer classifies your towing, hauling, mountain driving, low-speed operation, heat exposure, or other use as severe.
- Check underneath the vehicle for leaks and repair them promptly. Transmission fluid is not normally consumed like fuel.
- Use only the specified fluid and approved replacement parts.
- Keep fill equipment, funnels, pumps, and containers clean. Small amounts of dirt or the wrong fluid can affect hydraulic controls.
- Do not tow beyond the vehicle’s ratings, and use any required towing mode or additional cooling equipment.
- Address temperature warnings, slipping, shuddering, unusual noises, and delayed engagement early.
- Keep service records, including the fluid specification and quantity used.
- Do not add “stop leak,” friction modifier, cleaner, or conditioner unless the manufacturer specifically approves it.
Toyota advises owners to follow the manufacturer’s recommendations because no single interval applies to every vehicle. Ford likewise directs owners to obtain the fluid type and maintenance schedule for their specific vehicle. Some Honda maintenance systems call for more frequent service under high-temperature, low-speed mountain driving.
How to Dispose of Used Transmission Fluid
Allow the fluid to cool, then transfer it into a clean, leak-proof container with a secure cap. Label it clearly and keep it away from children, pets, flames, drains, soil, and rainwater.
Do not mix used transmission fluid with coolant, brake cleaner, gasoline, solvents, or other chemicals. A contaminated mixture may be rejected by a recycling facility and may require different hazardous-waste handling.
Take the fluid to a local automotive-fluid collection site, participating repair shop, household hazardous-waste program, or other approved recycling location. The U.S. Environmental Protection Agency recommends checking with local maintenance facilities, waste collectors, and government waste officials for accepted drop-off locations.
Clean spills promptly with an appropriate absorbent. Do not hose transmission fluid into a driveway, storm drain, sewer, or soil.
Frequently Asked Questions
How often should I change my transmission fluid?
Use the interval in the owner’s manual, maintenance guide, or maintenance-monitor system for your exact vehicle. There is no universal 30,000- or 60,000-mile rule. Towing, hauling, high heat, mountain driving, repeated low-speed operation, and other severe conditions may shorten the interval when the manufacturer says they do.
What type of transmission fluid is best for my vehicle?
The correct fluid is the one that meets the exact manufacturer specification for your transmission. Do not substitute a fluid merely because it is synthetic, the same color, or advertised as universal. Confirm compatibility in the owner’s manual or official service information.
Can I change transmission fluid without professional help?
You may be able to perform a basic drain-and-fill when the manufacturer supplies a clear procedure and you have safe lifting equipment, the correct fluid, a suitable torque wrench, and the required level-check tools. Use professional service when the manual prohibits DIY work or the transmission requires special adapters, scan data, programming, or high-voltage procedures.
What is the difference between a transmission fluid change and a flush?
A drain-and-fill replaces the fluid that drains from the pan or drain opening, while a fluid exchange replaces a much larger portion by circulating fluid through the system. A pan service may also include a serviceable filter and gasket. Use the method approved by the manufacturer for your vehicle.
Will changing the fluid fix a slipping transmission?
Not necessarily. Slipping can result from low or incorrect fluid, but it can also indicate worn clutches, pressure loss, valve-body trouble, solenoid faults, control-system problems, or internal damage. Diagnose severe slipping before assuming routine maintenance will repair it.
Should I change fluid that looks dark or smells burnt?
Dark color and a burnt odor justify inspection, but they do not reveal the full condition of the transmission. Check the service history, fluid level, diagnostic codes, operation, leaks, and pan debris. Seek diagnosis first when the vehicle slips severely, has a warning light, or contains substantial metal or friction material.
What happens if I overfill the transmission?
Excess fluid can contact rotating parts and become aerated or foamy. This may cause erratic hydraulic pressure, poor lubrication, overheating, leaks, or fluid discharge from a vent. Set the level with the specified temperature and engine-running procedure rather than relying only on the number of containers added.
How should I dispose of old transmission fluid?
Store cooled fluid in a sealed, leak-proof container and take it to an approved used-oil or automotive-fluid collection location. Keep it separate from coolant, solvents, gasoline, and other chemicals, and never pour it onto the ground or into a household or storm drain.
Conclusion
Changing transmission fluid can be useful preventive maintenance, but accuracy matters more than following a generic mileage, torque, or refill number. Identify the exact transmission, use the required fluid, support the vehicle safely, follow the approved drain and filter procedure, and set the final level at the specified temperature.
Stop and seek qualified help when the transmission is sealed, the manufacturer prohibits owner service, high-voltage components are involved, or the vehicle already has severe slipping, warning lights, heavy debris, or loss of movement. A careful, vehicle-specific service protects the transmission far better than an improvised fluid change.
Sources
- Toyota — How Often Should You Change Your Transmission Fluid? — Supports manufacturer-specific intervals, drain-and-fill versus flush distinctions, partial fluid replacement, condition checks, and sealed-transmission guidance.
- Ford — Transmission Maintenance Schedules — Supports checking the vehicle-specific maintenance schedule and required fluid specification.
- Honda 2026 HR-V Owner’s Manual — Transmission Fluid — Supports exact CVT-fluid compatibility and the warning that some transmissions should not be serviced by the owner.
- NHTSA VIN Decoder — Supports vehicle identification before selecting parts, fluids, or service instructions.
- Occupational Safety and Health Administration — Jack Safety — Supports rated jack capacity and securing a raised load before work begins.
- U.S. Environmental Protection Agency — Managing, Reusing, and Recycling Used Oil — Supports leak-proof storage and proper recycling of used automotive oil.







Leave a Reply