

Replacing spark plugs can restore smooth starting and reliable ignition when the old plugs are worn, damaged, or fouled. The job is manageable on many gasoline engines, but the correct plug, gap, tightening specification, and access procedure vary by model year and engine. Verify those details before loosening the first plug.
Quick Answer
To replace spark plugs, let the engine cool, verify the exact plugs and specifications for your engine, clean each plug well, remove one coil or wire at a time, inspect the old plug, check the new plug’s gap, hand-thread it, and tighten it to the exact dry-thread specification. Do not apply anti-seize unless the manufacturer specifically requires it.
Key Takeaways
- Use the vehicle’s model year, engine, VIN, OEM catalog, and service information to verify plug fitment, gap, and torque.
- Work only on an engine that is cool to the touch, and clean debris from every plug well before removing a plug.
- Most plated replacement plugs should be installed with clean, dry threads unless the exact instructions say otherwise.
- Start every plug by hand. It should turn several full revolutions without a ratchet or noticeable resistance.
- Misfires, hard starting, rough idle, and poor fuel economy can have causes other than spark plugs.
- Stop if a plug will not loosen, will not hand-thread, or appears to be cross-threaded.
At a Glance
| Time Required | About 45–120 minutes when the plugs are accessible; considerably longer if the intake manifold or other major parts must be removed |
| Difficulty | Moderate; access, aluminum threads, and exact torque requirements demand care |
| Tools Needed | Correct spark-plug socket, ratchet, extensions, calibrated torque wrench, approved gap gauge, compressed air or a narrow vacuum, basic hand tools, eye protection, and service information |
| Cost | Varies by cylinder count, plug design, tool ownership, and whether intake gaskets or other access parts must also be replaced |
Warning: Work only when the engine and cylinder head are cool to the touch. Keep the ignition off, move the key or keyless fob away from the vehicle, disable remote-start functions, wear eye protection, and never allow dirt or loose hardware to fall into an open spark-plug hole.
Verify the Correct Spark Plugs Before You Start
Do not select replacement plugs by thread size or electrode material alone. Engines that look similar can use different thread reach, seat design, heat range, resistor value, terminal style, projected-tip length, electrode configuration, gap, and tightening specification.
Confirm all of the following before beginning:
- Model year, make, model, and engine: Use the emissions label under the hood, the owner’s manual, OEM service information, and a trusted application catalog.
- VIN and engine identification: The NHTSA VIN Decoder can help confirm information encoded in the VIN. Use the vehicle manufacturer’s catalog or service information for final parts fitment.
- Exact plug part number: Cross-check the OEM number and the replacement manufacturer’s catalog.
- Thread and seat design: Confirm thread diameter, thread reach, hex size, and whether the plug has a gasket seat or taper seat.
- Heat range and resistor design: Do not substitute a hotter, colder, resistor, or non-resistor plug unless an approved application calls for it.
- Gap and torque: Record the exact specifications for the engine and plug before removing anything.
- Access procedure: Determine whether an intake manifold, cowl, engine cover, air duct, brace, or other component must be removed. Obtain any required replacement gaskets or seals first.
Note: A plug that physically threads into the cylinder head is not necessarily correct. The wrong reach, seat, heat range, or projected-tip design can cause poor running or engine damage.
Why Should You Replace Your Spark Plugs?

Spark plugs ignite the compressed air-fuel mixture in a gasoline engine. As the electrodes wear, the gap can grow and the ignition system may need more voltage to produce a spark. A plug can also become fouled by carbon, oil, fuel, coolant contamination, or an underlying mechanical or control-system problem.
Replacing worn plugs at the specified interval can help maintain reliable starting, smooth combustion, and proper ignition-system operation. However, new plugs will not repair a weak ignition coil, damaged wiring, injector fault, vacuum leak, low compression, oil-control problem, or incorrect air-fuel mixture.
A new spark plug can correct a worn or damaged plug, but it cannot cure the condition that caused abnormal fouling.
Signs You Need to Change Your Spark Plugs
Spark-plug problems can cause noticeable symptoms, but those symptoms are not unique to the plugs. Check the maintenance schedule and diagnose the engine before replacing parts solely on a guess.
Engine Misfires During Acceleration
A worn electrode, excessive gap, cracked insulator, carbon fouling, or incorrect plug can contribute to a misfire, especially when cylinder pressure rises under acceleration. Weak coils, damaged boots, injector problems, compression loss, incorrect fuel mixture, and wiring faults can produce similar symptoms.
Scan the engine-control module for diagnostic trouble codes when possible. A cylinder-specific code can help identify where to inspect, but it does not prove that the spark plug is the failed part.
Difficulty Starting the Vehicle
Worn or fouled plugs can make starting harder, particularly in cold conditions. Long cranking can also result from a weak battery, low fuel pressure, injector leakage, sensor faults, poor compression, or an ignition-system problem.
If the engine cranks slowly, test the battery and starting system before assuming the plugs are responsible. If it cranks normally but does not start, check for codes and follow the vehicle’s diagnostic procedure.
Decreased Fuel Efficiency
A plug that misfires or does not ignite the mixture consistently can contribute to increased fuel consumption. Fuel economy can also fall because of tire pressure, driving conditions, weather, fuel formulation, air-filter restriction, sensor faults, brake drag, or other mechanical problems.
Replacing worn plugs may restore efficiency that was lost because of poor ignition. It does not guarantee better mileage when the existing plugs are serviceable or another fault is present.
Rough Idle, Check-Engine Light, or Overdue Service
Rough idle, hesitation, reduced power, and a steady check-engine light are reasons to inspect the engine and review its service history. Replace plugs when the scheduled interval is due or when inspection and diagnosis identify a plug problem.
Warning: A flashing check-engine light can indicate an active misfire that may overheat and damage the catalytic converter. Avoid heavy acceleration and have the vehicle diagnosed promptly according to the owner’s manual.
How Often Should You Replace Spark Plugs?
Manufacturer’s Recommended Intervals
Follow the maintenance schedule for the exact model year and engine. There is no safe universal replacement interval for every vehicle. Some applications use conventional plugs with shorter service intervals, while others use long-life platinum or iridium designs intended to remain in service for 100,000 miles or more.
The vehicle schedule takes priority over a general mileage range because the interval is based on the engine, ignition system, emissions calibration, and original plug design. A Ford schedule, for example, specifies a 100,000-mile interval for certain applications, while other vehicles and operating conditions use different schedules.
Signs of Wear
Replace a plug sooner than the scheduled interval when inspection reveals a cracked insulator, damaged terminal, severely worn electrodes, abnormal erosion, an incorrect gap that cannot be safely corrected, or fouling that makes the plug unreliable.
Do not replace a repeatedly fouled plug without investigating the cause. Oil deposits, heavy carbon, overheating, or unusual wear can point to an engine, fuel, ignition, cooling, or tuning problem.
Driving Conditions Impact
Frequent short trips and long periods of low-speed operation can promote carbon fouling when the plug does not reach its normal self-cleaning temperature. Towing, sustained high load, forced induction, racing, and engine modifications can also change plug-temperature and ignition demands.
Do not invent a shorter interval based only on driving style. Use the OEM severe-service schedule or the written guidance from the engine builder or calibrator. Modified engines may require a different heat range, gap, or inspection interval.
| Common Design | What It Means | Replacement Rule |
|---|---|---|
| Standard nickel-alloy electrode, often with a copper core | A traditional design that may wear faster than an approved long-life precious-metal plug | Follow the exact OEM interval and part specification |
| Platinum electrode design | Uses platinum on one or more electrode surfaces for wear resistance in approved applications | Do not substitute solely to extend service life; verify compatibility |
| Iridium fine-wire design | Uses a small, durable center electrode and may be designed for long service in specific engines | Handle the fine-wire electrode carefully and follow the OEM schedule |
Essential Tools and Materials for Spark Plug Replacement

Gather the correct tools before opening the engine. Improvised sockets, an unsuitable torque wrench, or the wrong gap tool can damage a plug or make accurate installation impossible.
- Correct replacement spark plugs: Verify the exact application and inspect each plug for shipping damage.
- Spark-plug socket: Use the correct hex size with a rubber insert, magnetic retainer, or another plug-safe holding system.
- Ratchet and extensions: Use the shortest practical setup that reaches the plug without side-loading it.
- Calibrated torque wrench: Confirm that the required specification falls within the wrench’s useful range. A large wheel-lug wrench may be inaccurate at a low plug-torque setting.
- Approved gap gauge: Follow the plug manufacturer’s instructions for the specific electrode design.
- Compressed air or narrow vacuum: Clean debris from plug wells before removal. Wear eye protection and control where debris is blown.
- Basic hand tools: These may be needed for engine covers, coil fasteners, intake ducts, braces, or the upper intake manifold.
- Marker, tape, or numbered tray: Keep coils, wires, fasteners, and removed plugs organized by cylinder.
- Dielectric grease: Use only a light film inside the boot opening when the service information or boot manufacturer permits it. Do not coat the plug threads or electrodes.
- Replacement gaskets or seals: Obtain these in advance if the approved access procedure requires intake-manifold or plenum removal.
- Scan tool: Optional but useful for checking misfire codes and verifying whether a warning light returns.
Pro Tip: Arrange the removed plugs in cylinder order. Differences between cylinders can reveal a localized injector, coil, oil-control, coolant, or compression problem that would be hidden if the plugs were mixed together.
Step-by-Step Guide to Removing Old Spark Plugs
- Park safely. Place the vehicle on a level surface, select Park or neutral as appropriate, apply the parking brake, switch the ignition off, and move the key or fob away from the vehicle.
- Let the engine cool completely. A hot plug can cause burns, and working in a hot aluminum cylinder head increases the risk of thread damage.
- Review the service procedure. Identify the cylinders, coil or wire layout, plug torque, gap, required access parts, and any parts that must be replaced during reassembly.
- Remove necessary covers and ducts. Keep every fastener organized. Cover any open intake passage immediately with a clean, secure barrier that cannot fall into the engine.
- Work one cylinder at a time when practical. Disconnect the coil connector or remove the plug-wire boot by gripping the boot, not the wire. Use the specified puller when required.
- Inspect the plug well. Look for oil, coolant, water, rust, torn boots, carbon tracking, or damaged wiring. Oil in a deep plug well may indicate a leaking tube seal that should be repaired.
- Clean around the plug. Use controlled compressed air or a narrow vacuum before loosening the plug so grit cannot fall into the cylinder.
- Remove the plug straight out. Fully seat the spark-plug socket, keep the extension aligned with the plug, and turn counterclockwise without side-loading the ceramic.
- Stop if abnormal force is required. Do not keep pulling harder on a seized or binding plug. Follow the OEM stuck-plug procedure or have a qualified technician remove it before the shell breaks or the cylinder-head threads are damaged.
- Inspect the threads and sealing surface. Do not run a cutting tap through the cylinder head as a routine cleaning step. If threads are damaged or contaminated, use the approved repair procedure.
Warning: Once a plug is removed, do not blow compressed air directly into the open hole, drop tools near it, or leave it uncovered while performing unrelated work.
Inspect Old Spark Plugs Before Discarding Them
Plug appearance can provide useful clues, but it is not a complete diagnosis. Compare all cylinders and consider operating conditions, diagnostic codes, fuel trims, compression, and service history.
| Observed Condition | Possible Meaning | Next Step |
|---|---|---|
| Even light tan, gray, or modest dry deposits | May be consistent with normal use, depending on fuel and engine design | Compare electrode wear and gap across all cylinders |
| Dry black carbon | Possible rich mixture, repeated short trips, weak ignition, cold heat range, or extended idling | Diagnose the cause instead of repeatedly installing new plugs |
| Wet oil deposits | Possible oil entry through rings, valve guides, seals, or another mechanical problem | Check oil consumption and engine condition |
| White, blistered, glazed, or melted firing end | Possible overheating, incorrect heat range, lean operation, detonation, pre-ignition, or insufficient plug torque | Do not continue hard operation until the cause is diagnosed |
| Cracked ceramic or damaged terminal | Impact, improper socket use, side-loading, or installation damage | Replace the plug and inspect the socket, coil boot, and installation method |
| One plug looks very different from the others | Possible cylinder-specific coil, injector, compression, sealing, or coolant problem | Keep the plug identified by cylinder and diagnose that cylinder |
Gap New Spark Plugs
Many replacement plugs arrive pre-gapped, but shipping and handling can alter the setting. Verify the exact gap in the OEM service information or the plug manufacturer’s application catalog rather than relying on a universal range.
- Confirm the specification. Check the exact model year, engine, and plug part number.
- Inspect the electrodes. Do not install a plug with cracked ceramic, a bent ground strap, a loose terminal, or a damaged fine-wire center electrode.
- Use the specified gauge. Plug manufacturers may give different tool instructions for different electrode designs. Follow the directions supplied for the exact plug.
- Measure without force. The correct gauge should pass with light, consistent drag. Do not wedge a thick gauge between delicate electrodes.
- Adjust only the ground electrode. Never pry against the center electrode or ceramic. Make small changes and measure again.
- Replace a damaged plug. Do not attempt to straighten a cracked insulator or damaged fine-wire center electrode.
Champion’s gap guidance explains why the setting must match the vehicle, while NGK’s technical guidance warns against prying on fine-wire electrodes.
Note: Electrode material does not establish the correct gap. Two iridium plugs intended for different engines may require different gaps, heat ranges, seat designs, and torque values.
Install New Spark Plugs
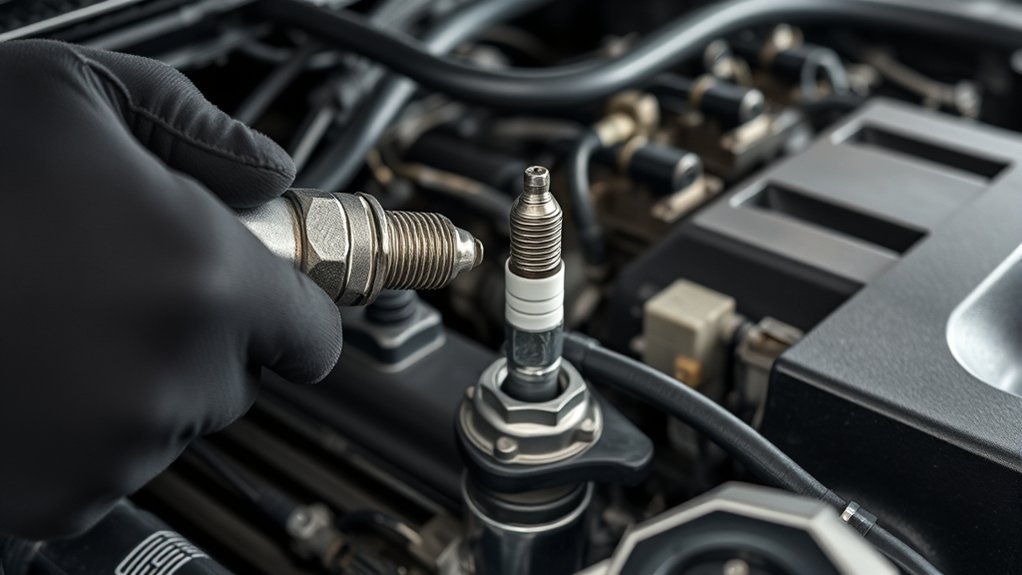
- Compare the old and new plugs. Confirm the part number, thread diameter, reach, seat, hex, terminal, and overall firing-end configuration.
- Keep the threads clean and dry. Do not routinely apply oil, grease, or anti-seize. Many modern plugs have a plated shell designed for dry installation.
- Lower the plug carefully. Use a retaining spark-plug socket or another plug-safe method. Do not drop it into a deep well.
- Start the plug by hand. Turn the extension or socket with your fingers and no ratchet attached. The plug should rotate several full turns easily.
- Stop at any resistance. Back the plug out, inspect the threads, confirm alignment, and try again. Never use the ratchet to force a plug that will not hand-thread.
- Tighten to the exact specification. Use a calibrated torque wrench and the specified value or approved angle method for that engine and plug.
- Inspect the boot or coil. Replace torn, swollen, burned, oil-soaked, or carbon-tracked boots. Use only a light film of dielectric grease inside the boot opening when permitted.
- Reinstall the coil or wire. Make sure the boot seats fully and the electrical connector locks. Tighten coil fasteners to their separate specification.
- Repeat one cylinder at a time. Keep wires and connectors in their original positions and routing.
Warning: Do not apply anti-seize by habit. NGK states that lubricant can alter torque and increase the risk of shell stretch or thread damage. Use a compound only when the exact vehicle or plug instructions explicitly require it and provide the matching installation procedure.
How to Torque Your Spark Plugs Correctly
Correct torque creates the required seal and allows heat to move from the plug shell into the cylinder head. Too little torque can reduce heat transfer or allow leakage and vibration. Too much can damage the cylinder-head threads, distort the plug shell, compromise internal seals, or make later removal difficult.
Before tightening, verify:
- The exact engine and plug part number
- The plug’s thread diameter and reach
- Gasket-seat or taper-seat construction
- Cylinder-head material
- Whether the value applies to a new or previously seated gasket
- Whether the specification assumes clean, dry threads
- The unit of measure: lb-ft, lb-in, or N·m
- That the torque wrench is accurate within the required range
DENSO’s installation guidance shows how torque changes with plug size, seat, and cylinder-head material. NGK also identifies torque as essential to sealing and heat transfer. These general references do not replace the vehicle-specific service specification.
Pro Tip: Set the torque wrench only after confirming the unit. Confusing lb-in with lb-ft or N·m can severely under-tighten or over-tighten a spark plug.
Reassemble and Test the Engine
- Inspect the work area. Confirm that no socket insert, rag, fastener, tool, or debris remains in a plug well or intake opening.
- Reconnect every coil and sensor. Check each connector lock and verify that wiring is not pinched, stretched, or routed against a hot or moving part.
- Reinstall removed components. Fit new intake gaskets when required and follow the approved tightening sequence and torque for intake parts, braces, ducts, and covers.
- Check hoses and ducts. A disconnected vacuum line or loose intake duct can create rough running that appears to be a spark-plug problem.
- Start the engine. Listen for smooth idle, unusual ticking, air leaks, arcing, or an immediate misfire.
- Scan for codes when available. Confirm that no new connector, circuit, or misfire code appeared. Do not erase codes before recording them.
- Perform a gentle road test. Once the engine is running normally and no warning light is flashing, check light-load acceleration before applying heavy load.
- Recheck the area. Look for loose connectors, displaced hoses, or parts that shifted during the road test.
Troubleshoot Issues After Spark Plug Replacement
If the engine runs worse immediately after the repair, first inspect everything that was touched. A new symptom that begins at once is often related to a loose connector, crossed wire, damaged boot, cracked plug, incorrect part, or assembly error.
| Issue | Likely Checks | Action |
|---|---|---|
| Engine misfires immediately | Loose coil connector, crossed plug wires, unseated boot, wrong plug, damaged ceramic, incorrect gap, or debris in a connection | Switch off the engine and inspect each cylinder in firing-order sequence |
| Check-engine light stays on | Stored pre-existing code, new circuit code, or continuing engine fault | Read and record codes; diagnose them rather than clearing the light repeatedly |
| Check-engine light flashes | Active misfire with possible catalyst overheating | Avoid heavy driving and arrange prompt diagnosis |
| Engine will not start | Disconnected shared harness, sensor or intake connector, crossed wires, weak battery, or unrelated no-start fault | Verify all removed connectors, grounds, ducts, hoses, and battery condition |
| Ticking or puffing near a plug | Possible loose plug, sealing problem, damaged seat, or thread issue | Shut the engine off and verify the installation using the approved procedure |
| Plug will not hand-thread | Misalignment, wrong plug, contaminated threads, or damaged cylinder-head threads | Do not use a ratchet; remove the plug and inspect before continuing |
| Same cylinder continues to misfire | Coil, injector, wiring, compression, vacuum leak, mechanical damage, or control-system fault | Perform cylinder-specific diagnosis instead of installing another set of plugs |
When to Stop and Call a Professional
Professional help is the safer choice when:
- A plug will not loosen with reasonable effort or begins to bind during removal.
- A plug shell breaks or the ceramic separates.
- The cylinder-head threads appear stripped, pulled, contaminated, or previously repaired.
- A new plug will not turn several revolutions by hand.
- The intake manifold, fuel system, high-pressure fuel components, or complex cowl assemblies must be removed beyond your experience.
- Oil, coolant, metal debris, or heavy deposits are found in or around the plug hole.
- A plug shows melting, severe overheating, mechanical impact damage, or a missing electrode.
- The engine has a flashing check-engine light, heavy misfire, backfire, abnormal noise, or no-start condition after reassembly.
- You cannot obtain the exact plug, gap, access, and tightening specifications for the engine.
Frequently Asked Questions
Can I replace spark plugs without professional help?
Yes, when the plugs are reasonably accessible and you have the exact service specifications, correct tools, and confidence to protect the cylinder-head threads. Stop if a plug is seized, will not hand-thread, or requires removal of components beyond your experience.
What happens if I install the wrong spark plugs?
The wrong reach, seat, heat range, resistor design, terminal, gap, or projected tip can cause misfires, poor sealing, overheating, piston or valve contact, thread damage, or serious engine damage. Verify the exact application rather than choosing a plug because it looks similar.
How can I tell if my spark plugs are faulty?
Inspect for worn electrodes, excessive gap, cracked ceramic, damaged terminals, abnormal deposits, carbon tracking, oil fouling, or overheating. Combine the inspection with trouble codes and tests of the coils, fuel system, wiring, compression, and air intake because the same symptoms can have other causes.
Will changing spark plugs improve my fuel economy?
It may restore fuel economy when worn, damaged, incorrectly gapped, or fouled plugs are causing poor ignition. Replacing healthy plugs will not correct low tire pressure, sensor faults, injector problems, brake drag, driving conditions, or other causes of increased fuel use.
Are there different spark plugs for different engines?
Yes. Engines may require different thread sizes, reach, seat styles, heat ranges, resistor values, terminal designs, electrode configurations, and gaps. Even two engines offered in the same vehicle can use different plugs.
Should I put anti-seize on spark-plug threads?
Not by default. Many modern spark plugs have plated threads and are designed for dry installation. Anti-seize changes friction and clamping force. Use it only when the exact OEM or spark-plug instructions explicitly require it and provide the matching tightening procedure.
Do pre-gapped spark plugs still need to be checked?
Yes. Confirm the specified gap and inspect for shipping damage, but use the gauge and adjustment method approved for that plug. Fine-wire iridium and platinum electrodes can be damaged by prying or by forcing an unsuitable gauge between the electrodes.
Should I replace the ignition coils at the same time?
Not automatically. Inspect coils, boots, terminals, and wiring, and replace parts that are damaged or fail testing. Replacing serviceable coils adds cost and does not correct injector, compression, wiring, or control-system faults.
Conclusion
A successful spark-plug replacement depends less on speed than on verification and careful installation. Confirm the exact plugs, gap, torque, and access procedure for the engine; work on a cool cylinder head; keep debris out; inspect the old plugs by cylinder; start every new plug by hand; and install it with clean, dry threads unless the written instructions say otherwise. If a plug binds, will not loosen, or shows signs of severe engine trouble, stop before a routine maintenance job becomes a cylinder-head repair.
Sources
- NGK: 5 Things You Should Know About Spark Plugs — anti-seize, fine-wire gapping, torque, and standard plug construction
- DENSO Spark Plug Installation — installation procedure, dry-thread torque guidance, seat design, and cylinder-head material
- Champion: How to Gap Spark Plugs — vehicle-specific gap verification and safe adjustment
- Champion Spark Plug Installation and Removal Guide — cold-engine safety, cleaning, hand-threading, and reassembly
- NGK: How to Read a Spark Plug — plug wear, deposits, overheating, and abnormal condition clues
- NHTSA VIN Decoder — vehicle-identification verification before selecting parts







Leave a Reply