
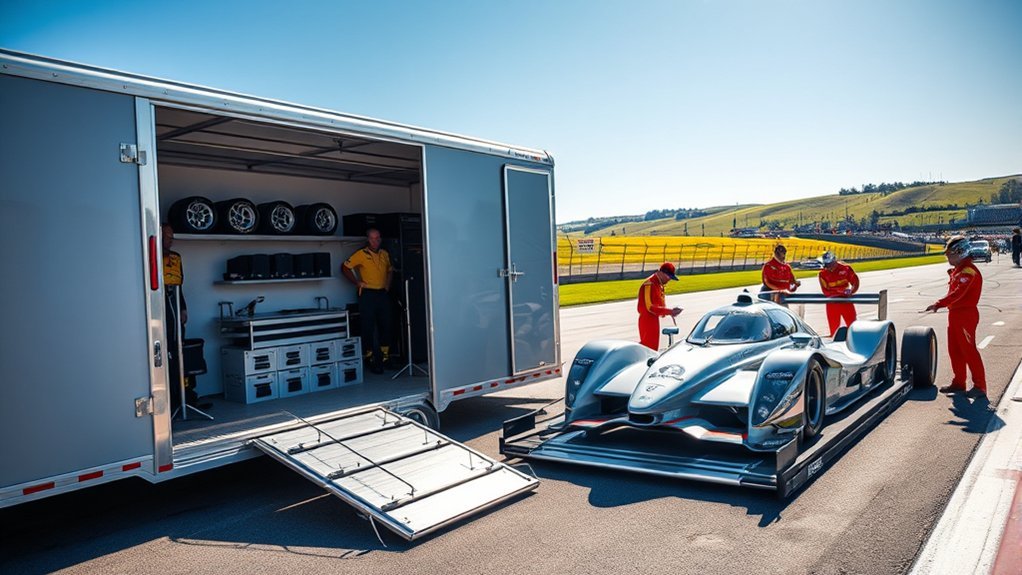
A useful race car trailer setup does more than hold a car and a few tools. It must fit the vehicle, stay within every weight rating, secure the car correctly, and give the crew safe access to parts and equipment. Start with measurements and loaded weights before adding cabinets, power systems, or other upgrades.
Quick Answer
A race car trailer setup should start with measured weights and secure loading, not cabinets or décor. Choose a certified trailer with enough payload, door and ramp clearance, then weigh the loaded combination. Use rated four-point securement, working brakes, crossed safety chains, proper tongue weight, and a repeatable pre-trip checklist.
Key Takeaways
- Measure the race car, rear-door opening, ramp, fenders, ceiling, and working space before choosing a trailer.
- Payload equals trailer GVWR minus its actual empty weight, but the tow vehicle, hitch, axles, and tires may impose lower limits.
- Use a scale to confirm the loaded trailer weight, axle loads, tow-vehicle axle loads, and tongue weight.
- Secure the car with a rated four-point system unless the equipment manufacturers specify another approved method.
- Test the brakes, breakaway system, lights, tires, coupler, chains, straps, doors, and loose equipment before every trip.
At a Glance
| Time Required | About 2–8 hours for measuring, test loading, weighing, labeling, and basic organization; professional electrical, cabinet, winch, or structural work takes longer. |
| Difficulty | Moderate for organization and test loading; advanced work involving brakes, structure, shore power, or permanent wiring should be completed by qualified professionals. |
| Tools Needed | Tape measure, wheel chocks, tire gauge, torque wrench, rated straps, scale access, labels, basic hand tools, flashlight, and the manuals for the tow vehicle and trailer equipment. |
| Cost | Varies widely. Chocks, labels, and rated straps are basic expenses, while a winch, cabinets, brakes, climate control, or professionally installed power system can cost much more. |
Why You Need a Race Car Trailer for Success on Race Day
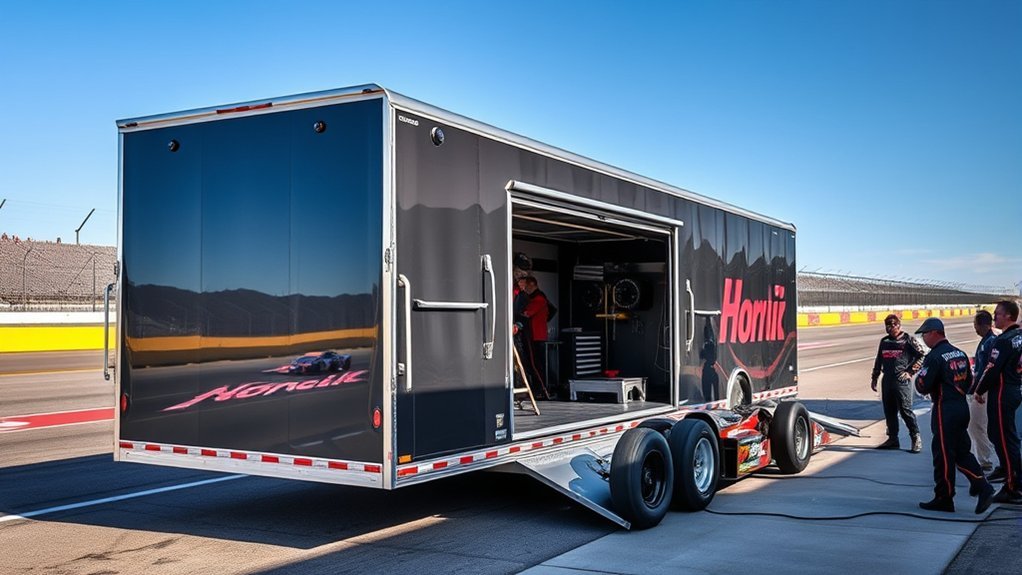
A dedicated trailer protects the race car during transport and keeps tools, spares, safety equipment, and setup records in one place. It can also serve as a compact mobile pit for inspections and minor repairs.
The trailer is not automatically safer just because it is enclosed or well organized. Its real value depends on correct weight selection, rated securement, working brakes and tires, and a layout that does not overload one axle or side.
A well-planned trailer reduces search time and protects equipment, but measured weights and secure loading are what make it road-ready.
Before buying a trailer, look for its VIN and certification label. The label should identify the manufacturer and applicable ratings. The National Highway Traffic Safety Administration warns that trailers offered for U.S. road use must comply with applicable federal safety standards for items such as lighting, tires, and wheels. See NHTSA’s trailer compliance guidance.
Essential Features for Your Race Car Trailer
Open or Enclosed Trailer
An open trailer is usually lighter, easier to inspect, and less demanding on the tow vehicle. It may be a good choice when the car can tolerate weather exposure and the team does not need enclosed storage.
An enclosed trailer offers weather protection, lockable storage, wall space, lighting, and a cleaner work area. The tradeoffs are greater empty weight, more wind resistance, a higher purchase cost, and less payload after cabinets and equipment are installed.
Loading and Access Features
Low race cars need enough ramp length and a smooth transition at the ramp hinge. Check the car’s approach angle, splitter clearance, wheelbase, ride height, and exhaust clearance during a slow test load.
Useful loading features include:
- A rear-door opening that is wider and taller than the race car
- Ramp extensions or low-profile loading ramps
- A winch with a rating and mounting system approved for the expected pull
- A driver-side escape door or removable inner fender where needed
- Bright interior and loading lights
- Rated floor anchors or track installed according to the track manufacturer’s instructions
- Wheel chocks and a secure place to store them
Interior and Utility Features
Cabinets, racks, tire storage, a workbench, ventilation, and climate control can improve race-day efficiency. Install them only after the loaded weight plan is complete. Every cabinet, battery, air conditioner, spare wheel, fluid container, and workbench reduces available payload.
Note: Nominal trailer length and width do not reveal the usable space. Measure between the inner fenders, at the rear-door frame, below cabinets, and at any roof equipment that reduces clearance.
Choosing the Right Size and Weight Capacity for Your Trailer
Common nominal sizes include 6 × 12, 7 × 16, 8.5 × 20, and 8.5 × 24 feet, but no one size fits every race car. The correct trailer is the one that provides enough clear space and payload while remaining within the tow vehicle’s ratings.
Assess Vehicle Dimensions
Measure the car in its normal transport condition, including the wing, splitter, mirrors, antenna, wheel offset, and ride height. Record:
- Overall length, width, and height
- Outside tire-to-tire width
- Wheelbase
- Front and rear overhang
- Lowest ground-clearance point
- Door-opening space needed for the driver to exit
- Clearance needed for straps around the tires
Add working room rather than selecting a trailer that barely fits. The crew may need space to move beside the car, inspect tie-downs, open a door, operate a winch, or remove equipment without damaging the body.
Evaluate Weight Limits
Do not select a trailer from the tow rating alone. Review the labels and manuals for the tow vehicle, receiver, drawbar, hitch ball, coupler, trailer, axles, wheels, and tires.
| GVWR | The maximum permitted total weight of the loaded vehicle or trailer. |
| GAWR | The maximum load allowed on a specific axle. |
| GCWR | The tow-vehicle manufacturer’s maximum rating for the loaded tow vehicle and loaded trailer together. |
| Trailer Payload | Trailer GVWR minus the trailer’s actual empty weight. Added options reduce the remaining payload. |
| Tongue Weight | The downward load the conventional trailer places on the hitch. It also counts against tow-vehicle payload and axle limits. |
The lowest applicable rating is the limit. A trailer may be under its GVWR while still overloading the tow vehicle’s rear axle, receiver, hitch ball, tires, or payload capacity.
Use a Scale Instead of Guessing
Load the car, tools, fuel, spares, generator, crew equipment, and other cargo as they will travel. Then use a suitable public scale or individual-wheel weighing service to check:
- The loaded tow vehicle without the trailer, when needed for comparison
- The complete loaded combination
- The tow vehicle’s front and rear axle loads
- The trailer axle load or loads
- The loaded trailer weight
- The tongue weight using a suitable scale or weighing method
Current manufacturer guidance explains that the loaded combination must remain under every applicable rating and that scale verification is the reliable way to confirm the result. See the 2026 GM trailer towing supplement for an example of this rating process.
Example Weight Worksheet
Assume a trailer has a 9,990-pound GVWR and weighs 3,000 pounds before loading. A 3,200-pound race car and 800 pounds of tools, tires, fuel, and equipment produce this estimate:
- Trailer empty weight: 3,000 pounds
- Race car: 3,200 pounds
- Equipment and supplies: 800 pounds
- Estimated loaded trailer: 7,000 pounds
- Remaining trailer-GVWR margin: 2,990 pounds
For a conventional trailer, 10–15% of a 7,000-pound loaded weight would be about 700–1,050 pounds. That is only a starting target. The measured tongue weight must also remain within the trailer, hitch, receiver, tow-vehicle payload, GVWR, and rear-GAWR limits.
Warning: Do not move cargo rearward simply to reduce hitch load without rechecking tongue weight and stability. Too little tongue weight can promote sway, while too much can overload the hitch or tow vehicle. Follow the trailer and tow-vehicle manuals and confirm the final setup on a scale.
How to Plan the Design and Layout of Your Trailer
Sketch the interior with the car in its transport position. Mark the axle area, wheel paths, door swing, winch cable path, strap angles, fire-extinguisher location, electrical panel, and the space needed to reach each tie-down.
Create Functional Zones
- Loading zone: Ramps, winch controls, wheel chocks, straps, and gloves near the rear door
- Tool zone: Labeled drawers or foam organizers close to the workbench
- Spare-parts zone: Bins grouped by system, such as brakes, suspension, electrical, and engine
- Tire zone: Secured racks that prevent wheels or tires from becoming loose cargo
- Fluid zone: Upright, restrained containers in a spill-resistant area away from ignition sources
- Safety zone: Extinguisher, first-aid kit, warning triangles, flashlight, and emergency contact information near an exit
Place Weight Low and Near the Axles
Keep dense equipment low and close to the trailer’s centerline. Start with heavy items over or slightly ahead of the trailer axles, then verify the completed setup with a scale. Avoid placing a generator, stacked tires, batteries, or a full toolbox high on one wall or far behind the rear axle.
Leave room for future equipment, but do not install oversized cabinets just because the wall is empty. A flexible layout is easier to update when the team changes cars, tire sizes, or racing classes.
Pro Tip: Photograph the finished load and mark the correct tire location on the floor. This creates a repeatable starting point, but it does not replace periodic scale checks when equipment changes.
Gathering Tools and Materials for Your Trailer Setup

For an existing certified trailer, most setup work involves measuring, mounting approved accessories, labeling storage, and testing the loaded system. Structural changes, axle work, brake installation, coupler replacement, and permanent 120-volt wiring require the correct expertise and documentation.
Essential Tools Checklist
- Tape measure and straightedge
- Cold tire-pressure gauge and portable inflator
- Torque wrench and the correct sockets
- Wheel chocks
- Rated wheel straps or vehicle securement assemblies
- Protective sleeves where required by the strap manufacturer
- Flashlight or inspection light
- Labels, inventory sheets, and permanent markers
- Spill kit and absorbent material
- Basic electrical tester for trained users
- Manuals for the trailer, axles, brakes, winch, hitch, tires, and straps
Keep tools in good condition and remove damaged cords, sockets, straps, hooks, ratchets, and lifting equipment from service.
Sourcing Quality Materials
Buy safety-critical parts from traceable manufacturers. Confirm the rating and intended use of the coupler, hitch ball, receiver, chains, anchors, track, straps, winch, tires, wheels, jacks, and replacement brake parts.
Salvage materials may be useful for noncritical bins or work surfaces, but unknown steel, used couplers, damaged wheels, old tires, and unmarked tie-down hardware are poor choices for load-bearing systems.
Warning: Building or materially altering a road-going trailer is not a simple welding project. Frame geometry, coupler loads, axle placement, brakes, lighting, tires, certification, titling, and state inspection requirements must all be addressed. Use a qualified trailer engineer and fabricator for structural work.
Electrical Power, Climate Control, and Generator Safety
A practical trailer may use both a 12-volt DC system and a 120-volt AC shore-power system. Plan each system around the expected load rather than adding outlets and batteries without a load calculation.
12-Volt DC System
Use correctly sized conductors, suitable fuses or circuit breakers near the power source, protected battery terminals, secure battery mounts, and proper ventilation for the battery type. Keep wiring away from sharp edges, heat, moving hinges, and areas where cargo can crush it.
120-Volt AC System
Have permanent shore-power wiring installed and inspected by a qualified electrician under the codes that apply to the trailer and its use. Use suitable overcurrent protection, grounding, GFCI protection where required, strain relief, and equipment approved for damp or mobile conditions.
Extension cords should be grounded, rated for the load and environment, protected from traffic, and inspected before use. OSHA explains that damaged cords and wet connectors can create shock, burn, and fire hazards in its flexible-cord safety guidance.
Generator and Climate-Control Safety
Never operate a portable generator inside the trailer, tow vehicle, awning enclosure, or another partly enclosed pit area. The CDC advises operating generators outdoors and more than 20 feet from doors, windows, and vents. Use a working carbon-monoxide alarm anywhere people may occupy or sleep near fuel-burning equipment. Review the CDC carbon-monoxide guidance.
Air conditioning and powered ventilation add useful comfort, but they also add roof load, electrical demand, and trailer weight. Include those items in the weight plan and keep roof penetrations sealed according to the equipment manufacturer’s instructions.
Essential Safety Features for Race Car Trailers
Hitch, Coupler, and Safety Chains
Confirm that the receiver, drawbar, hitch ball, coupler, retaining pin, and related hardware are compatible and rated for the loaded trailer and tongue weight. Lock the coupler as instructed and verify that the latch is fully engaged.
Cross the safety chains beneath the tongue when directed by the tow-vehicle and trailer manufacturers. Leave enough slack for turning but not enough for the chains to drag. Attach the breakaway cable to a suitable point separate from the safety chains or hitch-ball connection, following its manufacturer’s instructions.
Brakes, Breakaway System, and Lights
Trailer-brake requirements vary by trailer weight and jurisdiction. Use brakes that meet the trailer manufacturer’s requirements and applicable state law. Adjust the brake controller for the loaded trailer according to the brake-controller and tow-vehicle instructions.
Before departure, test:
- Running lights
- Brake lights
- Turn signals and hazard lights
- Electric or hydraulic trailer brakes
- The breakaway switch and battery using the manufacturer’s test procedure
- The seven-pin or other connector for secure engagement and damage
Tires, Wheels, Bearings, and Suspension
Check tire pressure when the tires are cold and use the trailer placard or manufacturer’s specification rather than the maximum number molded on the sidewall as a universal setting. Confirm that every tire and wheel has enough load capacity for the measured axle load.
Inspect tread, sidewalls, valve stems, lug hardware, suspension, hubs, and signs of overheating or grease leakage. NHTSA’s TireWise guidance explains tire maintenance, labeling, aging, and recall checks.
Fire, Fuel, and Shop Safety
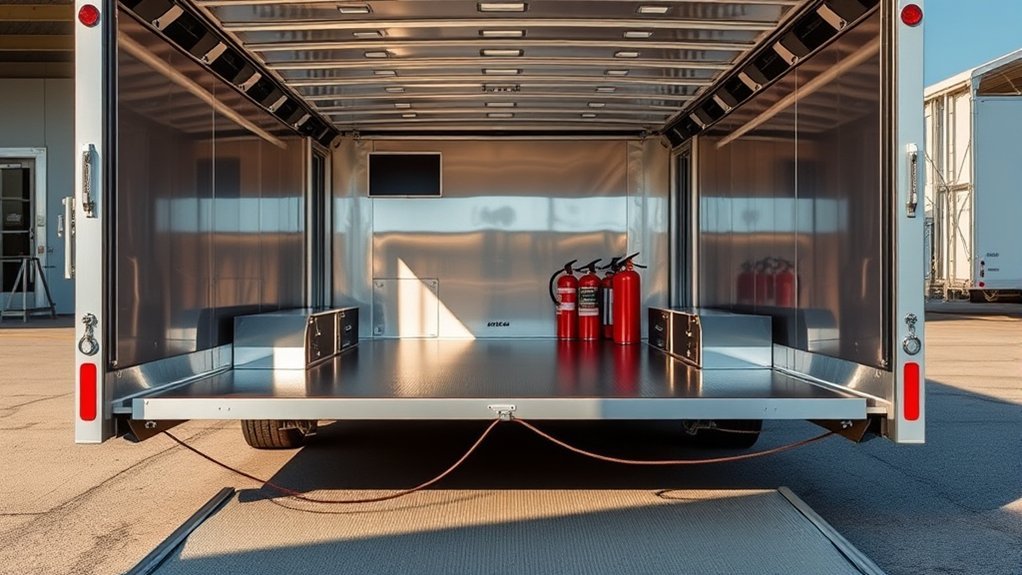
Mount a listed extinguisher suitable for the expected hazards in a visible location near an exit. Follow the track or sanctioning body’s type, size, inspection, and mounting rules.
Keep fuel and other flammable liquids in approved, closed containers. Restrain them upright, control leaks, provide ventilation where required, and keep them away from batteries, heaters, generators, welding, and other ignition sources. Transport compressed-gas cylinders only when permitted and secured under the cylinder supplier’s, track’s, and applicable legal requirements.
How to Load and Tie Down a Race Car Step by Step
- Park on firm, level ground. Connect the tow vehicle, apply the parking brake, chock the trailer wheels, and keep bystanders away from the loading path.
- Inspect the loading equipment. Check the ramp, hinges, extensions, winch, cable or rope, hooks, anchors, straps, and ratchets for damage and correct ratings.
- Set the ramp transition. Add approved ramp extensions if needed so the splitter, floor, exhaust, and chassis will clear the approach and breakover points.
- Use a spotter. Agree on hand signals before moving. The spotter should remain visible and stay out of the vehicle’s path.
- Load slowly. Drive or winch the car into its marked position. Do not use sudden throttle to climb the ramp.
- Center the car. Confirm side clearance, axle placement, door access, and the planned tire position.
- Apply a rated four-point securement system. Use wheel straps or vehicle-manufacturer-approved chassis attachment points. Follow the strap, anchor, track, and trailer manufacturers’ instructions.
- Check strap routing. Keep straps away from sharp edges, hot exhaust parts, brake hoses, steering parts, wiring, and bodywork. Do not knot or twist straps unless their manufacturer expressly permits it.
- Tension evenly. Remove slack without crushing suspension parts, deforming tires, or pulling the car sideways.
- Secure every loose item. Restrain ramps, jacks, tire stacks, toolboxes, batteries, fuel containers, and spare parts independently.
- Close and latch the trailer. Secure the rear ramp, side doors, cabinets, drawers, roof vents, and exterior access panels.
- Perform a walk-around. Verify the coupler, pin, chains, breakaway cable, jack, connector, lights, tires, straps, doors, and license plate.
- Stop and recheck. After the first few miles or when safe to do so, inspect the straps, doors, tires, hubs, and hitch again. Repeat checks during longer trips and after rough roads.
FMCSA’s commercial cargo rules require cargo to be firmly immobilized and use securement systems with adequate working load limits. Those rules do not automatically govern every private hobby tow, but they provide a useful safety benchmark. Review the FMCSA cargo securement overview and follow any stricter rules that apply to your operation.
Warning: Never attach a strap to a brake line, steering linkage, anti-roll bar, exhaust component, control arm, or other point unless the vehicle manufacturer identifies it as an approved transport attachment. An unsuitable point can fail or damage the race car.
How to Organize Your Race Trailer for Maximum Efficiency
Use clear bins or labeled drawers for small parts. Group equipment by task so a crew member can find it without opening every cabinet.
- Frequently used: Gauges, torque wrench, radios, gloves, tape, and basic tools at waist height
- Heavy: Jacks, batteries, dense spares, and full tool drawers low and near the axles
- Emergency: Extinguisher, first-aid kit, flashlight, and warning devices near an exit
- Dirty or wet: Drain pans, absorbent pads, funnels, and used parts in contained storage
- Time-sensitive: Fluids, sealants, batteries, and dated safety items checked through an inventory list
Foam organizers make missing tools easy to spot. A printed load map and cabinet list also help temporary crew members return items to the correct place.
Position ramps, wheel chocks, straps, and winch controls near the rear door, but secure them so they cannot strike the car. Keep the floor and exits clear throughout the race weekend.
Race Car Trailer Pre-Trip Checklist
- Trailer VIN, registration, insurance, and required permits are current
- Tow vehicle, trailer, hitch, and cargo remain within all measured ratings
- Coupler is latched and locked; receiver pin and clip are installed
- Safety chains are connected correctly and are not dragging
- Breakaway cable is connected correctly and its battery passes the prescribed test
- Jack is fully raised and secured
- Brake controller is connected and adjusted for the load
- Running lights, brake lights, turn signals, and hazards work
- Tires are at the specified cold pressure and show no damage
- Wheel hardware is checked to the trailer or wheel manufacturer’s procedure
- Car uses a rated, correctly routed securement system
- Ramps, tires, tools, fuel, cabinets, doors, and loose equipment are secured
- Mirrors provide a clear view along both sides of the trailer
- Route, weather, height, length, fuel stops, and parking access have been reviewed
Tips for Maintaining Your Trailer in Top Shape
There is no universal maintenance interval for every race trailer. Follow the schedules supplied by the trailer, axle, brake, tire, wheel, coupler, jack, battery, and winch manufacturers. Heavy race-weekend use, long storage, water exposure, rough roads, and frequent maximum-load operation may require more inspections.
Before and After Each Event
- Inspect tires, wheels, hubs, brakes, wiring, lights, coupler, chains, jack, doors, hinges, roof seals, and tie-down hardware.
- Clean oil, rubber, road salt, and debris before they hide cracks, leaks, corrosion, or loose fasteners.
- Remove and dry wet equipment.
- Check straps for cuts, melted fibers, damaged stitching, bent hooks, corrosion, or ratchet problems.
- Record repairs and unusual tire or hub temperatures.
During Storage
Store the trailer in a dry, ventilated location when possible. Control leaks and condensation, maintain batteries according to their manufacturer’s instructions, protect tires from prolonged sunlight, and prevent rodents from damaging wiring or insulation.
Do not assume a trailer is ready because it was parked in good condition. Perform the complete inspection again before its next trip.
Frequently Asked Questions
What is the 60/40 rule for trailers?
The 60/40 saying is a rough suggestion to place more cargo ahead of the trailer axles than behind them. It is not a substitute for weighing the trailer. Confirm the actual tongue weight, axle loads, and all vehicle and component ratings after the trailer is fully loaded.
Is it cheaper to build a trailer or buy one?
Not necessarily. A home build may require engineering, fabrication equipment, axles, brakes, tires, lighting, certification work, inspection, titling, and many hours of labor. A compliant trailer from an established manufacturer is often the safer and more predictable choice. Compare total completed costs rather than frame materials alone.
How do you build a trailer step by step?
A road-going race car trailer should be designed around structural loads, axle placement, braking, tires, lighting, coupling, federal equipment requirements, and state registration rules. This is not a safe generic DIY procedure. Use a qualified trailer engineer and fabricator or begin with a certified trailer chassis and approved components.
What size enclosed trailer is best for a race car?
Many single-car setups use an 8.5-foot-wide trailer around 20–24 feet long, but nominal size is not enough. Measure the car, rear-door opening, fender spacing, ceiling, ramp angle, exit clearance, work area, and equipment. Then confirm that the trailer has enough payload after all permanent options are installed.
How much tongue weight should a race car trailer have?
For many conventional trailers, the normal starting range is 10–15% of the loaded trailer weight. Use the trailer and tow-vehicle manufacturers’ instructions because some trailer types differ. Measure the final tongue weight and remain within the receiver, hitch, vehicle payload, GVWR, and rear-axle limits.
Does a race car trailer need its own brakes?
Brake requirements depend on loaded trailer weight, trailer design, tow-vehicle instructions, and state law. Most substantial enclosed car trailers use brakes and a compatible controller. Confirm the legal requirement for every state on the route and follow the trailer, axle, brake, and tow-vehicle manufacturers’ procedures.
Conclusion
A successful race car trailer setup begins with fit, payload, weight distribution, rated securement, and roadworthy equipment. Cabinets, lighting, climate control, and a polished work area are useful only after those basics are correct.
Measure the car and trailer, weigh the complete race-day load, follow every component manufacturer’s instructions, and use the same loading and inspection routine before each trip. A repeatable process protects the race car, reduces race-day delays, and gives the tow vehicle and trailer the best chance to perform safely.
Sources
- National Highway Traffic Safety Administration — Trailer Federal Safety Regulations — trailer certification labels and applicable federal safety equipment.
- General Motors — 2026 Colorado/Canyon Trailer Towing Supplement — weight ratings, scale checks, tongue weight, hitches, chains, brakes, wiring, and lights.
- Federal Motor Carrier Safety Administration — Cargo Securement Rules — immobilization, tiedown working load limits, and vehicle securement benchmarks.
- National Highway Traffic Safety Administration — TireWise — tire selection, maintenance, labeling, aging, and recalls.
- Centers for Disease Control and Prevention — Carbon Monoxide Poisoning Basics — portable-generator placement and carbon-monoxide precautions.
- Occupational Safety and Health Administration — Flexible Cord Safety — grounding, cord damage, ratings, and wet-condition hazards.







Leave a Reply