
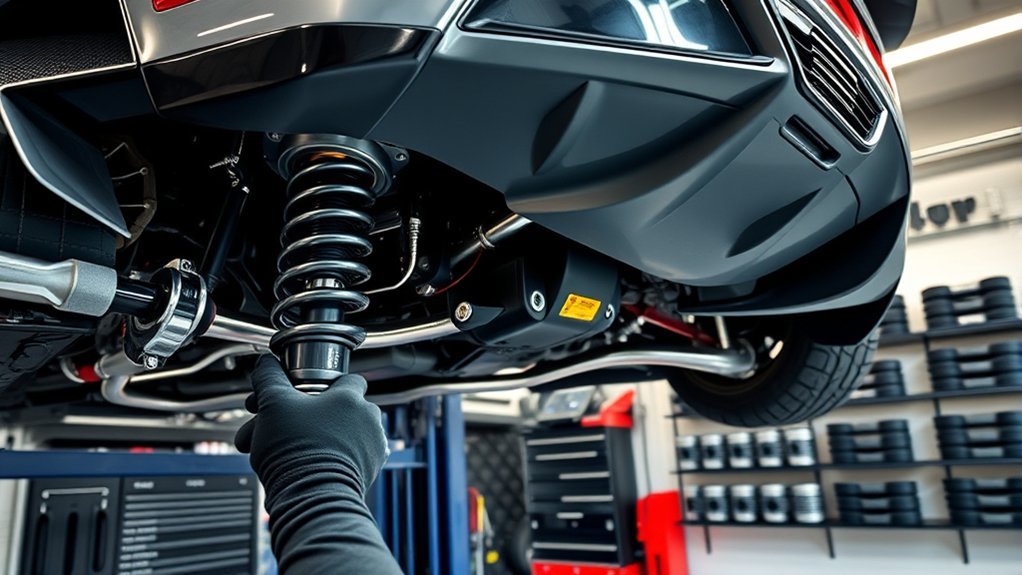
A well-planned performance suspension setup can make a car more predictable, easier to place, and more consistent at the limit. The goal is not to make every part as stiff or as low as possible. It is to keep the tires working, preserve suspension travel, and balance comfort, grip, steering response, and safety for the way you actually drive.
Quick Answer
Start with healthy tires and suspension parts, record the factory baseline, and use vehicle-specific settings. Adjust ride height, alignment, spring rate, dampers, and sway bars in small steps. Change one variable at a time, test on the same route or track, and stop if the car becomes less stable or loses suspension travel.
Key Takeaways
- Tires, tire pressure, worn joints, and alignment should be corrected before spring or damper tuning.
- Lower and stiffer do not automatically mean faster; poor geometry or too little travel can reduce grip.
- Use the suspension manufacturer’s baseline instead of a universal number of damper clicks.
- Front-to-rear roll stiffness changes handling balance, while overall stiffness affects compliance and ride quality.
- Document every change and evaluate one adjustment at a time under repeatable conditions.
At a Glance
| Time Required | About 2–4 hours for inspection, measurements, a baseline setup, and initial testing; installation time is separate. |
| Difficulty | Intermediate for measurement and adjustment; advanced or professional-level for spring, strut, or geometry changes. |
| Tools Needed | Accurate tire gauge, torque wrench, tape measure, jack and rated stands or lift, manufacturer adjustment tools, notebook, and professional alignment equipment when needed. |
| Cost | Home measurements may cost nothing beyond tools. Professional alignment, corner balancing, replacement parts, and coilovers are priced separately by vehicle and shop. |
What Is Suspension Tuning and Why Does It Matter?

Suspension tuning is the process of matching the springs, dampers, anti-roll bars, ride height, alignment, tires, and supporting hardware to the vehicle and its job. A good setup allows the car to respond in a repeatable way while keeping each tire within a useful operating range.
The best setup is always a compromise. A smooth racetrack may tolerate more spring and roll stiffness than a broken street. A street car needs bump travel, ground clearance, quiet bushings, wet-weather compliance, and stable emergency behavior. A dual-purpose car needs enough adjustment range to serve both uses without turning every drive into a harsh test session.
Ignore the myth that stiffer is always better. Excessive spring, damper, or anti-roll-bar stiffness can make a tire skip over rough pavement. Likewise, lowering a car beyond the suspension’s designed range can create poor control-arm angles, bump-steer, tire interference, or frequent contact with the bump stops.
Note: Tires are part of the suspension system in practice. Their size, construction, pressure, temperature, and condition can change the result more than a small damper or alignment adjustment.
Build a Safe Baseline Before Changing Suspension Settings
Before buying parts or turning adjusters, confirm exactly what is on the car. Use the VIN, model year, trim, drivetrain, axle package, current wheel and tire size, and suspension option codes to verify fitment. Cars with adaptive dampers, air suspension, rear steering, active anti-roll systems, or advanced driver-assistance systems may need special procedures or electronic calibration.
- Inspect the existing hardware. Check ball joints, tie-rod ends, wheel bearings, control-arm bushings, top mounts, dampers, springs, end links, fasteners, tires, and brakes. Tuning around worn parts produces inconsistent results.
- Set safe street tire pressure. For road use, begin with the vehicle manufacturer’s cold pressure on the door placard or in the owner’s manual, not the maximum molded into the tire sidewall. The National Highway Traffic Safety Administration also recommends checking pressure cold.
- Record ride height. Park on a level surface and measure from the wheel center to the fender lip at all four corners. Record fuel level, cargo, driver weight, and tire pressures so later measurements are comparable.
- Record the current alignment. Obtain a four-wheel printout showing camber, caster, individual toe, total toe, and thrust angle.
- Write down the current settings. Count damper clicks using the manufacturer’s stated reference direction, note anti-roll-bar holes, spring perch positions, spacers, and tire sizes.
- Define the problem. “More grip” is too vague. Identify whether the issue is harshness, body control, turn-in, mid-corner balance, traction on exit, braking stability, tire wear, or bottoming.
Warning: Loaded coil springs store enough energy to cause severe injury. Use the correct spring compressor and service procedure, support the vehicle with rated stands, block the wheels, and follow factory torque specifications. Manufacturer instructions from Eibach also call for qualified installation, proper support, and post-installation checks of alignment, clearances, brake lines, and ABS-related sensors.
Key Suspension Components That Influence Vehicle Handling
Springs, dampers, and sway bars matter, but they work through tires, bushings, geometry, and available travel. A change in one area can expose a weakness in another.
| Component | Primary Job | What Tuning Changes | Common Risk |
|---|---|---|---|
| Springs | Support sprung weight and resist suspension movement | Ride frequency, roll and pitch response, travel use | Too stiff for the tire, damper, or surface |
| Shock absorbers or dampers | Control the rate of suspension movement | Transient response, bump control, settling, traction | Using click counts that do not match the specific damper |
| Anti-roll bars | Add roll stiffness by coupling left and right suspension movement | Body roll and front-to-rear handling balance | Reducing independent wheel movement on uneven pavement |
| Bump stops | Provide progressive support near full compression | Effective wheel rate late in travel | Riding on them after excessive lowering |
| Bushings, joints, and mounts | Locate the wheel and filter noise or vibration | Compliance, precision, feedback | Binding, noise, or harshness with solid parts |
| Alignment and geometry | Control wheel angles through steering and travel | Contact-patch use, stability, tire wear, steering feel | Copying another car’s settings without checking geometry |
| Tires | Generate the forces that accelerate, brake, and turn the car | Grip, response, breakaway, temperature, ride | Masking a tire problem with chassis adjustments |
Spring Rate, Wheel Rate, and Motion Ratio
Spring rate describes how much force is required to compress a spring a given distance. The tire does not always feel that full rate because the spring may sit inboard on a control arm. Suspension motion ratio, installation angle, tire stiffness, bump-stop engagement, and anti-roll-bar contribution all affect the effective rate at the wheel.
That is why copying a spring rate from a different chassis is unreliable. A heavier car, different suspension layout, different aerodynamic load, or different tire can require a very different package even when the intended use is similar.
Shock Absorber Designs and Adjustability
Twin-tube and monotube dampers can both work well when properly engineered. Reservoirs can increase oil and gas volume and help manage heat. One-way adjusters may change compression and rebound together, while two-, three-, or four-way dampers separate low- and high-speed circuits. More adjusters provide more control, but they also create more ways to get lost.
Bushings, Top Mounts, and End Links
Rubber bushings allow controlled movement and isolate noise. Stiffer rubber, polyurethane, spherical bearings, and solid mounts can sharpen response, but may add noise, vibration, harshness, maintenance, or binding. Adjustable anti-roll-bar end links can remove bar preload after ride-height or corner-weight changes when set correctly on a level surface.
Choosing the Right Suspension for Street vs. Track Driving
The correct setup depends on surface quality, tire type, speed, weather, load, and driver priorities. A track setup is not automatically better on the street, and a comfortable street setup is not automatically slow.
| Use | Priority | Typical Direction | Do Not Sacrifice |
|---|---|---|---|
| Street | Compliance, stability, tire life, ground clearance, wet grip | Factory or mild spring rates, moderate damping, conservative alignment | Suspension travel, emergency behavior, clearance, legal requirements |
| Track | Repeatability, heat management, platform control, tire use | Vehicle- and tire-specific springs, damping, camber, toe, and corner weights | Predictable breakaway, curb compliance, braking stability, tire temperature limits |
| Dual purpose | Adjustment range without constant rework | Quality dampers, usable travel, two documented settings, reversible alignment changes | Road comfort and safe return-to-street settings |
Rough, cold, or wet tracks often reward more compliance than a smooth, warm circuit. Aero-equipped cars may also need spring and ride-height choices that control platform movement at speed, which is a different problem from tuning a low-downforce street car.
How Load Transfer Affects Your Car’s Performance

Load transfer occurs when acceleration acts through a center of gravity above the road surface. Braking shifts vertical load toward the front axle, acceleration shifts it toward the rear, and cornering shifts it toward the outside tires. Vehicle mass, center-of-gravity height, wheelbase, track width, acceleration, and suspension geometry all influence the result.
Load Transfer Fundamentals
- Longitudinal load transfer: Braking increases front-tire load and reduces rear-tire load. Acceleration does the reverse.
- Lateral load transfer: Cornering increases load on the outside tires while unloading the inside tires.
- Geometric and elastic paths: Roll centers, springs, anti-roll bars, and chassis compliance determine how lateral load transfer is distributed and how quickly the body responds.
- Front-to-rear distribution: The axle receiving a larger share of lateral load transfer usually gives up proportionally more total grip because tires are load-sensitive.
Impact on Tire Grip
An outside tire normally produces more force as vertical load rises, but not in direct proportion to that extra load. Tire research describes this as load sensitivity: the tire becomes less efficient as vertical load increases. The inside tire loses more capability than the outside tire gains, so greater load transfer can reduce the axle’s combined grip. A 2025 Washington University tire-modeling paper explains this relationship and its role in understeer and oversteer.
The outside tire gains load in a corner, but the axle does not gain grip in the same proportion. Managing load transfer is about preserving the combined work of both tires.
Balancing Front and Rear
Changing front or rear roll stiffness does not create static weight on that axle. It changes how much of the car’s lateral load transfer occurs through the front versus the rear during cornering. More front roll stiffness generally moves the balance toward understeer; more rear roll stiffness generally moves it toward oversteer. The exact response still depends on tires, suspension geometry, differential behavior, aerodynamics, and the phase of the corner.
Alignment affects how the tire meets the road during this movement, but it does not remove the underlying load transfer. Tire temperatures can help show whether the contact patch is being used evenly, though they must be interpreted with pressure, camber, driving line, and tire-construction data.
Adjusting Ride Height and Its Impact on Center of Gravity
Lowering ride height can lower the center of gravity and reduce the load-transfer moment, but only while the suspension remains in a useful part of its travel and geometry. The visual drop is not the performance target; the target is a stable platform with enough bump and rebound travel.
Effects on Handling Dynamics
A moderate, properly engineered drop may reduce body motion and sharpen response. An excessive drop can do the opposite by placing the car on its bump stops, increasing bump-steer, reducing camber control, causing driveshaft or control-arm interference, or making the damper operate outside its intended range. BILSTEIN’s suspension guidance likewise stresses balancing a lower center of gravity against geometry, wheel travel, and ride comfort.
- Preserve bump travel. Check full compression with the spring safely controlled and verify tire, wheel, brake hose, ABS wire, and body clearance.
- Preserve rebound travel. The inside tire needs droop travel to stay engaged over crests and uneven pavement.
- Measure both sides. Wheel-center-to-fender measurements are more useful than ground-to-fender measurements because tire diameter does not affect them.
- Stay within the approved range. Use the coilover or spring manufacturer’s model-specific limits.
Impact on Weight Distribution and Corner Balance
Changing all four ride heights equally usually has little effect on the car’s basic front-to-rear static weight distribution. Changing individual spring perches can alter corner loads and cross-weight on a car with appropriate adjustable hardware, but it does not move major masses inside the vehicle. Corner balancing is mainly used to improve left-right consistency with the driver and normal operating load in place.
Warning: Never use spring preload or damper body length outside the manufacturer’s approved range just to achieve a visual ride height. The Öhlins Road & Track owner’s manual warns that out-of-range height settings can cause interference or component failure.
How to Set Up Shock Absorbers for Predictable Performance
Dampers control how quickly the suspension moves; they do not hold the car up in the same way the springs do. Compression damping resists the damper as it shortens. Rebound damping resists it as it extends. Some adjusters change both at once, so identify the hardware before making assumptions.
- Read the exact manual. Confirm whether clicks are counted from fully closed or fully open, which direction is firmer, and whether the knob controls one or several circuits.
- Return to the recommended baseline. Do not use a generic “8–12 clicks” rule. Öhlins, for example, tells users to count from the closed position to the number listed in the mounting instructions for that specific kit.
- Match all corners. Set left and right dampers to the same baseline unless the manufacturer or race engineer specifies otherwise.
- Warm the car and tires consistently. Compare settings under similar fuel load, tire pressure, ambient conditions, and route or track layout.
- Change one circuit in small steps. One or two clicks may be enough on a sensitive damper. Record the direction and amount.
- Repeat the same test. Use the same braking zone, turn, bump, and acceleration point.
- Return to baseline if the result is unclear. A known reference is more useful than a collection of random changes.
| Symptom | Possible Damper Direction | Check Before Adjusting |
|---|---|---|
| Harsh impact or tire skipping over a sharp bump | Reduce compression damping in a small step | Tire pressure, bump travel, bump-stop contact, spring rate |
| Car keeps oscillating after a single bump | Add rebound damping in a small step | Damper condition, spring seating, loose hardware |
| Suspension packs down over repeated bumps | Reduce rebound damping | Available rebound travel and road profile |
| Slow, loose body movement in transitions | Add low-speed damping if independently adjustable | Alignment, worn bushings, anti-roll-bar links, tire response |
Pro Tip: Put a strip of tape near each adjuster and write the baseline on it. That prevents counting errors and makes it easy to restore the street setting after a track session.
The Role of Sway Bars in Suspension Tuning and Grip
Anti-roll bars resist the difference in left-to-right suspension movement. They can reduce body roll without adding the same amount of heave stiffness as stiffer springs, but they also connect the two wheels more strongly over one-wheel bumps.
- Stiffen the front bar: Usually increases the front axle’s share of lateral load transfer and tends to add understeer.
- Soften the front bar: Usually gives the front tires more independence and may reduce understeer.
- Stiffen the rear bar: Usually increases the rear axle’s share of lateral load transfer and tends to add rotation or oversteer.
- Soften the rear bar: Usually adds rear compliance and may improve traction or reduce oversteer.
These are starting directions, not guarantees. Differential type, suspension geometry, tire stagger, aerodynamics, and whether the problem occurs on entry, mid-corner, or exit can change the correct answer.
On an adjustable bar, the hole closer to the bar’s pivot usually creates a shorter lever arm and a stiffer setting. Confirm the manufacturer’s diagram before moving the end link. After changing ride height or corner weights, remove unwanted bar preload with adjustable end links if the design allows it.
Essential Wheel Alignment Techniques for Improved Handling

Alignment controls how the tires point and lean at rest and as the suspension moves. The right numbers depend on suspension design, ride height, bushing compliance, tire construction, and use. Start with factory specifications for a street car unless a qualified source provides a tested alternative for the exact chassis and tire.
| Angle | What It Changes | Performance Use | Risk When Excessive |
|---|---|---|---|
| Camber | Tire lean viewed from the front | Negative camber can keep the outside tire flatter in a corner | Inside-edge wear, reduced straight-line braking contact, tramlining |
| Toe | Direction the tires point viewed from above | Small changes can alter turn-in and straight-line stability | Rapid tire wear, nervous tracking, drag, unstable braking |
| Caster | Steering-axis tilt viewed from the side | Can improve self-centering and add camber as the wheel steers | Heavy steering, pull from side-to-side mismatch, clearance issues |
| Thrust angle | Direction the rear axle points relative to the body | Keeps the steering wheel and vehicle path aligned | Dog-tracking, steering-wheel offset, ADAS aiming errors |
Measure all four wheels after changing springs, coilovers, control arms, bushings, ride height, or tire size. Recheck after the suspension settles and after any curb or impact that changes steering position or tire wear.
Modern vehicles may also require a steering-angle reset, headlamp aim, ride-height sensor initialization, or ADAS calibration. Hunter Engineering lists suspension repairs, ride-height changes, tire-size changes, and wheel alignment among common situations that can trigger calibration requirements. Follow the original-equipment service information for the specific VIN.
Corner Weighting and Spring Preload
Corner weighting measures the load at each tire with the car in its normal operating condition. For a track car, that often means the driver or equivalent ballast, expected fuel, operating fluids, and the usual tire pressures. The goal is not necessarily identical weight at every tire. It is a repeatable cross-weight and sensible left-right balance for the chassis and course direction.
On a true coilover, spring preload and ride height may be independently adjustable. On other designs, turning a spring perch changes both. Read the kit manual before assuming that extra preload makes the spring rate stiffer; a linear-rate spring keeps the same rate until other elements, such as a tender spring or bump stop, come into play.
Corner balancing should be performed on level scales after ride height is close, tire pressures are set, anti-roll-bar preload is removed, and the car has been rolled or settled to release tire bind. Finish with a full alignment because perch changes can alter wheel angles.
Testing and Fine-Tuning Your Suspension for Peak Performance
A useful test isolates one problem and produces repeatable evidence. On the street, use a legal speed and a familiar route with safe bumps, curves, and braking zones. On track, build speed gradually and follow the event’s safety rules.
- Start from the documented baseline.
- Warm the tires and brakes consistently.
- Run several repeatable laps or passes. Five to ten laps may work on a track when traffic, tire condition, and temperatures remain stable, but do not force a fixed lap count if the tire or brake window changes.
- Describe the behavior by phase. Note braking, turn-in, mid-corner, curb or bump response, throttle application, and exit.
- Prioritize the largest safety or consistency problem.
- Make one small, reversible change.
- Repeat the same test and compare.
- Keep or reject the change. Return to baseline when the result is slower, less predictable, or unclear.
Data to Record After Each Test
- Cold and hot tire pressures, measured with the same gauge
- Ambient and track or road conditions
- Fuel level, ballast, passengers, and cargo
- Damper clicks, anti-roll-bar positions, ride height, and alignment
- Tire temperatures across the inner, middle, and outer tread when measured promptly and correctly
- Lap time or another repeatable performance measure
- Driver comments tied to a specific corner phase
- Any contact with bump stops, tire rub, warning lights, leaks, or abnormal noises
Focus on one adjustment at a time, prioritize the biggest problem, and compare results under the same conditions.
Street and Track Tire Pressure Rules
For street use, return to the vehicle manufacturer’s recommended cold pressure unless the manufacturer provides a different approved setting for the installed tire and load. Track pressures are tire-, car-, temperature-, and pace-specific. Use the tire manufacturer’s motorsport guidance or an experienced trackside engineer instead of copying a universal hot-pressure target.
Pressure rise alone does not diagnose load distribution. Combine it with tread temperatures, wear, lap behavior, and the tire maker’s target window. Uneven temperatures may come from camber, toe, pressure, braking, driving line, or insufficient warm-up.
Suspension Troubleshooting Chart
| Problem | Check First | Possible Tuning Direction |
|---|---|---|
| Understeer in most corners | Front tire condition and pressure, front camber and toe, bump travel, driving input | Reduce front roll stiffness or increase rear roll stiffness cautiously; verify with testing |
| Oversteer or nervous rear | Rear tires, rear toe, damper leaks, differential behavior, throttle input | Reduce rear roll stiffness or increase front roll stiffness cautiously |
| Harsh ride with poor grip on bumps | Tire pressure, spring rate, compression damping, bump-stop contact | Add travel or compliance before chasing body roll |
| Inside tire lifts or spins on corner exit | Droop travel, anti-roll-bar stiffness, differential, curb use | Soften the relevant anti-roll bar or restore droop travel |
| Rapid inner-edge tire wear | Toe first, then camber, ride height, worn bushings | Return toward a road-safe alignment and remeasure all four wheels |
| Steering wheel off-center or car pulls | Tire pull, brake drag, thrust angle, toe, damaged parts | Correct the mechanical cause and complete a four-wheel alignment |
Common Suspension Tuning Mistakes
- Changing several parts at once. You lose the ability to identify what helped or hurt.
- Using ride height as the only goal. A low car with poor travel or geometry can be slower and less safe.
- Using universal damper-click settings. Adjuster range and direction vary by damper.
- Ignoring tires. Old, overheated, mismatched, or incorrectly inflated tires make chassis data unreliable.
- Copying alignment numbers from another chassis. Motion ratio, camber gain, tire construction, and bushing compliance differ.
- Using anti-roll bars only to make the car feel flat. Less body roll is not proof of more grip.
- Skipping fastener rechecks. Recheck critical hardware at the interval specified by the parts or vehicle manufacturer.
- Forgetting electronics. Ride-height, steering, ABS, stability-control, headlamp, and ADAS systems may need inspection or calibration.
Frequently Asked Questions
What suspension setup do most race cars use?
Many race cars use adjustable dampers with coil springs, but there is no single universal layout. Some use conventional coilovers, while others use pushrods, pullrods, torsion bars, separate springs and dampers, or active elements where the rules allow. The common feature is a setup engineered for the chassis, tire, aerodynamics, rules, and track.
What is the most comfortable suspension setup?
Comfort usually comes from enough suspension travel, springs matched to vehicle weight, well-controlled but not excessive damping, compliant bushings, sensible tire pressures, and adequate tire sidewall. A very soft spring with weak damping can still feel uncomfortable because the body keeps moving after each bump.
What are the four main types of suspension systems?
There is no single official four-type list. Common passenger-vehicle layouts include MacPherson strut, double wishbone, multi-link, trailing-arm or twist-beam designs, and solid axles. Coilovers and air springs describe spring-and-damper arrangements or spring media, not a complete geometry category by themselves.
Is stiffer or softer suspension better?
Neither is always better. More stiffness can improve platform control on a smooth surface, while more compliance can keep the tires connected on rough pavement. The correct setup is the softest package that still controls body movement, geometry, and aerodynamic platform for the vehicle’s use.
Do coilovers automatically improve handling?
No. A quality, correctly installed coilover kit can add ride-height and damping control, but poor spring rates, low-quality dampers, incorrect preload, excessive lowering, or bad alignment can make handling worse. Fitment and setup matter more than the word “coilover.”
How low should I lower my car for performance?
Stay within the suspension manufacturer’s approved range and retain enough bump and rebound travel for the road or track. The best height is the one that preserves geometry, clearance, and damper stroke while meeting the handling goal. It is rarely the lowest possible setting.
Do I need an alignment after changing suspension parts?
Usually, yes. Springs, coilovers, control arms, bushings, top mounts, tie rods, and ride-height changes can alter camber, caster, toe, or thrust angle. Complete a four-wheel alignment and follow the vehicle manufacturer’s procedures for steering-angle, ride-height, headlamp, or ADAS calibration.
Conclusion
A strong performance suspension setup begins with healthy tires and hardware, accurate measurements, and a clear goal. Lowering, spring rate, damping, sway bars, alignment, and corner weights must work together rather than chase a single visual or handling trait. Start from the approved baseline, preserve travel and clearance, change one setting at a time, and keep the setup that makes the car more predictable—not merely harsher.
Sources
- NHTSA TireWise — cold tire-pressure guidance, placard pressure, tire-size, and maintenance basics.
- Öhlins Road & Track Automotive Owner’s Manual — damper adjustment, ride-height limits, testing method, and safety precautions.
- Eibach Suspension Installation Instructions — support, spring-compressor, torque, clearance, sensor, and alignment checks.
- Hunter Engineering: Five Things to Know About ADAS — alignment and calibration considerations after suspension, ride-height, or tire-size changes.
- Washington University: Tire Modeling and Data Analysis in the FSAE Context — tire load sensitivity, slip behavior, and the relationship between load transfer and axle grip.
- BILSTEIN VAG Tuning Guide — the relationship among lowering, suspension geometry, wheel travel, alignment, and ride comfort.







Leave a Reply