

Changing your engine oil at home can reduce maintenance costs and help you spot leaks or damaged parts early. The job is manageable for many beginners, but the oil specification, capacity, filter, drain-plug torque, lift points, and reminder-reset procedure must match your exact vehicle. Check those details before opening the drain plug.
Quick Answer
To change your engine oil, verify the exact oil grade, capacity, filter, drain-plug torque, and lift points for your year, model, and engine. Warm the engine briefly, support the vehicle safely, drain the oil, replace the filter and seal, refill, check for leaks and level, reset the reminder, and recycle the used oil.
Key Takeaways
- Use the oil viscosity, performance standard, capacity, and filter specified for your exact engine.
- Never work beneath a vehicle supported only by a jack. Use correctly rated jack stands or approved ramps on a firm, level surface.
- Replace the drain-plug seal when required and tighten the plug and cartridge-filter cap to their specified torque.
- Confirm that the old filter gasket came off, then inspect for leaks before driving.
- Recycle the used oil and filter according to local collection rules.
At a Glance
| Time Required | About 45–90 minutes for a first attempt, plus recycling time |
| Difficulty | Beginner to intermediate, depending on access and filter design |
| Tools Needed | Correct socket, ratchet, torque wrench, filter tool, drain pan, funnel, gloves, eye protection, wheel chocks, and safe lifting equipment if required |
| Cost | Varies by oil specification, engine capacity, filter type, and whether tools must be purchased |
Essential Tools and Supplies for an Oil Change
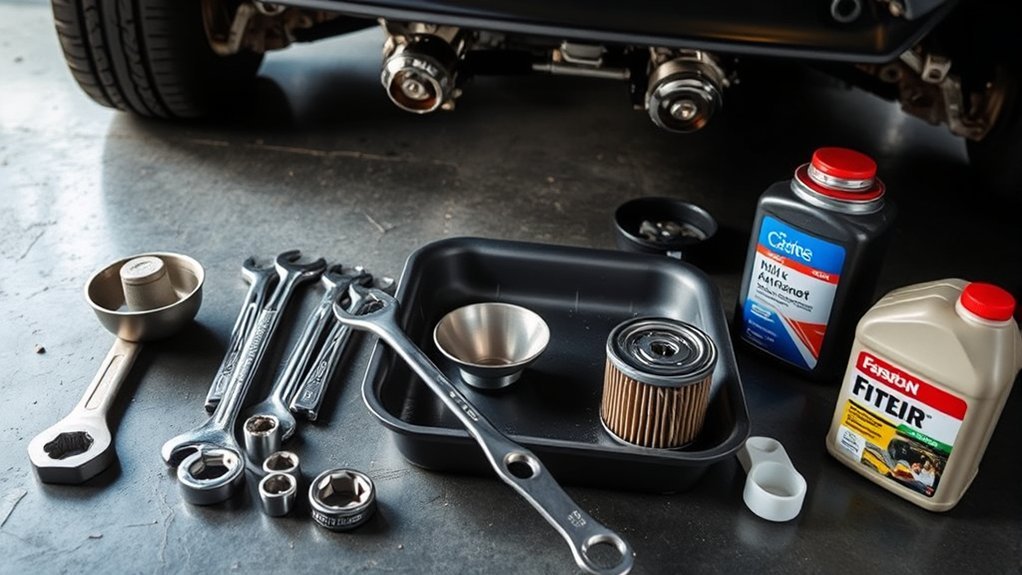
Gather every tool and part before lifting the vehicle or removing the drain plug. A missing seal, incorrect filter, or unsuitable torque wrench can stop the job after the oil has already been drained.
- Vehicle information: Owner’s manual, maintenance guide, or manufacturer service information for the exact year, model, engine, and drivetrain.
- New engine oil: The specified viscosity, API or ILSAC performance level, manufacturer approval, and quantity.
- Correct oil filter: A spin-on or cartridge filter that matches the exact engine.
- Replacement seals: A drain-plug washer, gasket, or O-ring when the manufacturer requires one. Cartridge filters may include several O-rings.
- Hand tools: The correct six-point socket, ratchet, extensions, and any tools needed to remove an underbody panel.
- Torque wrench: One whose operating range includes the drain-plug and filter-cap specifications.
- Oil-filter tool: A cap wrench, strap wrench, pliers-style wrench, or cartridge-cap socket suited to the filter.
- Collection equipment: A drain pan large enough for the engine’s full oil capacity, a funnel, rags, and a sealable container for recycling.
- Safety equipment: Nitrile or oil-resistant gloves, eye protection, wheel chocks, and suitable ramps or jack stands if additional clearance is necessary.
Note: Do not assume the drain plug uses a 14 mm socket or that the engine holds a standard number of quarts. Both details vary. Manufacturer guidance may require entering the VIN or selecting the engine before displaying the correct oil, filter, and capacity.
Verify the Oil, Filter, Capacity, and Torque Specifications
Start with the owner’s manual or the manufacturer’s official service information. Confirm all of the following before buying supplies:
- Oil viscosity, such as 0W-20, 5W-30, or another specified grade
- Required API, ILSAC, ACEA, or manufacturer-specific approval
- Whether full synthetic oil is required, recommended, or optional
- Refill capacity with a filter change
- Correct oil-filter part number and filter design
- Drain-plug tightening torque
- Oil-filter or cartridge-cap tightening instructions
- Whether the drain-plug washer or filter O-rings are reusable
- Approved lift and support points
- Oil-life or maintenance-reminder reset procedure
The American Petroleum Institute Motor Oil Guide explains the certification symbols found on oil containers. Current bottles may show API SQ or ILSAC GF-7 markings, but a newer certification mark does not replace the need to use the viscosity and manufacturer approval specified for the vehicle.
Do not change from the specified viscosity merely because the weather is hot or cold unless the owner’s manual lists another approved grade for those conditions. Oil passages, variable-valve systems, turbochargers, pumps, bearings, and emissions equipment may be designed around a specific viscosity range.
Stay Safe During an Oil Change
Park on a firm, level surface away from traffic. Shift an automatic transmission into Park or a manual transmission into gear, apply the parking brake, switch off the engine, remove the key, and chock the wheels that will remain on the ground.
Warning: Never place any part of your body beneath a vehicle supported only by a hydraulic, bottle, scissor, or emergency jack. A jack is a lifting device, not a work support. Use correctly rated jack stands at manufacturer-approved support points or use ramps designed for the vehicle. Read the lifting equipment’s safety instructions before use.
If you use ramps, center the tires, drive up slowly, apply the parking brake, chock the wheels, and confirm that both ramps are stable. If you use a floor jack and stands, lift only at approved points, lower the vehicle fully onto the stands, and gently test its stability from outside before going underneath.
Warm oil drains more readily, but fully heated oil, the exhaust, and nearby engine parts can cause burns. Run a cold engine only long enough to make the oil warm, then switch it off and allow dangerously hot components to cool. Wear gloves and eye protection, and keep your face away from the drain path.
Do not begin if the surface is sloped, soft, icy, oily, or unstable. Stop and use a qualified repair facility if you cannot identify the correct lift points or safely support the vehicle.
How to Choose the Right Oil and Filter
The best engine oil is one that meets every specification listed for your engine. Full synthetic oil may offer strong low-temperature flow, oxidation resistance, and high-temperature stability, but it is not a substitute for the correct viscosity or manufacturer approval. Use full synthetic oil when the manufacturer requires it.
Check the certification and approval information printed on the container rather than relying only on advertising terms such as “premium,” “high mileage,” or “advanced.” Diesel engines, European vehicles, turbocharged engines, and vehicles with manufacturer-specific standards may require approvals beyond a basic API category.
Match the filter to the exact engine, not merely the model name. One model year may offer several engines with different filters and capacities. The Ford oil-selection process, for example, directs owners to verify the year, model, engine, or VIN before choosing the oil, filter, and refill amount.
A spin-on filter has a metal can and rubber sealing gasket. A cartridge filter fits inside a reusable housing and usually comes with one or more replacement O-rings. Cartridge-filter caps are often plastic and can crack if the wrong tool or excessive torque is used.
Step-by-Step Guide to Changing Your Oil

Read the complete procedure before starting. The exact location and order can vary, especially when the filter is above the engine or hidden behind an underbody panel.
- Confirm every specification. Write down the oil viscosity and approval, refill capacity, filter part number, drain-plug torque, filter instructions, lift points, and reminder-reset steps.
- Prepare the vehicle. Warm a cold engine briefly, park on level ground, switch it off, secure the vehicle, and open the hood. Remove the oil-filler cap to confirm that it is not stuck and to help the crankcase vent while draining.
- Raise and support the vehicle if necessary. Use approved lift points, correctly rated stands, or ramps. Some vehicles provide enough clearance without lifting.
- Remove access panels. Take off only the underbody panel or service door needed to reach the engine-oil drain plug and filter. Keep the fasteners organized.
- Identify the correct drain plug. Confirm its position with the owner’s manual or service diagram. Do not loosen a nearby transmission, transfer-case, or differential plug.
- Position the drain pan. Place it beneath and slightly beyond the plug because the first stream may travel outward. Ensure the pan can hold more than the engine’s entire oil capacity.
- Remove the drain plug. Loosen it with the correct six-point socket. Finish turning it by hand while pressing it lightly toward the pan, then pull it away quickly. Allow the oil to drain until it slows to an occasional drip.
- Inspect and reinstall the plug. Clean the plug and sealing surface. Check for damaged threads, a rounded head, cracks, or metal debris. Install the specified new washer or seal, start the plug by hand to prevent cross-threading, and tighten it to the manufacturer’s torque specification.
- Remove the old filter. Move the pan beneath the filter and loosen it with the appropriate tool. Expect additional oil to drain. For a cartridge filter, note the position of each O-ring and remove all old O-rings from their grooves.
- Check the old gasket. On a spin-on filter, confirm that the rubber gasket came off with the filter. Installing a new filter over a stuck old gasket can create a rapid leak.
- Prepare the new filter. Clean the mounting surface. Apply a thin film of clean engine oil to the new spin-on gasket or replacement cartridge O-rings unless the filter instructions state otherwise. Do not place a cartridge O-ring on the cap threads.
- Install the filter. Start it straight. Tighten a spin-on filter according to the markings or instructions on the filter. Tighten a cartridge housing only to the specified torque with the correct cap tool. Filter manufacturers such as FRAM instruct installers to remove the old gasket, oil the new gasket, and follow the filter’s tightening guide.
- Recheck the plug and filter. Confirm that both are installed before adding oil. Wipe away spilled oil so a fresh leak will be easy to identify.
- Lower the vehicle if required for an accurate level check. Remove tools and the drain pan, reinstall necessary access panels, and place the vehicle on level ground.
- Add new oil gradually. Insert a clean funnel and add slightly less than the stated refill capacity. Replace the filler cap, then check the dipstick according to the owner’s manual. Add small amounts until the level is within the approved range.
- Start the engine and check oil pressure. Start the engine without revving it. The oil-pressure warning light should go out within the normal time described by the manufacturer. Shut the engine off immediately if the light remains on, the engine makes abnormal noises, or oil pours from the filter or drain plug.
- Inspect for leaks. With the engine running briefly, look around the filter and drain plug from a safe position. Never crawl under a running vehicle.
- Perform the final level check. Switch off the engine, wait the time specified in the manual, and check the oil on level ground. Add oil in small amounts if needed. Do not overfill.
- Reset and record the service. Reset the oil-life monitor or maintenance reminder using the vehicle-specific procedure. Record the date, mileage, oil specification, quantity, filter, and any observations.
Pro Tip: Compare the new filter and seal with the old parts before installation. Check the diameter, height, thread or cartridge shape, gasket position, and included O-rings. This can catch a catalog or packaging error before the engine is refilled.
Post-Change Checks and Proper Oil Disposal
After the engine has run and the final level is correct, inspect the drain plug, filter, filler cap, dipstick, underbody panel, and ground beneath the vehicle. Recheck the level and look for fresh oil after the first drive and again the following day.
A normal oil-pressure warning light should turn off shortly after startup. If it remains illuminated, shut the engine off immediately. Do not assume it is only a reminder light. Check the level, filter installation, drain plug, and any visible leaks before restarting. Have the vehicle towed or professionally inspected if the cause is unclear.
Pour used oil into a clean, leakproof container with a secure lid. Do not mix it with coolant, brake cleaner, gasoline, solvents, paint, water, or other waste. Contaminated oil may not be accepted by a recycling center.
Drain the old filter according to local requirements and place it in a bag or suitable container for transport. Take the oil and filter to an approved collection site, repair shop, municipal facility, or retailer that accepts them. Call ahead because quantity limits, container rules, filter acceptance, and fees vary.
The U.S. Environmental Protection Agency recommends recycling used motor oil and explains that properly handled oil can be re-refined or reused as an industrial material. Never pour it onto the ground, into a storm drain, into household plumbing, or into ordinary trash.
Common Oil-Change Problems and What to Do
The drain plug will not loosen: Confirm that it is the engine-oil drain plug and that the tool is turning in the correct direction. Use a snug six-point socket. Stop if the head begins to round; excessive force can damage the plug or oil pan.
The drain plug turns but will not tighten: The plug or oil-pan threads may be stripped. Do not fill and drive the vehicle while hoping it will seal. A proper thread repair or oil-pan replacement may be necessary.
The filter is stuck: Use a filter tool that fits securely and confirm the loosening direction. Avoid puncturing the filter unless the vehicle manufacturer or a qualified technician approves that method; puncturing can leave a sharp, collapsed filter that is harder to remove.
Oil leaks immediately after startup: Shut the engine off. Check for a loose drain plug, missing or doubled drain seal, loose filter, pinched cartridge O-ring, cracked filter housing, or an old spin-on gasket left on the mounting surface.
The oil level is too high: Do not continue driving with a significant overfill. Drain or extract enough oil to return the level to the approved range. Excess oil can be aerated by rotating parts and may increase crankcase pressure.
The oil level is too low: Add the correct oil a little at a time. If a large quantity is missing after the stated refill amount was added, inspect for leaks and verify that the vehicle was level during measurement.
The maintenance reminder remains on: The reminder does not normally reset itself when new oil is added. Follow the exact instrument-panel or infotainment procedure in the owner’s manual.
How Often Should Engine Oil Be Changed?
There is no single correct mileage interval for every vehicle. Follow the maintenance schedule and oil-life monitor for the exact model and engine. Time limits still matter for vehicles driven only a few miles each year.
Oil-life systems may consider operating time, temperature, trip length, load, idling, and other conditions. Ford explains that its Intelligent Oil-Life Monitor adjusts service timing according to vehicle use, operating conditions, and time.
Short trips, repeated cold starts, extensive idling, towing, dusty operation, track use, extreme temperatures, or commercial service may fall under a severe-use schedule. Use the shorter interval when the manufacturer classifies your driving that way.
Hybrid and Electric Vehicle Considerations
Battery-electric vehicles do not have an internal-combustion engine and therefore do not need engine-oil changes. They may still require other fluid inspections and scheduled maintenance.
Hybrid and plug-in hybrid vehicles do have an engine that requires the specified oil and filter. Their gasoline engine may start automatically under some conditions. Follow the manufacturer’s shutdown and maintenance-mode instructions, keep clear of high-voltage cables and components, and never disconnect or service orange high-voltage wiring as part of an oil change.
Frequently Asked Questions
How often should I change my oil?
Follow the maintenance schedule, time limit, and oil-life monitor for your exact vehicle. A universal 3,000-mile or 7,500-mile rule does not fit every engine. Severe driving conditions may require a shorter interval.
Can I mix synthetic and conventional motor oil?
Compatible synthetic and conventional engine oils can generally be mixed when necessary. Topping up with an oil that meets the required viscosity and performance standard is usually better than operating with a low oil level. Mixing may reduce the benefits of the higher-performing oil, so use one compliant product for a routine full refill.
What happens if I overfill the engine oil?
A significant overfill can allow rotating engine parts to aerate the oil and may increase crankcase pressure. This can interfere with lubrication or contribute to leaks. Check the level on level ground using the manufacturer’s procedure and remove excess oil before driving.
Can I change oil without a vehicle lift?
Yes. Some vehicles have enough ground clearance to reach the drain plug without lifting. Others can be serviced with approved ramps or a jack followed by correctly rated jack stands. Never go underneath a vehicle supported only by a jack.
What tools are optional for an oil change?
A creeper, drain-plug retrieval tool, absorbent mat, inspection light, and oil extractor may be optional. A suitable drain pan, correct socket, filter tool when needed, funnel, safety equipment, and safe vehicle supports are not optional when the procedure requires them.
Should I change the oil when the engine is hot or cold?
Warm oil usually drains more readily than cold oil, but fully heated oil and exhaust parts can cause burns. Warm a cold engine briefly, switch it off, and wait until the oil and nearby components can be approached safely.
How tight should the oil drain plug be?
Use the manufacturer’s torque specification for the exact oil pan and drain plug. Do not copy a torque value from another engine. Start the plug by hand, install the required seal, and use a torque wrench within the correct range.
Why is my oil warning light still on after the change?
First determine whether it is an oil-pressure warning or a maintenance reminder. If the oil-pressure warning remains on after startup, shut the engine off immediately and check the level, filter, drain plug, and visible leaks. A maintenance reminder usually needs a separate reset procedure.
Conclusion
A successful oil change depends on careful verification rather than universal measurements. Use the correct oil, filter, capacity, seals, torque values, and lift points for your exact engine. Support the vehicle safely, prevent double gasketing, check for leaks, confirm the final level, reset the reminder, and recycle the used oil. Stop and seek professional help when a plug, filter, warning light, leak, or lifting setup does not look right.
Sources
- American Petroleum Institute Motor Oil Guide — oil certification marks, viscosity guidance, and current service categories
- Ford: Recommended Engine Oil and Filter — vehicle, engine, VIN, oil, filter, and capacity verification
- Mopar Oil Change Guide — tools, drain-plug seal, torque, and old-filter-gasket checks
- FRAM Oil Filter Installation Instructions — gasket inspection, lubrication, and filter tightening
- Ford Intelligent Oil-Life Monitor — vehicle-specific oil-life calculations and reminder reset
- U.S. Environmental Protection Agency: Used Oil Recycling — safe management and recycling of used oil and filters







Leave a Reply