
A lift kit can create room for a different tire setup, improve clearance in specific areas, and give a truck or SUV a taller stance. It also changes suspension geometry, handling, lighting aim, and sometimes electronic safety systems. The right choice depends on your exact vehicle, intended use, tire plan, budget, and willingness to complete the required alignment and calibration work.
Quick Answer
Choose a lift kit by matching a vehicle-specific system to your driving needs, desired tire size, and acceptable handling tradeoffs. Verify the exact year, trim, drivetrain, and factory packages before buying. Plan for alignment, possible electronic calibration, tire-clearance testing, and follow-up inspections rather than treating the kit as a simple height upgrade.
Key Takeaways
- Body lifts, suspension lifts, and leveling kits change different parts of the vehicle; their names do not guarantee a specific lift height.
- Fitment must match the vehicle’s year, model, trim, cab, bed, engine, drivetrain, axle, suspension, and factory technology packages.
- A suspension lift usually requires alignment and may also require headlight aiming, steering-angle setup, radar calibration, or other electronic work.
- Larger tires affect clearance, effective gearing, braking feel, acceleration, fuel use, speedometer accuracy, and component loads.
- A lift does not automatically increase the manufacturer’s GVWR, GAWR, payload, or towing ratings.
At a Glance
| Time Required | Several hours plus alignment and any required calibration; complex kits, corrosion, or added steering and driveline work can extend the job to a full day or longer. |
| Difficulty | Intermediate to advanced for most suspension lifts; vehicle-specific instructions, safe lifting equipment, accurate torque work, and alignment knowledge are essential. |
| Tools Needed | Vehicle-rated lift or floor jack, approved stands, wheel chocks, hand tools, torque wrench, penetrating oil, measuring tools, and any specialty tools listed by the kit manufacturer. |
| Cost | Varies widely. Budget for the kit, labor, alignment, calibration, tires, wheels, possible steering or driveline parts, and follow-up service. |
Understanding Lift Kits: Types and Terminology
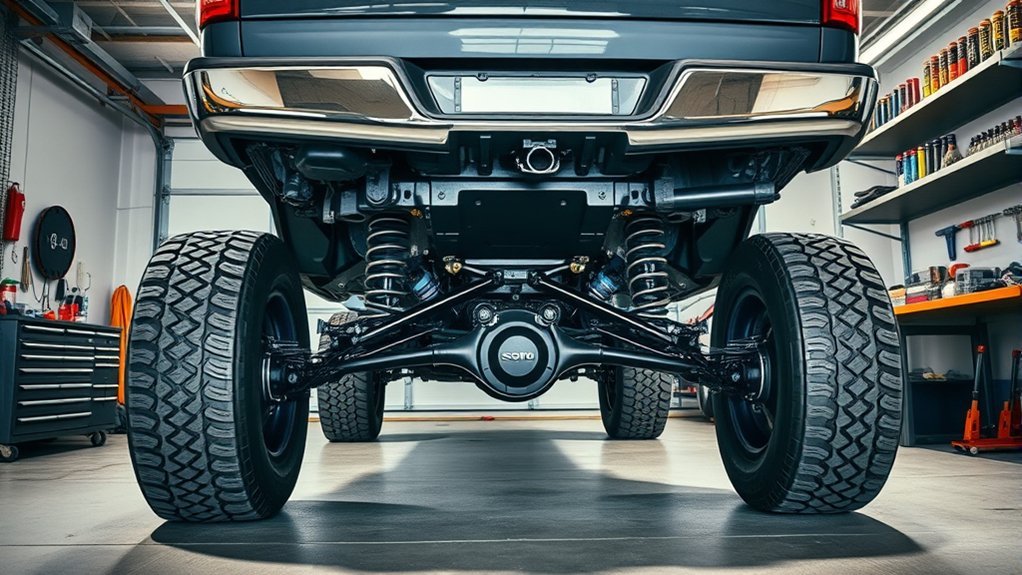
“Lift kit” is a broad term. The important question is not only how many inches a kit advertises, but also which parts it changes and how those changes affect suspension travel, steering, driveline angles, electronics, and tire clearance.
Body Lift Kits
A body lift places spacers between the body and frame of a body-on-frame truck or SUV. It raises the body and may create more room around the wheel openings, but it does not move the frame, suspension mounts, axles, or differentials farther from the ground.
Body lifts can require bumper-relocation brackets and checks of steering shafts, fan shrouds, fuel-filler hoses, wiring, grounds, and other body-to-frame connections. They are not suitable for every vehicle construction or trim.
Suspension Lift Kits
A suspension lift changes springs, struts, shocks, control-arm positions, knuckles, brackets, leaf-spring hardware, or related parts. Lift height can be mild or substantial, depending on the vehicle and system. A complete kit should account for suspension geometry, travel, bump stops, steering, brake hoses, sensor wiring, and driveline angles.
A suspension lift can raise the chassis and improve approach, breakover, or departure clearance. It does not raise a solid axle’s differential housing; a larger tire is normally needed to increase differential clearance.
Leveling Kits
A leveling kit raises one end of the vehicle, usually the front, to reduce factory rake. Factory rake leaves the rear higher so the vehicle can sit closer to level when loaded. Removing too much rake can make the rear appear low when carrying cargo or trailer tongue weight.
Some leveling kits use spacers, while others use replacement springs, torsion-key adjustments, struts, or control arms. The correct design and allowable height depend on the suspension.
| Kit Type | What It Changes | Common Goal | Key Limitation |
|---|---|---|---|
| Body lift | Body-to-frame spacing | Taller body stance or added wheel-opening room | Does not raise the frame, suspension, axle, or differential |
| Suspension lift | Springs, struts, shocks, arms, brackets, knuckles, or related geometry | Chassis clearance, tire room, suspension tuning, or off-road geometry | Can affect handling, alignment, travel, driveline angles, and electronics |
| Leveling kit | Primarily one end of the suspension | Reduce factory rake and allow a modest tire change | May reduce loaded rake and can still alter suspension geometry |
How to Choose the Right Lift Kit for Your Needs
Define the Vehicle’s Main Use
Start with what the vehicle must do most of the time. A daily-driven truck that regularly tows needs different priorities from a trail vehicle built around suspension travel and obstacle clearance.
- Daily driving: Favor mild height changes, predictable steering, low noise, and easy alignment.
- Off-road travel: Evaluate travel, bump stops, shock tuning, underbody clearance, steering angles, and tire durability.
- Towing or hauling: Preserve load-carrying rake, stability, hitch geometry, and the manufacturer’s weight limits.
- Appearance: Choose the smallest change that creates the desired stance without adding unnecessary mechanical compromises.
Verify Exact Vehicle Fitment
Do not order from the model name alone. Decode the VIN with the NHTSA VIN decoder, then confirm the following against the lift manufacturer’s current application guide:
- Model year and production date
- Two-wheel drive, four-wheel drive, or all-wheel drive
- Engine and transmission
- Hybrid or non-hybrid powertrain
- Cab, bed, wheelbase, and body style
- Axle, differential, and factory gear ratio
- Factory off-road, heavy-payload, towing, or performance package
- Electronic, adaptive, or air suspension
- Adaptive cruise control, lane-centering, automatic emergency braking, or other driver-assistance equipment
Fitment exclusions are common. One kit may fit a standard trim but not a hybrid, long-bed model, high-payload package, adaptive-suspension model, or vehicle equipped with a particular driver-assistance package.
Measure Before Selecting Lift Height
Park on level ground and measure from the center of each wheel hub to the fender opening. Hub-to-fender measurements are more useful than measuring from the ground because tire pressure and tread depth do not change the result.
Also record garage-door clearance, parking-garage limits, roof-rack height, step-in height, hitch height, and the amount of factory rake. These numbers help prevent choosing more lift than the vehicle or daily routine can reasonably support.
Choose a Complete, Engineered System
Compare what each kit includes, not just the advertised height. Depending on the vehicle, a complete system may need matched shocks or struts, control arms, knuckles, track-bar correction, sway-bar links, bump-stop extensions, differential relocation, brake-hose brackets, sensor-wire brackets, driveline parts, and calibration instructions.
Check whether the kit has published installation instructions, torque specifications, alignment targets, tire and wheel limits, warranty terms, and technical support. An official example is Ford’s Bronco two-inch lift-kit installation manual, which includes alignment, light-aiming, radar-alignment, and torque procedures.
Budget for the Complete Project
The kit price is only one part of the project. Include:
- Installation labor
- Wheel alignment
- Headlight, radar, camera, or steering-angle calibration when required
- Wheels and tires
- Speedometer or powertrain recalibration when supported and required
- Extended or relocated brake hoses and sensor wiring
- Driveshaft, CV-joint, steering, or control-arm corrections
- Spare-tire carrier changes
- Follow-up inspection and retorque service
Note: A taller advertised lift is not automatically better. The smallest vehicle-specific system that meets the actual goal usually creates fewer clearance, geometry, calibration, and drivability problems.
Should You Install Your Lift Kit Yourself or Hire a Pro?
A do-it-yourself installation can be reasonable when the owner has the correct equipment, understands suspension disassembly, can follow torque procedures, and has access to professional alignment and calibration afterward. Saving labor is not worthwhile if the result includes damaged threads, unsafe support, stretched hoses, incorrect spring placement, or unverified steering geometry.
When DIY Installation May Be Reasonable
- The kit is explicitly approved for the exact vehicle configuration.
- The full manufacturer instructions are available before the job begins.
- No spring compressor, cutting, welding, or specialized calibration is required beyond the installer’s training.
- The installer has a level workspace, vehicle-rated support equipment, torque wrench, and required specialty tools.
- A professional alignment and any required calibration are scheduled before normal driving resumes.
When Professional Installation Is the Better Choice
- The vehicle has adaptive suspension, radar, cameras, electronic steering, or advanced driver-assistance systems.
- The kit changes knuckles, control arms, crossmembers, differential position, steering, or driveline geometry.
- The vehicle is heavily corroded or has damaged suspension hardware.
- Springs require controlled compression.
- The installation requires welding, cutting, programming, or manufacturer-specific scan tools.
- The lift manufacturer or accessory warranty requires an approved installer.
Warning: Never work beneath a vehicle supported only by a floor jack. Use the vehicle manufacturer’s approved lifting points, wheel chocks, and properly rated stands or a professional vehicle lift. Follow the factory service manual and the lift-kit instructions for every support and torque procedure.
Installation time is kit-specific. Some vehicle-specific systems have published labor estimates, but corrosion, seized fasteners, tire changes, alignment, and electronic calibration can add substantial time. Use the current kit instructions instead of relying on a generic hourly estimate.
The Benefits and Tradeoffs of Lifting Your Truck
Potential Benefits
Depending on the system, a lift can improve approach, breakover, or departure clearance, create space for a carefully selected tire-and-wheel package, and provide suspension tuning intended for rough surfaces. It can also create the taller stance many owners prefer.
Actual off-road improvement depends on the complete build. Shock tuning, suspension travel, tire construction, traction aids, gearing, underbody protection, and driver skill often matter as much as advertised lift height.
Handling and Safety Tradeoffs
Raising the vehicle can raise its center of gravity. That may increase body motion, change steering response, and reduce rollover resistance during abrupt maneuvers. Review NHTSA’s rollover-propensity research for background on center-of-gravity and vehicle-dynamics testing.
Larger and heavier tires may also increase unsprung and rotating mass. The result can include slower acceleration, different braking feel, increased steering effort, added component load, more road noise, and reduced fuel economy. The size of each effect depends on the tire, wheel, vehicle, gearing, and driving conditions.
A lift kit changes a system, not just a measurement. Ride height, suspension travel, steering geometry, tire fit, lighting, electronics, and load behavior must work together.
Common Lift Kit Installation Challenges and How to Overcome Them
Alignment and Suspension Geometry
Changing ride height can move camber, caster, and toe away from their intended ranges. Some vehicles can be corrected with factory adjustments, while others need control arms, brackets, bushings, or different components.
Complete the alignment with the vehicle at finished ride height and with the final tire-and-wheel package installed. If the required alignment cannot be achieved within the kit manufacturer’s targets, do not accept “close enough” without identifying the cause.
Brake Lines, ABS Wiring, and Breathers
With the suspension safely supported, inspect brake hoses, parking-brake cables, ABS wiring, differential breathers, and other lines through full steering lock and the suspension’s intended travel. Nothing should become tight, rub a sharp edge, or serve as a suspension travel limiter.
Install extensions, relocation brackets, or replacement hoses only when specified for the vehicle and kit. After opening the hydraulic brake system, bleed and test it according to the factory service procedure.
Driveshaft, CV-Joint, and Steering Angles
A lift can change operating angles at CV joints, universal joints, driveshafts, steering shafts, tie rods, and ball joints. Excessive angles can cause vibration, accelerated wear, binding, or reduced travel.
Rotate and inspect components as directed by the instructions. Confirm that boots are not stretched or contacting nearby parts and that the steering reaches both locks without binding.
Headlights and Driver-Assistance Systems
Ride-height changes can alter headlight and fog-light aim. They may also change the position or operating angle of radar and camera systems used for adaptive cruise control, emergency braking, or lane assistance.
Follow the vehicle and kit manufacturer’s procedures for aiming, scanning, and calibration. Toyota, for example, has identified specific lift configurations validated for Toyota Safety Sense compatibility rather than treating every lift as interchangeable. See the official Tacoma TRD lift-kit fitment information.
Tire Contact at Full Lock and Compression
A tire that clears while parked may still contact the fender liner, body mount, frame, sway bar, control arm, bumper, or wiring during steering and suspension movement. Check both steering directions and both sides of the vehicle.
Do not assume every tire with the same labeled size has the same actual dimensions. Tread width, section width, shoulder shape, wheel width, offset, and backspacing all affect clearance.
Corroded or Seized Hardware
Older vehicles may have seized bolts, damaged threads, worn bushings, leaking shocks, or weakened mounts. Inspect the suspension before installation so the lift is not installed over existing defects.
Replace damaged hardware with the exact grade, type, and size required. Do not reuse torque-to-yield or single-use fasteners when the factory procedure calls for replacement.
Pro Tip: Download and read the complete installation manual before buying the kit. Confirm that every required bracket, fastener, calibration step, replacement part, and specialty tool is available before the vehicle is taken apart.
How Tire Size Affects Lift Kit Performance
Tire size is part of the lift-kit decision, not a separate cosmetic choice. The safest combination is one approved by the vehicle or lift manufacturer and verified for actual clearance, wheel fit, and load capacity.
Impact on Performance Metrics
- Acceleration: A larger or heavier tire can reduce acceleration because the drivetrain must turn more mass and a larger effective radius.
- Braking: Added rotating mass and leverage can change stopping feel and increase demand on the braking system.
- Effective gearing: A taller tire reduces engine speed at a given road speed and makes the effective axle ratio numerically lower.
- Transmission behavior: Shift timing and gear selection may change, especially under load.
- Fuel use: Added weight, rolling resistance, tread design, aerodynamic change, and altered gearing can increase fuel consumption.
- Speedometer and odometer: Changing rolling circumference can create an indicated-speed and distance error unless the vehicle supports recalibration.
Tire Size Compatibility Considerations
Use the lift manufacturer’s listed tire and wheel limits as a starting point, then verify the exact tire manufacturer’s dimensions. Check:
- Overall diameter and loaded radius
- Section width and tread width
- Wheel diameter and width
- Wheel offset and backspacing
- Bolt pattern, center bore, and lug-seat design
- Tire and wheel load ratings
- Speed rating appropriate for intended use
- Clearance at full steering lock and suspension compression
- Spare-tire location and carrier capacity
- TPMS compatibility
NHTSA advises using the original tire size or another size recommended by the vehicle manufacturer and provides additional guidance through TireWise. At minimum, replacement tires and wheels must have suitable load capacity for the vehicle and its actual use.
| Change | Possible Effect | What to Verify |
|---|---|---|
| Larger diameter | More differential clearance, altered gearing, possible contact | Actual diameter, calibration support, gear behavior, full-travel clearance |
| Greater width | More side and inner-suspension clearance demand | Wheel width, offset, backspacing, liner and control-arm clearance |
| Heavier tire or wheel | More rotating and unsprung mass | Brake performance, steering feel, suspension control, spare carrier |
| Different offset | Changes inner and outer clearance and steering scrub radius | Manufacturer limits, bearing load, fender coverage, steering contact |
Lift Kit Installation and Post-Install Checklist
Before Installation
- Confirm the part number against the exact VIN and vehicle configuration.
- Read the complete kit manual and relevant factory service procedures.
- Inspect tires, wheels, wheel bearings, steering joints, ball joints, bushings, shocks, springs, mounts, brake hoses, and CV boots.
- Measure and record ride height, alignment symptoms, and headlight position.
- Confirm all parts, replacement hardware, fluids, and specialty tools are present.
- Schedule alignment and any required calibration.
During Installation
- Support the frame and suspension exactly as the instructions require.
- Keep left- and right-side parts organized.
- Do not let calipers, knuckles, axles, or suspension parts hang from hoses or wiring.
- Use the specified fastener lubricant or thread treatment where required.
- Apply torque only with a calibrated torque wrench and follow the specified sequence.
- Tighten bonded-rubber suspension bushings at the required ride-height position when the service procedure calls for it.
Before the First Drive
- Confirm every fastener has been installed and marked or documented.
- Check brake-hose, ABS-wire, breather, sway-bar, driveshaft, and steering clearance.
- Verify wheel-lug torque using the vehicle or wheel manufacturer’s specification.
- Turn the steering from lock to lock and check tire clearance.
- Check fluid leaks and brake-pedal feel.
- Complete wheel alignment, headlight aim, scanning, and calibration required by the instructions.
- Verify that no warning lights or diagnostic trouble codes remain.
Initial Shakedown
Begin with a low-speed test in a controlled area. Listen for contact, clunks, clicking, or vibration. Confirm that the steering returns normally, the brakes operate consistently, and the vehicle tracks straight.
Recheck the system at the mileage or operating interval specified by the lift manufacturer. Also inspect it after severe off-road use, a hard impact, or any new steering, braking, vibration, or tire-wear symptom.
Maintenance and Safety Tips After Installing Your Lift Kit
Regular Component Inspection
Follow the lift-kit and vehicle manufacturer’s inspection schedule. A useful routine inspection includes:
- Shocks and struts for leaks, dents, damaged shafts, or loose mounts
- Springs, spacers, isolators, and bump stops for movement or damage
- Control arms, track bars, tie rods, ball joints, and bushings for wear
- Brake hoses, ABS wires, and differential breathers for tension or rubbing
- CV boots and driveshaft joints for leakage, binding, or abnormal angles
- Tires for rubbing, cuts, uneven wear, pressure loss, or load damage
- Wheel bearings and steering for looseness or noise
Retorque Suspension Bolts
Retorque only the fasteners identified by the kit manufacturer and use the exact specifications and procedure provided. Do not apply a generic torque value, and do not retorque a torque-to-yield fastener unless the factory procedure permits it.
Many kits call for an early post-installation check after the components settle. Record the date, mileage, fasteners inspected, torque values, alignment report, and any calibration performed.
Alignment and Tire Care
Have the alignment checked when the vehicle begins to pull, the steering wheel is off-center, or tire wear becomes uneven. Rotate tires at the interval specified by the vehicle and tire manufacturers, and maintain the correct pressure for the approved tire and load configuration.
Warning Signs That Require Immediate Attention
Stop driving and inspect the vehicle if you notice:
- Loss of brake pressure or a brake-fluid leak
- Sudden steering looseness, binding, or failure to return
- A new severe vibration or driveshaft shudder
- Repeated tire contact with the body, frame, hose, or wiring
- A loose spring, spacer, control arm, track bar, or shock mount
- Illuminated brake, stability-control, steering, or driver-assistance warnings
- Cracked brackets, elongated holes, or shifting suspension components
How a Lift Kit Affects Towing, Payload, and Daily Driving
A lift kit does not automatically increase the manufacturer-assigned gross vehicle weight rating, gross axle weight ratings, payload, or towing rating. Added parts, larger tires, wheels, bumpers, steps, spare carriers, and other accessories also consume available payload.
When towing, confirm:
- The truck remains within GVWR, GAWR, GCWR, tire, wheel, hitch, and trailer limits.
- The trailer is level or within the trailer and hitch manufacturer’s specified attitude.
- Ball-mount rise or drop is correct for the new receiver height.
- Weight-distribution equipment remains compatible and correctly adjusted.
- The vehicle retains adequate rear suspension travel and does not sit nose-high under tongue weight.
- Brake, steering, transmission, and stability behavior remain predictable during a controlled test.
A lifted tow vehicle may feel different in crosswinds, curves, emergency maneuvers, and lane changes. Use conservative speeds and allow extra space until the modified vehicle’s behavior is understood.
Lift-Kit Warranty, Legal, and Insurance Considerations
Vehicle and Kit Warranty
An aftermarket lift does not automatically cancel an entire vehicle warranty. According to the Federal Trade Commission’s auto-warranty guidance, warranty coverage may remain in effect when aftermarket parts are used, but coverage can be denied for damage caused by a defective part or improper installation.
Read the vehicle warranty, lift-kit warranty, tire and wheel warranties, and any service contract before installation. Some accessory warranties depend on who performs the installation. Keep purchase receipts, part numbers, instructions, alignment sheets, calibration reports, torque records, and maintenance documents.
Federal and State Rules
Federal standards primarily regulate new vehicles and equipment. After the first retail sale, manufacturers, distributors, dealers, and motor-vehicle repair businesses generally may not knowingly make required safety equipment inoperative. NHTSA explains this distinction in its vehicle-modification interpretation.
State and local rules may separately regulate overall height, frame or bumper height, headlamp height, mud flaps, tire coverage, fenders, inspections, and road use. Check your current state code and motor-vehicle agency through the USAGov state motor-vehicle directory before modifying or registering the vehicle.
Note: This article provides general educational information, not legal advice. Equipment laws, inspection rules, warranty terms, and enforcement practices can change and vary by location.
Insurance and Resale Documentation
Tell the insurer about material suspension, tire, wheel, or value changes when the policy requires disclosure. Ask whether custom-equipment coverage, photographs, receipts, or an appraisal are needed.
When selling the vehicle, provide the new owner with the kit manual, part numbers, alignment records, calibration records, maintenance history, and details of any changes to tire size, spare-tire mounting, or towing equipment.
Frequently Asked Questions
Will a lift kit void my vehicle’s warranty?
Not automatically. An aftermarket lift does not normally cancel the entire written warranty merely because it was installed. However, a manufacturer or warranty provider may deny coverage for damage caused by the lift, another aftermarket part, or improper installation. Read the warranty terms and keep complete installation and maintenance records.
How do lift kits affect fuel efficiency?
Fuel use often increases when the finished vehicle is taller, heavier, or fitted with heavier tires and wheels. Tire tread, rolling resistance, aerodynamic drag, effective gearing, alignment, pressure, and driving style all affect the result, so there is no universal miles-per-gallon loss.
Can I use a lift kit with my existing suspension?
Only when the kit manufacturer approves the exact vehicle and suspension configuration. Worn shocks, struts, ball joints, bushings, bearings, springs, or steering parts should be repaired first. Vehicles with electronic, adaptive, or air suspension require especially careful fitment verification.
What are the legal restrictions for lift kits in my state?
Restrictions vary. A state may regulate frame, bumper, body, headlamp, or overall vehicle height, as well as tire coverage, mud flaps, inspections, and equipment condition. Check the current state code and official motor-vehicle agency before installation rather than relying on a nationwide chart or an old forum post.
How long does a lift-kit installation typically take?
There is no universal installation time. A vehicle-specific kit may take several hours, while a complex system, corroded vehicle, or installation requiring steering, driveline, fabrication, alignment, and electronic calibration can take a full day or longer. Use the kit manufacturer’s labor guidance.
Does a lift kit increase ground clearance?
It depends on what is being measured. A body lift raises the body but not the frame, axles, or differentials. A suspension lift can raise the chassis and improve approach, breakover, or departure clearance. Differential clearance on a solid axle normally increases only when tire radius increases.
Do I need an alignment or ADAS calibration after installing a lift kit?
Most suspension lifts require a wheel alignment. Depending on the vehicle, the job may also require steering-angle setup, headlight aiming, radar alignment, camera calibration, ride-height sensor adjustment, or a diagnostic scan. Follow the vehicle and lift manufacturer’s exact procedures.
Conclusion
The best lift kit is not simply the tallest option or the one that clears the largest advertised tire. It is a complete, vehicle-specific system that matches how the truck or SUV is actually used and preserves safe steering, braking, suspension travel, lighting, electronics, and load behavior.
Verify fitment by VIN and configuration, read the full instructions before purchasing, budget for alignment and calibration, and test tire clearance through the complete steering and suspension range. With correct installation, documentation, and kit-specific maintenance, a lifted vehicle can deliver the intended stance and capability without relying on unsafe shortcuts.
Sources
- NHTSA VIN Decoder — verifies vehicle information encoded in the VIN.
- NHTSA TireWise — tire sizing, pressure, tread, recall, and replacement-tire safety guidance.
- NHTSA Light Vehicle Dynamic Rollover Propensity Research — supports the center-of-gravity and rollover discussion.
- Federal Trade Commission: Auto Warranties and Auto Service Contracts — explains aftermarket-part and warranty-coverage principles.
- Ford Performance Bronco Two-Inch Lift-Kit Instructions — demonstrates vehicle-specific torque, alignment, light-aiming, and radar-alignment requirements.
- Toyota Tacoma TRD Lift-Kit Information — supports model-specific fitment and driver-assistance compatibility guidance.







Leave a Reply