
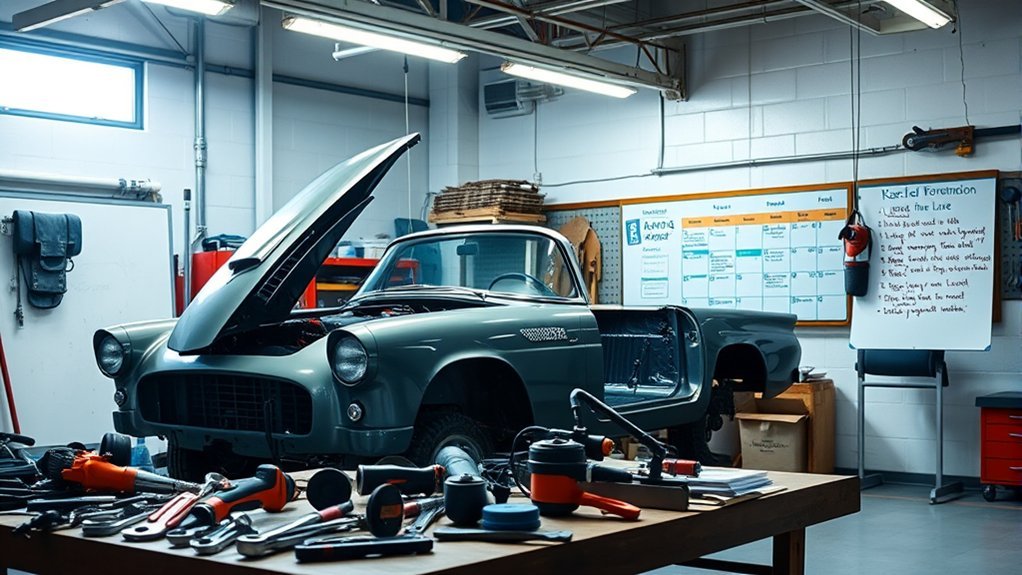
Restoring a classic car is not one long repair. It is a series of inspection, documentation, structural, mechanical, cosmetic, and testing decisions. The best projects begin by verifying the vehicle, defining the desired result, inspecting the body and chassis, and building a realistic plan before the first major part is removed.
Quick Answer
To restore a classic car, verify its identity and ownership, inspect the structure, define the restoration level, document the vehicle, and create a system-by-system plan. Repair structural damage before cosmetics, complete safety and mechanical systems before driving, and use the factory service manual for specifications, fluids, fasteners, and adjustments.
Key Takeaways
- Confirm the VIN, title, model year, body tags, and major component numbers before buying expensive parts or removing identification plates.
- Choose whether you are building a preserved original, reliable driver, concours restoration, or restomod before setting the budget.
- Inspect structural rust and previous collision repairs before spending money on paint, upholstery, or cosmetic trim.
- Photograph, label, measure, and inventory everything before and during disassembly.
- Make the car structurally sound and complete its steering, suspension, brakes, fuel, electrical, cooling, and drivetrain systems before road testing.
- Use trained professionals for structural welding, machining, alignment, paint hazards, and refrigerant work that exceeds your tools or experience.
At a Glance
| Time Required | Several months to several years, depending on the vehicle’s condition, parts availability, restoration level, and outsourced work |
| Difficulty | Intermediate to expert; beginners should combine manageable tasks with professional structural and safety-critical work |
| Tools Needed | SAE and metric hand tools, torque wrenches, multimeter, approved jack and stands, flare-nut wrenches, pullers, measuring tools, PPE, labeled storage, and model-specific service information |
| Cost | Highly variable; obtain vehicle-specific estimates for metalwork, paint, machine work, parts, upholstery, transport, storage, and professional labor |
Define Your Classic Car Restoration Goal
Decide what the finished car should be before you price parts or begin disassembly. A project intended for occasional local driving has different requirements from a factory-correct show car.
| Restoration Level | Primary Goal | Main Trade-Off |
|---|---|---|
| Preservation | Retain sound original finishes, materials, and components | Visible age and wear remain part of the car |
| Driver restoration | Create a safe, dependable car for regular use | Some factory-correct details may be secondary to reliability |
| Concours restoration | Reproduce factory appearance and specifications closely | Requires extensive research, rare parts, and specialist labor |
| Restomod | Combine classic styling with selected modern components | Modifications may affect originality, fitment, value, and legal compliance |
Write a one-paragraph scope statement. Include the intended use, originality target, performance goals, exterior color, interior standard, safety upgrades, and work you will outsource. Use that scope to control later decisions.
Verify the VIN, Title, and Model Year
Confirm that the title and registration identify the same vehicle as its permanent chassis or body number. Compare all visible identification plates, frame stampings, body tags, engine numbers, transmission numbers, and casting or date codes that apply to the model.
For most 1981-and-newer vehicles, the standardized 17-character VIN can be checked with the NHTSA VIN Decoder. Earlier classic cars often use shorter manufacturer-specific serial numbers, so consult the factory parts book, marque club records, manufacturer archives, and state title agency instead of forcing the number into a modern decoder.
Also search the NHTSA recall database by VIN, year, make, or model. Be aware that VIN results may not display recalls more than 15 years old, completed recalls, some specialty vehicles, or certain international campaigns.
Note: Do not remove, relocate, restamp, or alter a VIN or other legal identification plate. Requirements vary by state, so contact the appropriate motor-vehicle agency before replacing rusted panels around an identification number.
Inspect the Car Before Disassembly
Perform a complete assessment before buying cosmetic parts. Record the condition of:
- Frame rails, unibody rails, rocker panels, floors, cowl, trunk, body mounts, and suspension mounting points
- Panel alignment, door gaps, glass openings, hinges, and signs of previous collision repair
- Engine rotation, compression where practical, oil condition, cooling system, and visible leaks
- Transmission, clutch, differential, driveshaft, axles, and mounts
- Steering play, suspension joints, wheel bearings, springs, and shocks
- Brake lines, hoses, master cylinder, wheel cylinders or calipers, drums, rotors, and parking brake
- Fuel tank, lines, hoses, pump, carburetor or injection equipment
- Battery cables, grounds, charging system, starting circuit, fuse protection, and wiring harness
- Trim, glass, weatherstripping, instruments, seats, hardware, and model-specific parts
Structural rust is usually more important than faded paint. If the shell is weak, twisted, incomplete, or badly repaired, obtain a professional body or frame assessment before committing to the project.
Setting Your Budget and Timeline
Create a budget from the vehicle’s actual condition rather than a generic restoration average. Price the major work categories separately:
- Purchase, taxes, title work, transport, and storage
- Structural metalwork and rust repair
- Body preparation, paint materials, booth time, and finishing
- Engine machining, rebuilding, cooling, exhaust, and fuel delivery
- Transmission, clutch, driveshaft, differential, and axle work
- Steering, suspension, brakes, wheels, and tires
- Electrical harnesses, switches, instruments, lighting, and charging components
- Glass, weatherstripping, upholstery, carpet, headliner, and trim
- Tools, fasteners, sealants, abrasives, fluids, and other consumables
- Professional welding, machine work, alignment, refrigerant service, and inspections
Use written quotes whenever possible. Add a contingency based on the amount of hidden rust, missing hardware, previous modifications, unknown drivetrain condition, and scarcity of parts. A complete but worn vehicle is often easier to budget than an apparently inexpensive car with missing model-specific components.
The purchase price is only the entry cost. The condition of the structure, completeness of the vehicle, and availability of correct parts usually have a greater effect on the final budget.
Build a Milestone Timeline
Use milestones instead of one completion date. A practical project plan may include:
- Identity, title, scope, and condition verification
- Documentation and parts inventory
- Disassembly and shell bracing where required
- Structural and corrosion repair
- Chassis, steering, suspension, and brake rebuilding
- Drivetrain, cooling, fuel, and electrical work
- Panel test fitting and body preparation
- Paint, corrosion protection, and curing
- Interior, glass, weatherstripping, and final assembly
- Fluid filling, static testing, alignment, first start, and road testing
Allow time for machine-shop queues, back-ordered parts, shipping damage, test fitting, rework, and curing. Review the schedule after each milestone rather than hiding delays until the budget is exhausted.
Pro Tip: Set decision gates before the expensive stages. Reassess the project after teardown, after structural repair estimates, and before paint. Those are the best points to reduce scope, change direction, or stop without wasting finished work.
Set Up a Safe Workspace and Choose the Right Tools
A restoration workspace should be dry, well lit, ventilated, and large enough to open doors and move removed components without damaging them. Keep clear access to exits and fire extinguishers. Store gasoline, solvents, paint products, batteries, and compressed-gas cylinders according to their labels and local fire requirements.
Essential Restoration Tools
- Quality SAE and metric sockets, ratchets, extensions, combination wrenches, screwdrivers, and pliers
- Flare-nut wrenches and tubing tools for brake and fuel fittings
- Torque wrenches covering the ranges required by the service manual
- Digital multimeter, test light suitable for the system, wire tools, and fused jumper leads
- Approved floor jack, wheel chocks, and properly rated jack stands
- Breaker bar, impact driver, penetrating oil, pullers, and dead-blow hammer
- Calipers, micrometers, feeler gauges, straightedge, and thread gauges
- Drain pans, approved fluid containers, funnels, plugs, caps, and absorbent material
- Safety glasses, face shield, gloves appropriate to the task, hearing protection, and suitable respiratory protection
- Factory service manual, factory parts book, wiring diagram, and model-specific technical bulletins
An angle grinder, drill press, engine hoist, engine stand, parts washer, welder, paint equipment, press, and diagnostic instruments may be useful, but they are specialty tools rather than universal requirements. Rent or outsource work when the equipment will be used only once or when a mistake could damage the car or injure someone.
Warning: Never work under a vehicle supported only by a hydraulic, bumper, or scissor jack. Use stands rated for the load on a solid, level surface, place them only at approved support points, chock the remaining wheels, and follow the jack, stand, lift, and vehicle instructions.
Control Welding, Fuel, and Fire Hazards
Welding, cutting, brazing, and grinding are hot work. The OSHA welding guidance identifies hazards that include metal fumes, ultraviolet radiation, burns, eye damage, electrical shock, and fire.
Remove combustible trim, carpeting, seam sealer, undercoating, and fuel-system hazards from the work area. Do not weld, cut, or grind on a fuel tank or a component that has held flammable liquid unless it has been made safe using an appropriate professional procedure. Keep a suitable extinguisher nearby and inspect both sides of the panel for hidden wiring, hoses, insulation, and fuel residue.
Protect Yourself From Old Brake, Clutch, and Paint Dust
Some older brake and clutch components may contain asbestos. You cannot reliably identify asbestos content by appearance. Follow the EPA’s brake and clutch work practices. Do not clean assemblies with compressed air, a dry rag, a dry brush, or an ordinary non-HEPA shop vacuum.
Old coatings and accumulated sanding dust may also contain lead or other hazardous substances. The EPA identifies lead as toxic when inhaled or swallowed. Test unknown coatings where appropriate, contain dust, use effective extraction, and select respiratory protection for the material and task rather than relying on a simple nuisance-dust mask.
Handle Batteries, Coolant, and Refrigerant Correctly
- Confirm whether the car uses negative or positive ground before connecting a battery, charger, alternator, radio, or electronic accessory.
- Disconnect the battery before repairing unfused wiring or performing work that could short a live terminal.
- Do not open a hot or pressurized cooling system. Capture coolant and keep it away from children and animals.
- Identify the installed refrigerant before opening an air-conditioning system. Do not vent refrigerant.
EPA rules require technicians who service motor-vehicle air-conditioning systems for payment or other consideration to hold Section 609 certification. Use a qualified technician with suitable recovery equipment for refrigerant work. See the EPA motor-vehicle A/C requirements.
Document the Car Before Taking It Apart
Thorough documentation reduces assembly errors and preserves useful history. Before removing a component:
- Photograph it from several angles, including fasteners, clips, spacers, shims, and wire routing.
- Record panel gaps, ride height, alignment shims, linkage lengths, hose routes, and exposed thread counts.
- Label both ends of every electrical connector, hose, cable, and hard line.
- Place related fasteners in sealed, labeled bags instead of one shared container.
- Create a spreadsheet or notebook containing the part name, location, condition, supplier, part number, cost, and installation status.
- Keep receipts, warranties, machine-shop reports, paint formulas, alignment results, and photographs.
Retain damaged or replaced parts until the restoration is finished. An old component can provide dimensions, routing, finish, fastener type, or casting information even when it cannot be reused.
Pro Tip: Add a ruler or labeled reference card to close-up photographs. The image will then preserve scale, orientation, vehicle side, and assembly order instead of showing an unidentified bracket months later.
How to Restore a Classic Car Step by Step
Work on one system at a time, but do not treat the sequence as rigid. A body-on-frame vehicle, a unibody car, and a running preservation project may require different orders. The following sequence works as a general planning framework.
1. Complete the Assessment and Plan
Verify ownership and identification, define the restoration level, inspect structural areas, test what can be tested safely, list missing parts, research availability, and estimate professional work. Do not order a complete cosmetic package until you know whether the shell and chassis are viable.
2. Photograph, Label, and Inventory
Build a complete record before teardown. Mark right and left components, note shim locations, protect identification plates, and create dedicated storage for trim, glass, interior pieces, hardware, and mechanical assemblies.
3. Disassemble in Controlled Stages
Remove assemblies in a planned order rather than stripping the entire car at once. Support or brace the shell when removing structural panels, roofs, floors, rockers, or major body sections. Keep doors, hood, trunk lid, and adjacent panels available for test fitting.
4. Repair the Structure and Corrosion
Address frame damage, unibody rails, floors, rocker panels, pillars, cowl sections, body mounts, suspension mounts, and other load-bearing areas before final bodywork. Confirm dimensions and panel alignment during the repair, not after the car has been painted.
Structural welding and straightening require correct measurements, penetration, corrosion protection, and load-path knowledge. Hire an experienced restoration or collision specialist when those requirements exceed your training.
5. Rebuild the Chassis, Steering, and Suspension
Inspect the frame or subframes, springs, control arms, bushings, ball joints, tie rods, steering gear, idler and pitman arms, wheel bearings, shocks, and mounting hardware. Check for cracks, seized adjusters, distorted components, and incompatible previous modifications.
Do not fully tighten rubber-bushed suspension pivots at full droop unless the service manual specifies that procedure. Many designs require final tightening at normal ride height to prevent bushing preload.
6. Service the Engine, Transmission, and Driveline
Measure before rebuilding. Depending on the vehicle, useful checks may include compression, leak-down, oil pressure, crankshaft end play, cylinder condition, cooling-system pressure, clutch condition, transmission operation, differential backlash, universal joints, and mount condition.
Use a qualified machine shop for cleaning, crack inspection, precision measurement, boring, honing, crankshaft work, head work, balancing, and other machining. Match internal clearances, torque procedures, sealants, lubricants, and break-in steps to the exact engine and component specifications.
7. Rebuild the Cooling, Fuel, and Electrical Systems
Inspect the radiator, heater core, water pump, thermostat, hoses, fan, shroud, pressure cap, and temperature sender. Flush or replace contaminated components and confirm that the cooling system is appropriate for the engine and intended use.
Check the fuel tank for corrosion and residue. Replace unsafe hoses with material compatible with the fuel being used. Inspect hard lines, pump, filter, carburetor or injection components, tank venting, and heat shielding. Route lines away from exhaust heat, moving parts, and electrical hazards.
For the electrical system, inspect the harness for brittle insulation, overheated terminals, unprotected splices, missing fuses, incorrect wire sizes, and weak grounds. Confirm the original system voltage and polarity before adding modern accessories.
8. Rebuild and Test the Brakes
Brakes must be functional before the vehicle moves under its own power. Inspect the master cylinder, booster where fitted, lines, flexible hoses, proportioning or combination valves, wheel cylinders, calipers, drums, rotors, bearings, seals, parking brake, pedals, and linkage.
Use parts matched to the exact axle, spindle, wheel, tire, master-cylinder bore, and brake configuration. After assembly, fill and bleed the system using the specified fluid and sequence. Check for leaks, verify pedal reserve, confirm parking-brake operation, and perform controlled static and low-speed tests before entering public roads.
9. Test Fit Before Final Paint
Install and align the doors, hood, trunk lid, fenders, grille, bumpers, lights, trim, glass, weatherstripping samples, drivetrain, exhaust, and major interior parts before final paint where practical. Test fitting reveals missing holes, bracket conflicts, panel interference, and incorrect reproduction parts while corrections are still manageable.
10. Paint, Protect, and Finish the Body
Remove corrosion rather than hiding it under filler or coating. Prepare bare metal and compatible coatings according to the product manufacturers’ instructions. Protect cavities, seams, undersides, and repaired panels against future moisture while keeping drains open.
Professional paint work may be the safer choice when the job requires hazardous coatings, supplied-air respiratory protection, controlled ventilation, or a compliant spray area.
11. Reassemble the Interior, Glass, and Trim
Install sound deadening, wiring, ducts, headliner, glass, weatherstripping, dashboard, instruments, carpet, seats, belts, door hardware, and trim in a sequence that preserves access. Confirm that wiring, drains, ventilation, and fasteners are correct before covering them.
12. Complete Static Tests, Alignment, and Road Testing
Fill fluids, inspect every connection, torque critical fasteners to the correct specification, test circuits with suitable protection, perform a professional alignment, and complete the first-start checklist. Begin road testing at low speed in a controlled area and expand the distance only after checking brakes, steering, temperatures, leaks, charging, noises, and fastener security.
System-by-System Restoration Checklist
| System | Key Questions |
|---|---|
| Body and structure | Are load-bearing areas sound? Are drains open? Do panel gaps indicate sagging, collision damage, or incorrect previous repairs? |
| Steering and suspension | Is there excessive play, binding, cracking, worn joints, loose mounting hardware, damaged springs, or an alignment problem? |
| Brakes | Are hard lines, hoses, seals, friction parts, bearings, hydraulics, pedal linkage, and the parking brake safe and correctly matched? |
| Engine and cooling | Does the engine have acceptable compression and oil pressure? Are clearances, temperature control, lubrication, mounts, and ventilation correct? |
| Transmission and driveline | Are the clutch or converter, mounts, linkages, seals, joints, differential, axles, and operating adjustments in specification? |
| Fuel system | Is the tank clean and sound? Are hoses fuel-compatible, lines protected, vents open, filters clean, and fittings leak-free? |
| Electrical system | Are the voltage, polarity, wire sizes, grounds, fuse protection, connectors, charging output, and starting circuit correct? |
| Wheels and tires | Are wheel dimensions, offsets, lug hardware, load ratings, tire sizes, age, clearances, and pressures suitable for the vehicle? |
| Interior and restraints | Are seat mounts, latches, belts, pedals, controls, instruments, defrosting, visibility, and fire-resistant barriers secure? |
How to Source the Correct Restoration Parts
Buy parts by verified application rather than appearance. Similar components may differ by model year, plant, engine, axle, trim level, production date, or optional equipment.
- Start with the factory parts book and service manual.
- Record casting numbers, stamped numbers, date codes, dimensions, connector styles, and mounting patterns.
- Ask whether a replacement is original, new old stock, rebuilt, used, reproduction, or modified.
- Confirm whether a superseded part requires additional brackets, fittings, wiring, or machining.
- Inspect used parts for cracks, corrosion, wear, stripped threads, previous repairs, and missing hardware.
- Test electrical and mechanical parts where practical before installation.
- Test fit reproduction panels, glass, trim, weatherstripping, exhaust, and brackets before paint.
- Keep supplier invoices, batch numbers, warranties, and installation instructions.
Factory-correct parts may matter for a concours project, while a driver restoration may benefit from carefully selected safety or reliability upgrades. Document every departure from the original specification and retain reversible original components when practical.
Top 10 Mistakes to Avoid During Classic Car Restoration
- Starting without a defined goal. Mixing concours, driver, and restomod decisions produces incompatible parts and uncontrolled costs.
- Buying based on fresh paint or photographs. Cosmetic condition can hide rust, filler, poor welds, missing trim, and title problems.
- Disassembling before documenting the car. Unlabeled shims, brackets, clips, fasteners, and wire routes become difficult to reconstruct.
- Underestimating structural and paint labor. Rust repair, panel alignment, block sanding, test fitting, and refinishing can consume more time than mechanical assembly.
- Ordering parts before confirming the exact application. Verify VIN or serial information, build date, engine, transmission, axle, brakes, and production changes.
- Mixing parts and hardware in shared containers. Bag, label, photograph, and inventory every assembly as it is removed.
- Performing hot work near fuel or combustible material. Welding and grinding sparks can ignite fuel residue, upholstery, undercoating, insulation, or hidden debris.
- Finishing cosmetics before structure and fit. Rust repair, panel welding, drivetrain mock-up, exhaust routing, and trim test fitting should occur before final paint.
- Using universal specifications. Torque values, fluids, clearances, wire sizes, brake components, alignment settings, and maintenance intervals must match the exact vehicle and parts.
- Skipping staged testing. A successful first start does not prove that brakes, steering, cooling, charging, fuel delivery, wheel torque, alignment, or road behavior are safe.
Avoiding Financial Stalls
Track committed costs as well as money already spent. A project may appear to be within budget while major unpaid work—paint, upholstery, machining, glass, tires, or transport—remains outstanding.
When costs rise, protect completed structural and safety work first. Reduce optional performance upgrades, rare cosmetic details, or show-level finishing before compromising brakes, steering, fuel integrity, wiring protection, tires, or corrosion repair.
Why Documenting Your Restoration Process Matters
A complete restoration file makes the car easier to assemble, maintain, diagnose, insure, and eventually sell. Keep:
- Before-and-after photographs: Show condition, hidden repairs, panel preparation, and component routing.
- Parts records: Record suppliers, part numbers, applications, serial numbers, and warranties.
- Service details: Save torque records, clearances, fluid specifications, alignment results, and machine-shop measurements.
- Modification records: Document wiring changes, brake upgrades, engine changes, wheel fitment, and nonstandard components.
- Financial records: Retain receipts, labor invoices, transport charges, and professional reports.
- Ownership records: Protect copies of titles, registrations, appraisals, historic photographs, and provenance documents.
Documentation does not guarantee a higher sale price, but it can give buyers, appraisers, mechanics, and insurers clearer evidence of what was repaired and which parts were used.
When to Hire a Professional Restoration Specialist
Stop and obtain qualified help when a task requires equipment, certification, structural knowledge, or precision beyond your experience. Common referral points include:
- Frame straightening, unibody measurement, structural welding, or major rust reconstruction
- Engine machining, crack inspection, crankshaft work, cylinder boring, and precision balancing
- Automatic-transmission rebuilding or differential setup
- Brake-system redesign, incompatible component correction, or hydraulic diagnosis
- Air-conditioning refrigerant recovery, conversion, charging, or leak repair
- Hazardous coating removal and professional paint application
- Safety-glass installation, complex upholstery, and convertible-top adjustment
- Final alignment, corner weighting where applicable, and advanced drivability diagnosis
A good specialist should provide a written scope, labor rate, parts policy, change-order process, expected documentation, payment schedule, and storage terms. Photograph the vehicle and agree on its condition before delivery.
First-Start and Road-Test Checklist
Before the First Start
- Confirm that the engine turns freely using the model-appropriate procedure.
- Verify oil type and level, cooling-system fill, fuel connections, transmission fluid, and other required lubricants.
- Check battery polarity, cable routing, grounds, fuse protection, and starter clearance.
- Prime the lubrication and fuel systems only according to the service manual and component instructions.
- Inspect the engine bay and exhaust area for tools, loose fasteners, rags, wiring, and fuel residue.
- Place a suitable fire extinguisher within reach and have a second person watch for leaks and smoke.
- Provide adequate ventilation and never run the engine in a closed garage.
During the First Start
Watch oil pressure, temperature, charging output, fuel delivery, and warning indicators. Shut the engine down immediately if oil pressure does not appear as expected, fuel leaks, coolant escapes, wiring overheats, severe mechanical noise develops, or the throttle does not return correctly.
Follow the camshaft, piston-ring, bearing, clutch, transmission, brake, and differential manufacturers’ break-in procedures where new or rebuilt components require them. Do not substitute a generic internet break-in routine for the exact component instructions.
Before Public-Road Use
- Verify brake pedal reserve, hydraulic integrity, parking-brake operation, and controlled stopping.
- Confirm steering response, wheel-bearing adjustment, wheel torque, tire pressure, and tire clearance.
- Check for fuel, oil, coolant, brake-fluid, transmission-fluid, and differential leaks.
- Complete a professional wheel alignment when suspension or steering geometry has changed.
- Confirm that lights, signals, wipers, mirrors, instruments, defrosting, seat mounts, and restraints operate correctly.
- Make sure the vehicle is legally registered, insured, and permitted for road use in your jurisdiction.
Begin with short, low-speed runs near the workshop. Reinspect the car after each run and increase speed and distance gradually. Do not combine the first high-speed test, first long trip, and first heavy-braking test.
How to Maintain Your Classic Car After Restoration
Base the maintenance schedule on the factory service manual, rebuilt-component instructions, fluid manufacturers, tire manufacturers, and how the car is used. A low-mileage collector vehicle may need time-based service even when it has not reached a mileage interval.
After the First Drives
Reinspect the car frequently during its shakedown period. Check:
- Fluid levels, leaks, hose clamps, belts, fittings, and wiring temperature
- Wheel and driveline fasteners where rechecking is specified
- Brake adjustment, pedal feel, parking brake, and uneven heating
- Steering play, alignment, tire contact, ride height, and suspension settling
- Exhaust clearances, body mounts, engine mounts, and driveline vibration
- Battery charging, ground connections, fuses, and lighting
Engine and Fluid Care
Check engine oil before trips and change it according to the engine builder, oil supplier, and service manual. For cars driven infrequently, also consider elapsed time, short-trip moisture, fuel dilution, storage conditions, and whether the engine reaches full operating temperature.
Use the specified coolant type and concentration. Inspect hoses, the radiator cap, heater valve, water pump, fan, and corrosion protection. Never remove a pressure cap while the system is hot.
Do not mix brake fluids or substitute a fluid based only on color. Use the specification required by the installed brake components and replace contaminated fluid using the correct procedure.
Tire and Wheel Care
Inspect tire pressure when the tires are cold and before long trips. Look for cracking, bulges, cuts, punctures, uneven wear, vibration, and sidewall contact. NHTSA’s TireWise guidance provides information about tire maintenance and aging.
Follow the tire and wheel manufacturers’ rotation instructions. Directional, staggered, bias-ply, specialty, or mismatched wheel-and-tire arrangements may require a different pattern or may not permit normal rotation.
Cleaning, Corrosion Prevention, and Storage
- Wash road salt, mud, insects, and chemical residue from the body and underside without forcing water into vulnerable cavities.
- Keep body and cowl drains open.
- Repair paint chips and coating damage before corrosion spreads.
- Store the car in a dry, clean, ventilated area with stable conditions.
- Use a clean, breathable cover that will not trap moisture against the paint.
- Maintain the battery with equipment suitable for its chemistry and voltage.
- Use a fuel-storage plan appropriate to the fuel system, climate, and expected storage period.
- Protect the car from rodents without placing flammable or damaging material near wiring, exhaust, or ventilation openings.
Driving a roadworthy car regularly is usually better than repeated short idling. A complete drive allows the engine, exhaust, transmission, brakes, wheel bearings, and other components to reach normal operating conditions, provided weather and road conditions are suitable.
Joining the Classic Car Community for Support and Resources
Model-specific clubs, restoration forums, museum archives, manufacturer heritage departments, swap meets, and local specialists can help identify production changes and hard-to-find components.
Use the community to locate:
- Factory manuals, parts books, service bulletins, and historic photographs
- VIN, serial-number, casting-number, and body-tag references
- Known corrosion points and model-specific repair methods
- Reputable machine shops, upholsterers, painters, platers, and rebuilders
- Original hardware, used parts, new old stock, and accurate reproductions
- Examples of correct routing, finishes, fasteners, and assembly details
Verify community advice against the service manual and the exact components installed on your car. A method that works on a similar model year may be wrong for a midyear production change, optional axle, different brake package, or previous modification.
Frequently Asked Questions
What is the correct order for restoring a classic car?
Begin with identity, title, scope, documentation, and condition assessment. Repair structural damage before cosmetic finishing. Rebuild the chassis, steering, suspension, drivetrain, cooling, fuel, electrical, and brake systems, then test fit panels and trim before final paint. Finish with reassembly, alignment, static checks, first start, and staged road testing. The exact sequence may vary by vehicle construction and project scope.
What are the most common classic-car restoration mistakes?
Common mistakes include buying without checking rust and ownership, tearing the car apart before documenting it, ordering parts without verifying the exact application, finishing paint before test fitting, underestimating professional labor, performing unsafe hot work, mixing hardware, using universal specifications, and road testing before the brakes, steering, tires, cooling, and fuel systems are proven safe.
What is the 30-60-90 rule for classic-car restoration?
There is no generally accepted 30-60-90 rule that divides a restoration into fixed percentages. A more useful system is to use decision gates: verify the vehicle and scope, complete teardown and structural assessment, approve the revised budget, finish mechanical and body milestones, and conduct final inspection and testing before road use.
What skills are essential for classic-car restoration?
Useful skills include mechanical diagnosis, safe lifting, accurate measurement, fastener and thread identification, electrical troubleshooting, documentation, parts research, corrosion assessment, and careful assembly. Welding, machining, advanced bodywork, paint application, alignment, transmission rebuilding, and refrigerant service may require specialist training and equipment.
How long does a classic-car restoration take?
A limited mechanical recommissioning may take months, while a full structural and cosmetic restoration can take several years. The largest variables are rust, missing parts, body and paint labor, machine-shop availability, project changes, and the number of hours available each week.
How do I know whether a classic car is worth restoring?
Compare the car’s identity, completeness, structural condition, parts availability, historical importance, personal value, and realistic completed value with the total remaining cost. A project may still be worthwhile for personal reasons, but make that decision after obtaining structural, paint, drivetrain, and missing-parts estimates rather than relying on the purchase price alone.
Conclusion
A successful classic car restoration starts with verification and planning, not immediate disassembly. Confirm what the car is, decide what you want it to become, inspect its structure, and document every component before work begins. Complete structural and safety-critical repairs before cosmetics, follow model-specific specifications, and test the car in controlled stages.
Patience matters, but disciplined decisions matter more. A written scope, organized parts records, professional help at the right stages, and a careful shakedown process will produce a safer, more reliable, and easier-to-maintain classic car.
Sources
- National Highway Traffic Safety Administration VIN Decoder — standardized VIN decoding and vehicle identification information
- NHTSA Recall Lookup — vehicle, tire, and equipment safety-recall searches and lookup limitations
- NHTSA TireWise — tire inspection, maintenance, labeling, and aging guidance
- EPA Brake and Clutch Asbestos Best Practices — safe dust-control methods for automotive brake and clutch work
- OSHA Welding, Cutting, and Brazing Guidance — welding fumes, radiation, burns, shock, and fire hazards
- EPA Motor Vehicle Air-Conditioning Requirements — refrigerant recovery and Section 609 technician requirements







Leave a Reply