

Replacing spark plugs can restore reliable ignition when the old plugs have reached their scheduled service interval, but the job depends on exact vehicle specifications. Before removing anything, confirm the correct plugs, gap, tightening torque, and access procedure for your vehicle’s year, model, engine, and VIN. A cool engine, clean plug wells, careful hand-threading, and correct torque are more important than speed.
Quick Answer
To replace spark plugs, let the engine cool, verify the exact plug and torque specifications, clean each plug well, remove the coil or wire, and unscrew the old plug. Check the new plug’s gap, hand-thread it into the cylinder head, torque it to the specified value, reconnect everything, and test for misfires.
Key Takeaways
- Match the new plugs to the exact vehicle and engine application. A visual comparison alone is not enough.
- Work on a fully cooled engine and keep dirt from falling into the open spark-plug holes.
- Verify the gap, but do not automatically bend a factory-set fine-wire electrode.
- Install modern plated spark plugs dry unless the vehicle or plug manufacturer specifically requires anti-seize.
- Hand-start every plug and use the exact application-specific torque rather than a generic value.
At a Glance
| Time Required | About 30–90 minutes for an accessible engine; longer when an intake plenum or other major components must be removed |
| Difficulty | Beginner to intermediate, depending on plug access |
| Tools Needed | Correct spark-plug socket, ratchet, extensions, suitable torque wrench, gap gauge, compressed air or a vacuum, and basic hand tools |
| Cost | Varies by plug count, electrode material, and vehicle; also budget for intake gaskets or damaged coil boots when required |
Warning: Work only with the ignition off and the engine fully cooled. Keep the key or keyless-entry fob away from the vehicle while your hands are near ignition components. If the job requires working near hybrid high-voltage components, follow the vehicle’s high-voltage disabling procedure or use a trained technician.
Gather the Right Tools and Specifications
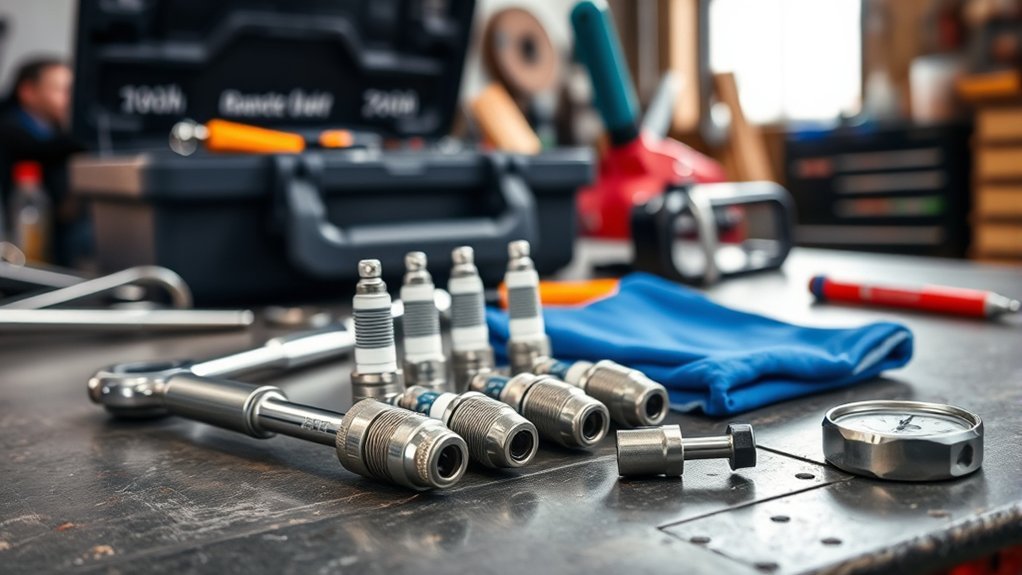
Gather every tool and specification before opening a spark-plug well. Leaving the engine half-disassembled while searching for a socket or torque value increases the chance of lost fasteners, damaged connectors, and debris entering the engine.
- Replacement spark plugs: A complete, application-matched set for the exact engine.
- Spark-plug socket: Use the correct size with a rubber insert, magnet, or other plug-retaining feature.
- Ratchet and extensions: A wobble extension or universal joint may help with angled or recessed plugs.
- Torque wrench: It must accurately cover the vehicle’s specified spark-plug torque.
- Gap gauge: Use the gauge type recommended by the plug manufacturer, especially with fine-wire electrodes.
- Compressed air or vacuum: Use it to remove dirt from around the coils, boots, and plug wells.
- Basic hand tools: These may be needed for engine covers, coil bolts, intake ducts, brackets, or a plenum.
- Eye protection and clean cloths: Protect your eyes when clearing debris and keep parts clean during reassembly.
- Dielectric grease: Optional and used only as a thin film where the product or vehicle manufacturer directs.
- Replacement gaskets: Required when an intake plenum or another gasketed component must be removed.
Verify the Correct Spark Plugs
Look up the plugs by year, make, model, engine, and VIN when the vehicle has more than one engine option. Confirm the OEM number or a verified equivalent using the vehicle manufacturer’s service information or a reputable application catalog such as the NGK Part Finder.
The correct plug must match more than its visible size. Important details include thread diameter, thread reach, gasket or taper seat, heat range, resistor design, electrode configuration, and specified gap. Installing a plug with the wrong reach or heat range can cause serious operating problems even when it screws into the cylinder head.
Note: Record the spark-plug part number, gap specification, dry-thread torque, ignition-coil bolt torque, and any intake-component torque before beginning. Do not rely on a universal online torque chart when vehicle-specific information is available.
The exact part number and torque specification matter more than any generic spark-plug rule.
Step-by-Step Process for Removing Old Spark Plugs
- Park safely and let the engine cool. Park on a level surface, set the parking brake, switch the ignition off, and wait until the cylinder heads are cool. Removing plugs from a hot aluminum head increases the risk of thread damage.
- Document the original layout. Take a clear photo of hoses, connectors, brackets, coils, and wires before disassembly. Label parts when several similar connectors are close together.
- Remove access components. Remove the engine cover, intake duct, breather hose, brackets, or other parts that block access. If an intake plenum must come off, follow the vehicle-specific procedure and use new gaskets when required.
- Clean around the plug wells. Vacuum loose material or use compressed air carefully while wearing eye protection. Clear debris before removing a coil, wire, or plug.
- Disconnect the ignition component. On a coil-on-plug engine, release the electrical connector without forcing its lock, remove the coil hold-down fastener, and pull the coil straight out with a gentle twisting motion. On an engine with plug wires, grip the boot rather than pulling on the wire.
- Check the well for oil or water. Fluid in a plug well can indicate a leaking seal, spilled oil, or water intrusion. Remove the fluid before opening the cylinder and repair the source when necessary.
- Loosen the old plug. Seat the spark-plug socket fully and keep the extension aligned with the plug. Apply smooth pressure rather than striking the ratchet or pulling at an angle.
- Stop if the plug binds. A plug that becomes unusually tight, squeaks heavily, or will not rotate normally may have damaged or contaminated threads. Do not force it. Use the vehicle manufacturer’s stuck-plug procedure or seek professional help.
- Remove the plug carefully. Once loose, turn it out with the socket and extension. Keep the tool aligned so the ceramic insulator is not struck against the well.
- Protect the open hole. Do not place tools, fasteners, rags, or loose debris over the open spark-plug hole.
Pro Tip: Work on one cylinder at a time when access allows. This reduces the chance of crossing traditional plug wires or plugging an ignition-coil connector into the wrong location.
Inspect the Old Spark Plugs
Line up the removed plugs in cylinder order and compare them. Spark-plug appearance can provide useful clues, although it should not replace proper diagnosis. The NGK spark-plug inspection guide explains how deposits and insulator condition can relate to engine operation.
- Oil-wet deposits: May point to oil entering the combustion chamber or plug well.
- Fuel-wet plug: May be associated with a no-start, weak ignition, excessive fueling, or repeated short cranking.
- Heavy black deposits: Can have several causes, including an overly rich mixture, prolonged idling, an ignition problem, or an incorrect plug application.
- Blistering, melting, or severe whitening: Requires further diagnosis before new plugs are installed and the engine is driven.
- Cracked ceramic or damaged threads: Check the socket, removal technique, coil boot, and cylinder-head threads carefully.
- One plug that differs sharply from the others: Focus diagnosis on that cylinder rather than assuming the plugs alone caused the problem.
Properly Installing New Spark Plugs
Before installation, compare the new and old plug part numbers and visible dimensions. Confirm that any sealing washer supplied with the new plug is present and undamaged. Do not add, remove, or reuse sealing washers unless the exact installation instructions call for it.
Check the Spark-Plug Gap
Verify the gap against the vehicle specification before installing each plug. A factory-set gap is not proof that the plug is correct for every engine application, and shipping damage can occasionally bend a ground electrode. However, verification does not mean every plug should be adjusted.
When adjustment is permitted, follow the exact plug manufacturer’s instructions. NGK advises moving only the ground electrode and avoiding pressure against a fine-wire center electrode or ceramic insulator. Bosch states that its current factory-set plugs do not require workshop readjustment. Review the guidance for the exact product before changing its gap: NGK gap guidance and Bosch spark-plug installation guidance.
Use Anti-Seize and Dielectric Grease Correctly
Warning: Do not automatically apply anti-seize, oil, or grease to spark-plug threads. NGK and Bosch direct installers to fit their plated plugs dry. Thread lubricant changes the relationship between wrench torque and clamping force, which can lead to over-tightening. Use anti-seize only when the vehicle or exact plug manufacturer expressly requires it.
NGK’s technical guidance explains that its plated threads act as a corrosion-resistant release surface and should not receive anti-seize. If another manufacturer specifically requires a compound, use only the stated amount and the corrected torque specification supplied for lubricated threads.
Dielectric grease does not improve electrical conductivity. When permitted, apply only a thin film inside the opening of the coil or plug-wire boot and on the upper ceramic area as directed by the grease manufacturer. Keep excess grease away from the plug’s firing end and avoid packing the metal contact area with grease. Its main purposes are moisture exclusion, electrical insulation around the boot, and easier future removal.
Hand-Thread and Torque the New Plugs
- Place the plug in the socket. Use a socket that holds the plug securely without crushing the ceramic.
- Lower it into the well carefully. Do not drop the plug onto its ground electrode or strike it against the cylinder head.
- Start the threads without a ratchet. Turn the socket and extension by hand for several full rotations. The plug should thread smoothly with little resistance.
- Back out a plug that does not turn freely. Do not use the ratchet to force engagement. Recheck alignment, thread cleanliness, and part compatibility.
- Seat the plug gently. Continue by hand until the gasket or taper seat reaches the cylinder head.
- Apply the exact specified torque. Attach the torque wrench and tighten smoothly to the dry-thread specification for that vehicle and plug. Do not use the original article’s generic 15 lb-ft figure.
- Reinstall the coil or wire. Inspect the boot for tears, carbon tracking, swelling, or hardened rubber. Push it fully into place and reconnect the electrical connector or plug wire.
- Tighten coil fasteners correctly. Small coil hold-down bolts can be damaged easily, so use the vehicle-specific torque when available.
- Repeat for the remaining cylinders. During scheduled maintenance, replace the engine’s plugs as a matched set unless a diagnostic procedure calls for a different approach.
DENSO and Bosch both recommend hand-starting the plug and using a torque wrench. Their published guidance also shows why a single torque number cannot cover every plug size, seat design, and cylinder-head material: DENSO spark-plug installation.
Reassemble Removed Components
Reconnect every ignition-coil connector, vacuum hose, breather line, sensor connector, ground wire, and bracket removed for access. Reinstall intake components with new gaskets when required and tighten their fasteners in the specified sequence. Make sure no tools, loose bolts, cloths, or packaging remain in the engine bay.
Test Your Engine After Installing New Spark Plugs

Complete a visual and hands-on check before starting the engine:
- Every spark plug has been torqued.
- Every ignition coil or plug-wire boot is fully seated.
- Every coil connector is locked.
- All intake ducts, vacuum hoses, and breather lines are connected.
- All tools and loose parts have been removed.
- No fuel, oil, cleaner, or other liquid is pooled near the ignition components.
- Start the engine. Listen for a steady idle, abnormal ticking, snapping sounds, or a clear misfire.
- Watch the dashboard. Confirm that no new check-engine or powertrain warning remains illuminated.
- Inspect the engine bay. Look for a disconnected hose, loose intake duct, arcing, unusual vibration, or a coil that is not seated.
- Scan for diagnostic trouble codes when necessary. If a warning light appears or the engine runs poorly, retrieve the codes before clearing anything.
- Take a short test drive only after the idle is stable. Use light to moderate acceleration and check for hesitation, misfire, or warning lights.
- Recheck the work area. After the drive, verify that connectors and intake parts remain secure.
Warning: A flashing check-engine light can indicate a severe misfire that may damage the catalytic converter. Reduce speed, stop the test, and diagnose the problem promptly rather than continuing to drive.
Troubleshooting Problems After Replacement
- The engine will not start: Check that every ignition-coil connector, engine sensor connector, ground connection, and intake component removed for access has been reconnected.
- The engine idles roughly: Look for a coil boot that is not fully seated, a crossed plug wire, a damaged connector, an incorrect plug, an excessive or incorrect gap, or a vacuum hose left disconnected.
- A single-cylinder misfire appears: Inspect that cylinder’s coil, boot, connector, plug insulator, gap, and part number. Moving a suspected coil to another cylinder can be part of a proper diagnostic procedure when the service information permits it.
- A ticking or puffing sound comes from a plug well: Shut the engine off and check for a loose plug, damaged seat, cracked plug, or thread problem.
- The warning light stays on: Retrieve the diagnostic trouble code. Do not assume the computer only needs to be reset.
- The engine runs worse than before: Recheck every item that was touched. New parts can be incorrect, damaged, improperly gapped, or installed in the wrong application.
Note: Do not judge fuel-economy changes from one short drive. Fuel use varies with trip length, temperature, traffic, driving style, and the engine computer’s operating conditions.
Avoid These Common Spark-Plug Replacement Mistakes
- Buying plugs by appearance alone: Verify the exact engine application and part number.
- Removing plugs from a hot engine: Allow the cylinder head to cool first.
- Opening a dirty plug well: Remove loose debris before the plug comes out.
- Pulling on a plug wire: Grip and twist the boot instead of tugging on the cable.
- Changing a factory-set fine-wire gap unnecessarily: Verify the specification and follow the plug manufacturer’s adjustment limits.
- Applying anti-seize automatically: Many modern plated plugs are intended for dry installation.
- Starting the plug with a ratchet: Begin by hand so resistance can be felt before thread damage occurs.
- Guessing the torque: A generic value cannot account for every thread size, seat type, plug design, and cylinder head.
- Dropping the new plug into a deep well: Lower it with a retaining spark-plug socket.
- Mixing up wires or connectors: Work cylinder by cylinder or label each connection.
- Over-tightening coil bolts: These small fasteners and their mounting points are easy to damage.
- Reusing required intake gaskets: A leaking plenum or intake seal can create a rough idle after an otherwise correct plug replacement.
Bosch lists lubrication, unnecessary gap readjustment, poor cleaning, incomplete plug-set replacement, and failure to use a torque wrench among the most common installation mistakes. See its spark-plug service guidance.
When Should Spark Plugs Be Replaced?
There is no single replacement interval for every vehicle. Follow the maintenance schedule, maintenance reminder, or service information for the exact model and engine. Plug material alone does not determine the interval; engine design and the plug’s original-equipment specification also matter. NGK likewise recommends using the vehicle manufacturer’s scheduled interval rather than a universal mileage rule: NGK replacement-interval guidance.
Possible signs of worn or fouled plugs include:
- Scheduled maintenance is due
- Hard starting
- Rough or unstable idle
- Misfire under load
- Hesitation or reduced power
- A check-engine light with misfire-related diagnostic codes
- Increased fuel use under otherwise similar conditions
These symptoms are not proof that the plugs are the only problem. Ignition coils, injectors, vacuum leaks, compression loss, wiring faults, and other conditions can produce similar symptoms. Diagnose the cause before replacing additional parts.
When to Stop and Use a Professional
Professional service is the safer choice when a plug is seized or broken, cylinder-head threads are damaged, fluid repeatedly fills a plug well, the intake manifold requires complex removal, access involves high-voltage hybrid components, or the engine continues to misfire after the installation has been checked. Thread repair and broken-plug extraction require specialized tools and vehicle-specific procedures.
Frequently Asked Questions
How often should I replace my spark plugs?
Follow the replacement interval in the vehicle’s owner’s manual, maintenance schedule, or maintenance reminder. There is no universal mileage because intervals vary by engine, plug design, calibration, and operating conditions.
Can I replace spark plugs without removing other components?
It depends on the engine layout. Some engines provide direct access after removing a cover, while others require removal of intake ducts, brackets, a plenum, or other components. Follow the vehicle-specific procedure and replace disturbed gaskets when required.
What are the signs of worn spark plugs?
Possible signs include hard starting, rough idle, hesitation, reduced power, misfire under load, increased fuel use, or a check-engine light with misfire codes. These symptoms can also come from coils, injectors, wiring, vacuum leaks, or mechanical problems.
Do I need to gap spark plugs every time?
Check the gap against the exact vehicle specification, but do not assume every plug needs adjustment. Many precious-metal plugs are factory-set. If adjustment is permitted, move only the ground electrode and avoid pressing against a fine-wire center electrode or the ceramic insulator.
Can I use any spark plug that fits the threads?
No. The plug must match the engine’s thread reach, seat type, heat range, resistor design, electrode configuration, gap, and other application requirements. Verify the exact OEM number or approved equivalent for the vehicle and engine.
Should I use anti-seize on new spark plugs?
Not unless the vehicle or exact spark-plug manufacturer specifically requires it. Many modern plugs have plated threads intended for dry installation. Anti-seize lubricates the threads and can produce excessive clamping force when a dry-thread torque value is used.
Why does my engine run worse after changing the spark plugs?
Common causes include an unplugged coil, crossed plug wires, an incorrectly seated boot, the wrong plug part number, a damaged insulator, an incorrect gap, a loose plug, or an intake hose or sensor connector left disconnected. Retrieve any diagnostic trouble codes before replacing more parts.
What should I do if a spark plug is stuck?
Stop rather than applying increasing force. Recheck that the engine is cool and consult the vehicle manufacturer’s removal procedure. A seized, binding, or broken plug may require special extraction tools and professional cylinder-head repair.
Sources
- NGK: 5 Things You Should Know About Spark Plugs — anti-seize, fine-wire gapping, and torque guidance
- DENSO Spark-Plug Installation — hand-threading, torque variation, gap handling, and over-tightening risks
- Bosch Spark-Plug Technical Guidance — dry installation, factory-set gaps, correct tools, and common installation mistakes
- NGK Spark-Plug Gap Guidance — application-specific gap verification and fine-wire electrode precautions
- NGK Replacement-Interval Guidance — why the vehicle manufacturer’s schedule controls replacement timing
- U.S. EPA: On-Board Diagnostics FAQ — misfire warnings, diagnostic trouble codes, and flashing check-engine-light risks
Conclusion
A successful spark-plug replacement depends on matching the exact plugs to the engine, keeping debris out of the cylinders, protecting the threads, and following the correct gap and torque specifications. Install each plug by hand before using a torque wrench, avoid automatic anti-seize use, and reconnect every coil, wire, hose, and sensor carefully. If a plug binds, the threads appear damaged, or the engine develops a severe misfire, stop and diagnose the problem rather than forcing the repair.







Leave a Reply