
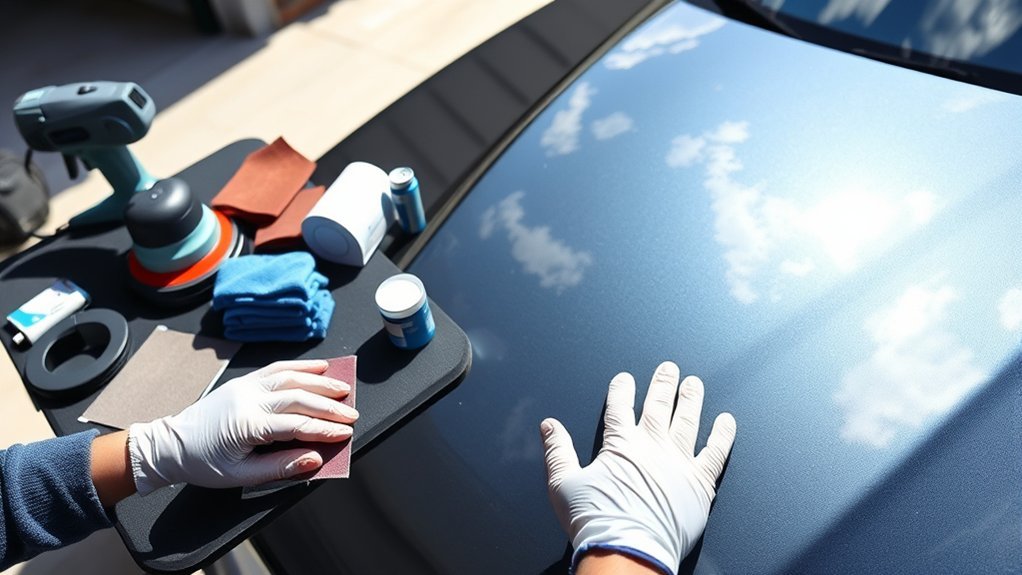
Car scratches range from removable paint transfer to damage that cuts through the color and exposes primer, metal, or plastic. The safest repair starts with identifying the affected layer, cleaning the panel, and using the least aggressive method that can work. Polishing may correct a shallow clear-coat scratch, while deeper damage needs matched touch-up paint or professional refinishing.
Quick Answer
Wash and inspect the mark first. Remove paint transfer with a paint-safe cleaner, then use a clear-coat-safe polish for shallow scratches. If color, primer, metal, or plastic is exposed, polishing will not replace the missing coating. Use matched touch-up materials or arrange professional refinishing instead.
Key Takeaways
- Confirm whether the mark is paint transfer, a clear-coat scratch, or damage through the color before choosing a repair.
- Start with washing and the least aggressive method; do not clay, compound, or sand automatically.
- Polishing can improve shallow clear-coat defects but cannot replace missing primer, color, or clear coat.
- Verify the vehicle’s paint code before buying touch-up paint, especially for metallic, pearl, and multi-stage colors.
- Do not polish matte paint or use abrasive compounds on paint protection film unless its manufacturer specifically allows it.
At a Glance
| Time Required | About 20–60 minutes for paint transfer or light polishing; touch-up repairs require additional drying and curing time. |
| Difficulty | Easy for paint transfer; moderate for hand polishing; advanced for sanding, blending, or spray refinishing. |
| Tools Needed | Automotive shampoo, microfiber towels, inspection light, painter’s tape, foam applicator, paint-safe cleaner, compound or polish, and matched touch-up materials when required. |
| Cost | Low to moderate for a small DIY repair. Professional cost varies by panel size, finish type, color complexity, and whether blending is required. |
Understanding Different Types of Car Scratches
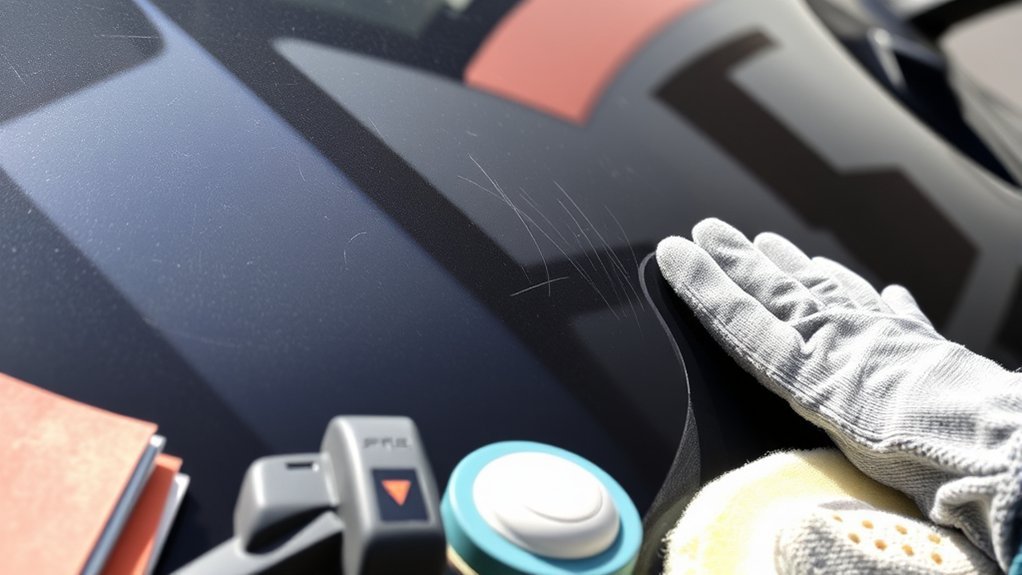
Before applying a cleaner, compound, or touch-up paint, inspect the mark in bright, indirect light. Wash and dry the panel first so dirt does not hide the true damage.
| Damage Type | What It Looks Like | Likely Repair |
|---|---|---|
| Paint transfer or scuff | A contrasting smear or residue that may feel raised rather than cut into the finish. | Paint-safe cleaner followed by light polish if needed. |
| Clear-coat scratch | A white, gray, or dull line with the original body color still visible underneath. | Clear-coat-safe compound or polish; controlled sanding only when appropriate. |
| Color-coat damage | The line has lost body color and may show a pale or dark layer underneath. | Matched basecoat and clear coat or professional refinishing. |
| Primer or bare-metal scratch | Gray primer, shiny metal, rust, or a sharp-edged groove is visible. | Prompt cleaning, corrosion treatment if required, primer, matched color, and clear coat. |
| Plastic gouge | Bare black, gray, or colored bumper plastic is visible, sometimes with raised edges. | Plastic-compatible repair materials or professional bumper refinishing. |
The fingernail test can provide one clue: if a clean fingernail catches, the defect is probably deeper than a very light surface mark. It is not a complete diagnosis. Also check whether the original color remains, whether primer or substrate is visible, and whether the mark is raised paint transfer.
Note: Metallic, pearl, and tri-coat colors are harder to blend than solid colors. A correctly coded touch-up paint may still appear slightly different because the original paint has aged and because metallic flakes change appearance with application angle and film thickness.
Warning: Do not compound, polish, or sand matte or satin paint. Polishing changes the sheen and can leave a permanent glossy patch. Follow the vehicle or coating manufacturer’s instructions for matte-finish care. If the panel has paint protection film or a vinyl wrap, confirm the film manufacturer’s cleaning and repair procedure before using abrasives.
If the damage has gone through the clear coat, polishing alone cannot replace the missing color or protective coating.
Essential Tools for Effective Scratch Removal
The exact supplies depend on the scratch depth. Gather only what the repair requires rather than starting with the most aggressive tool.
Essential Cleaning Supplies Needed
- Automotive shampoo: Removes dirt without relying on household detergents that may strip protection or leave residue.
- Clean microfiber towels: Use separate towels for washing, drying, polishing, and final inspection.
- Soft wash mitt: Helps lift dirt without grinding it into the finish.
- Paint-safe surface cleaner: Removes oil, wax, or residue before touch-up work. Follow the coating manufacturer’s instructions.
- Clay bar or synthetic clay: Optional. Use it only when the clean paint still feels rough from bonded contamination, and use plenty of suitable lubricant.
Professional refinishing guidance begins with a thorough wash, complete drying, and a clean repair surface. PPG’s light body repair and surface preparation process also stresses cleaning between repair stages.
Recommended Scratch Repair Materials
| Material | Purpose | Selection Tip |
|---|---|---|
| Fine automotive polish | Removes haze, light swirls, and very shallow clear-coat defects. | Confirm that it is approved for the vehicle’s finish. |
| Cutting compound | Corrects defects that a finishing polish cannot remove. | Use the least aggressive cut that can achieve the correction. |
| Foam applicator or polishing pad | Spreads compound or polish evenly. | Keep pads clean and assign separate pads to compound and finishing polish. |
| Paint-code-matched touch-up system | Replaces missing primer, color, and clear coat in deeper damage. | Verify the actual vehicle paint code using the label or manufacturer information. PPG provides an OEM color-code location guide. |
| Painter’s tape and inspection light | Protects trim and helps you monitor the correction. | Use paint-safe tape and inspect from several angles. |
Test every cleaner, polish, or touch-up material in a small, inconspicuous area first. Read the label and Safety Data Sheet before use.
Safety Gear for Protection
- Safety glasses or goggles: Protect your eyes from compound splatter, sanding dust, and paint droplets.
- Chemical-resistant gloves: Reduce skin contact with cleaners, solvents, paint, and clear coat.
- Suitable respiratory protection: Respirator selection depends on the dust, solvent, aerosol, and coating listed in the product’s Safety Data Sheet. A basic nuisance-dust mask is not suitable for every paint hazard.
- Protective clothing: Wear clothing that keeps sanding dust and paint off your skin.
- Knee pad or work mat: Improves comfort and control when repairing lower doors, rocker panels, or bumpers.
Warning: Paints, aerosols, cleaners, and solvents can create harmful or flammable vapors. Work in a well-ventilated area away from pilot lights, cigarettes, sparks, heaters, and other ignition sources. Follow the product label, Safety Data Sheet, and applicable painting safety requirements. Leave catalyzed professional spray coatings and coatings requiring supplied-air respiratory protection to a properly equipped body shop.
Removing Surface Scratches: Step-by-Step
Surface correction works by cleaning away transferred material or leveling a tiny amount of the surrounding clear coat. Because factory clear coat is limited, begin gently and stop as soon as the mark is acceptably improved.
- Work on a cool panel. Park in shade and allow the body panel to cool. Avoid working on hot paint or in direct sun.
- Wash and dry the area. Remove all grit before rubbing the finish.
- Inspect for raised transfer. If the mark appears to sit on the paint, use a paint-safe cleaner and a clean microfiber towel. Do not begin with sandpaper.
- Decontaminate only when necessary. If the panel still feels rough after washing, use lubricated automotive clay lightly. Stop if the clay creates visible marring.
- Test a fine polish. Apply a small amount to a clean foam applicator. Work a small section with controlled, overlapping passes rather than scrubbing one spot continuously.
- Inspect the result. Wipe away residue and view the mark under good light. If it remains but has improved, repeat once or move to a slightly stronger clear-coat-safe compound.
- Refine and protect. Follow compound with a finishing polish if needed. Apply compatible wax or sealant after correction unless the panel has fresh paint that has not finished curing.
Pro Tip: Place a strip of painter’s tape beside the scratch before polishing. The untouched side gives you a direct comparison and helps prevent unnecessary repeated passes.
A dual-action polisher can provide a more even correction than hand polishing, but it also removes material faster. Keep the pad flat, clean, and moving. Stop if the panel becomes hot, the color changes, the finish turns hazy, or pigment appears on a pad while working on a basecoat/clear-coat vehicle.
Manufacturer scratch-removal systems use controlled sanding, compounding, and polishing only for defects in the outer finish. They also warn that damage below the clear coat may require repainting. Review the limits described in the 3M scratch removal guidance before attempting an abrasive repair.
Car Scratch Removal: Tackling Deep Paint Scratches
A deep scratch needs material added back to the panel. Polishing may soften its edges, but it cannot restore missing primer, color, or clear coat.
| Step | Procedure |
|---|---|
| 1. Inspect the substrate | Determine whether the scratch exposes primer, steel, aluminum, or plastic. Look for rust, peeling edges, a dent, or cracking around the damage. |
| 2. Verify the finish and paint code | Confirm whether the vehicle uses single-stage, basecoat/clear-coat, metallic, pearl, or matte paint. Match the factory paint code rather than relying only on the color name. |
| 3. Clean the repair | Wash, dry, and use a compatible surface cleaner. Remove wax, loose paint, and contamination without enlarging the damaged area. |
| 4. Address corrosion | Do not paint over active rust. Small exposed-metal marks need prompt treatment; spreading rust, bubbling paint, or perforation requires professional repair. |
| 5. Apply primer when required | Use the primer specified for the exposed substrate and touch-up system. Keep it inside the damaged area and allow the stated drying time. |
| 6. Add color in thin coats | Use a fine applicator and several thin coats rather than one heavy drop. Follow the label’s flash time between coats. |
| 7. Apply clear coat when the system requires it | Basecoat/clear-coat systems need compatible clear coat over the color. Single-stage and matte systems use different procedures. |
| 8. Cure before leveling or protecting | Do not sand, polish, wax, or seal fresh touch-up paint until the product instructions allow it. Dry-to-touch time and full cure time are not the same. |
A small touch-up repair can seal exposed material and make the scratch less obvious. It may still remain visible at close range. A body shop can feather, blend, and refinish a larger area when a seamless result is important.
When Sanding a Car Scratch Is Appropriate
Sanding is an advanced correction step, not a default scratch-removal method. It may be used to level a cured clear-coat defect, refine a touch-up repair, remove damaged coating during refinishing, or prepare an exposed substrate according to a complete paint system.
Professional procedures use specific abrasive grades, controlled repair areas, progressive refinement, overlapping passes, cleaning, and inspection. For example, 3M’s spot-repair procedure uses separate defect-removal, scratch-refinement, micro-refinement, and polishing stages.
Do not sand when:
- You cannot identify the finish or coating.
- The panel is matte, satin, wrapped, or covered with PPF.
- The scratch crosses a sharp body line or panel edge, where coating is often easier to cut through.
- You do not have the correct abrasive sequence and compatible finishing system.
- Rust, cracking, peeling, a dent, or widespread coating failure is present.
- You need an invisible repair on a metallic, pearl, or tri-coat finish.
Top Mistakes in Car Scratch Removal and How to Avoid Them
- Working on dirty paint: Dirt trapped under a towel or pad creates new scratches. Wash and dry first.
- Assuming every mark is a scratch: Remove paint transfer and residue before reaching for compound.
- Using the strongest compound first: Start with a fine polish and increase cut only when necessary.
- Claying automatically: Clay removes bonded contamination, not scratches, and can leave light marring.
- Scrubbing one spot: Concentrated pressure creates heat and uneven clear-coat removal.
- Polishing matte paint or PPF: Abrasives can change matte sheen or damage a film’s top surface. Some PPF manufacturers specifically prohibit abrasive polish or rubbing compound. See the care information for automotive paint protection film.
- Choosing touch-up paint by color name: Similar color names may use different formulas. Verify the actual paint code.
- Painting over rust: Coating active corrosion hides rather than repairs the problem.
- Ignoring drying instructions: Heavy coats, short flash times, or early polishing can wrinkle, smear, or pull out the repair.
- Expecting touch-up paint to look factory-sprayed: A small brush repair protects the panel but may not blend invisibly.
When to Call a Professional for Car Scratch Repair
Professional repair is the safer choice when:
- The scratch exposes bare metal across a large area or corrosion has started.
- The damage crosses several panels, a sharp body line, or a panel edge.
- The panel is dented, cracked, peeling, or distorted.
- The finish is matte, satin, candy, pearl, tri-coat, or difficult to color-match.
- The vehicle has aluminum, carbon-fiber, or specialized composite panels.
- Parking sensors, cameras, radar units, trim, or electrical parts must be removed.
- Previous polishing has left haze, strike-through, uneven gloss, or exposed color.
- A nearly invisible repair is required for resale, lease return, or a high-value vehicle.
Ask the repairer whether the quote covers spot repair, full-panel refinishing, blending into adjacent panels, corrosion treatment, trim removal, sensor calibration, and warranty coverage.
How to Keep Your Car Scratch-Free
No coating makes paint completely scratch-proof, but careful washing and targeted protection reduce avoidable damage.
- Pre-rinse loose dirt before touching the paint.
- Use clean wash media and separate wheel-cleaning tools.
- Wash from the cleaner upper panels toward the dirtier lower panels.
- Dry with clean microfiber towels or filtered forced air.
- Do not place bags, tools, fuel containers, or boxes on painted surfaces.
- Remove bird droppings, bug residue, tree sap, and road contamination promptly with a paint-safe method.
- Leave space around the vehicle when parking and avoid brushing against hedges or overhanging branches.
Regular Washing Schedule
Wash when dirt and contamination are present rather than following one fixed interval. A daily-driven vehicle in winter salt, coastal air, construction dust, or frequent rain may need cleaning more often than a garaged weekend vehicle.
Use a pH-appropriate automotive shampoo and work on a cool surface in the shade. Pre-rinse first, keep the wash mitt clean, and rinse each section before soap dries. Owners of low-gloss vehicles should follow finish-specific guidance rather than standard polishing or waxing advice.
Protective Coating Application
Wax, sealant, ceramic coating, and paint protection film serve different purposes:
- Wax: Adds gloss, water behavior, and short-term environmental protection.
- Synthetic sealant: Provides longer-lasting surface protection than many traditional waxes, depending on the formula and conditions.
- Ceramic coating: Can improve chemical resistance, water behavior, and ease of cleaning, but it does not stop stone chips or deep scratches.
- Paint protection film: Adds a physical film over vulnerable paint and is designed to help resist chips, scratches, stains, and road exposure.
High-impact areas such as the front bumper, hood edge, mirror caps, rocker panels, door cups, and cargo ledge may benefit from professionally installed PPF. Follow the film manufacturer’s maintenance instructions and avoid abrasive products unless approved.
Frequently Asked Questions
How can I quickly remove a car scratch?
Wash and inspect the mark first. If it is paint transfer, a paint-safe cleaner may remove it. If it is a shallow clear-coat scratch, use a fine automotive polish and a clean foam applicator. Stop if primer, metal, plastic, or missing color is visible.
Can WD-40 remove car scratches?
It may loosen adhesive residue, grime, tar, or transferred paint when used as directed, but it does not level a groove or replace missing clear coat. Wash the area afterward before polishing or applying paint so oily residue does not interfere with the repair.
Does a Magic Eraser remove car scratches?
Do not use a household melamine cleaning eraser on glossy painted body panels. Its scrubbing action can dull or haze the clear coat. Use a product specifically labeled as safe for automotive clear coat instead.
What is the best deep scratch remover for cars?
There is no compound that removes a scratch after color, primer, or substrate has been exposed. The proper repair is a compatible primer, paint-code-matched color, and clear coat, or professional refinishing when blending is required.
Can toothpaste remove scratches from car paint?
Toothpaste is not formulated or tested as an automotive paint correction product. Its abrasiveness is inconsistent, and additives may leave residue. A clear-coat-safe automotive polish provides more predictable cutting and finishing behavior.
How do I know whether a scratch is through the clear coat?
Clean the area and inspect it under indirect light. A shallow scratch usually leaves the original body color visible. Missing color, gray primer, shiny metal, black plastic, rust, or a sharp groove indicates deeper damage. A fingernail catch is only one clue, not a final diagnosis.
Can scratches be polished out of matte car paint?
No. Abrasive polishing changes the texture and reflectivity of matte or satin paint, leaving a glossy spot. Clean the panel only with products approved for low-gloss finishes and have visible damage evaluated by a qualified refinisher.
Conclusion
Successful car scratch removal depends more on diagnosis and restraint than aggressive rubbing. Clean the panel, identify the damaged layer, and begin with the mildest suitable method. Paint transfer and shallow clear-coat marks may improve at home, while exposed color, primer, metal, plastic, rust, or complex finishes require touch-up materials or professional refinishing. Stop before a small cosmetic defect becomes a larger paint repair.
Sources
- 3M Scratch Removal System — limits and methods for repairing minor outer-coat scratches and scuffs.
- 3M Spot Repair Standard Operating Procedure — controlled sanding, scratch refinement, inspection, and polishing stages.
- PPG Light Body Repair and Surface Preparation Process — cleaning, substrate preparation, sanding, inspection, and OEM procedure guidance.
- PPG Refinish User Guides and Manuals — OEM paint-code locations, matte-finish care, color lookup, and refinishing guidance.
- Occupational Safety and Health Administration Painting Standard — ventilation, respiratory protection, solvent, PPE, and ignition hazards.
- 3M Paint Protection Film Guidance — physical protection against chips, scratches, stains, and environmental exposure.







Leave a Reply