
Replacing the battery in a 2021 Jeep Grand Cherokee is manageable at home, but the battery is not under the hood on the standard two-row model. It sits beneath the front passenger seat, where it must be secured and connected to the factory vent system. Before buying parts or removing cables, confirm whether you have the two-row Grand Cherokee WK2 or the three-row Grand Cherokee L.
Quick Answer
On a two-row 2021 Jeep Grand Cherokee WK2, the main 12-volt battery is under the front passenger seat and is accessed from the rear footwell. Move the seat forward first, remove the floor cover, disconnect negative before positive, remove the hold-down and vent hose, then install the verified replacement in reverse order.
Key Takeaways
- The two-row 2021 Grand Cherokee WK2 has its battery under the passenger-front seat; the underhood posts are for jump-starting and temporary power.
- The three-row 2021 Grand Cherokee L is a different platform and places the main battery under the driver-front seat.
- A 10 mm socket normally fits the terminal clamps, while a 13 mm deep socket and extension normally fit the hold-down hardware.
- Match the original battery’s technology, dimensions, terminal layout, CCA rating, and vent arrangement instead of buying by group number alone.
- Stop/Start-equipped models may have a second auxiliary battery that should be tested whenever the main battery fails.
At a Glance
| Time Required | 30–60 minutes for the main WK2 battery; longer if corrosion or a second battery is involved |
| Difficulty | Moderate |
| Tools Needed | 10 mm socket or wrench, 13 mm deep socket, ratchet, extensions, trim tool, battery strap, terminal brush, gloves and safety glasses |
| Cost | About $200–$350 for a quality main AGM battery; an auxiliary battery, shop labor and local pricing can increase the total |
Verify Which 2021 Grand Cherokee You Have
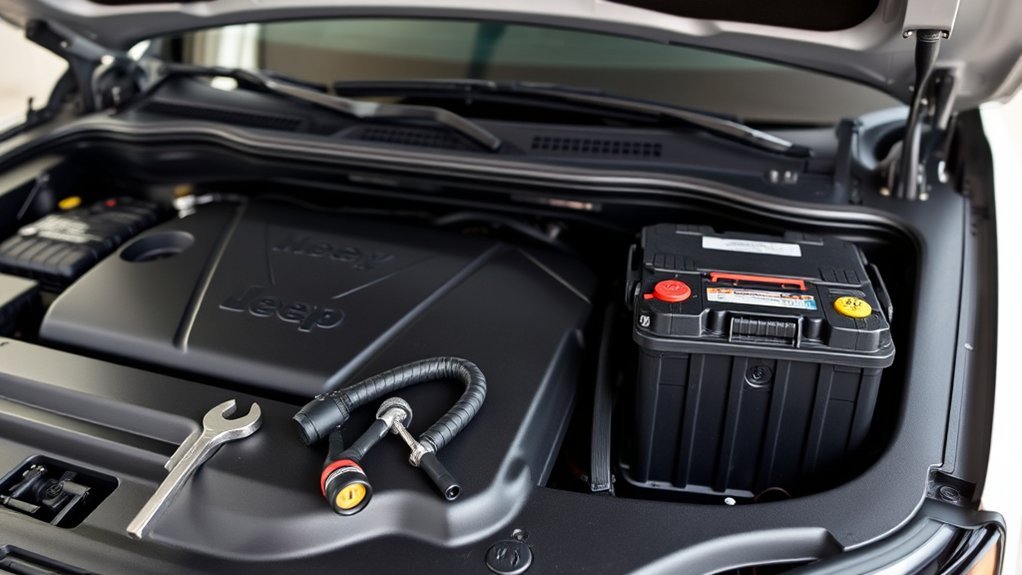
The 2021 model year includes two different Grand Cherokee platforms, so confirm the vehicle before following a battery-replacement guide:
- Two-row Grand Cherokee WK2: The main 12-volt battery is under the front passenger seat. The detailed procedure below covers this version.
- Three-row Grand Cherokee L: The main battery is under the front driver’s seat. Its seat, trim and cable arrangement differ, so use the official 2021 Grand Cherokee L owner’s manual and platform-specific service information.
You can usually identify the L by its three-row seating, longer body and “Grand Cherokee L” model designation. For a VIN-specific confirmation, use the vehicle information shown on the driver-door certification label and in your Mopar owner profile.
Note: On the two-row WK2, the marked positive and negative posts under the hood are remote jump-start terminals. They are not the physical battery terminals. Jeep’s owner’s manual confirms that the battery itself is beneath the passenger-front seat.
Open the Official 2021 WK Owner’s Manual
Choose the Correct Replacement Battery
Many 2021 Grand Cherokee WK2 applications use an H7/94R AGM main battery, but that is not a safe universal fitment rule. Check the label on the installed battery and verify the replacement by VIN, engine and equipment before purchase.
Match all of the following:
- Battery technology: Use AGM when AGM is specified or already installed, especially on vehicles with Stop/Start and high electrical demand.
- Group size and dimensions: The case must fit the tray and hold-down correctly.
- Terminal orientation: Positive and negative posts must be in the same positions as the original.
- Cold-cranking amps: Meet or exceed the vehicle’s specified CCA without changing the case size or terminal layout.
- Vent provision: The replacement must accept the factory vent hose used for the under-seat installation.
- Auxiliary-battery fitment: If a small second battery is present, identify and test it separately rather than assuming the main battery is the only problem.
A current application guide such as the Interstate Grand Cherokee battery finder can narrow the choices, but the existing battery label and VIN-specific catalog remain the final checks.
Tools and Supplies
- 10 mm socket or combination wrench for the terminal clamps
- 13 mm deep socket for the battery hold-down hardware
- Ratchet with medium and long extensions
- Plastic trim tool
- Battery lifting strap or carrier
- Safety glasses
- Chemical-resistant work gloves
- Terminal brush and battery-terminal cleaner
- Clean rags and a small plastic terminal cover
- Digital multimeter
- Verified replacement battery with the required vent port and vent plug
Hardware can be changed during earlier repairs, so test-fit the socket by hand before applying force. Do not use an oversized socket that can round a terminal nut or hold-down bolt.
Battery Replacement Safety
Park on a level surface, shift into Park, apply the parking brake and turn off every electrical accessory. Switch the ignition off, remove the key fob from the cabin and allow the vehicle’s electronics to shut down before disconnecting cables.
Warning: Do not continue a routine DIY replacement if the battery is frozen, hot, swollen, cracked or leaking. Keep flames, cigarettes and sparks away. Remove metal jewelry, wear eye and hand protection, and never allow a tool to bridge the positive terminal to the body or seat frame.
Lead-acid battery residue can contain corrosive sulfuric acid. The Agency for Toxic Substances and Disease Registry advises avoiding contact with car-battery residue and using safety glasses and chemical-resistant gloves. Wash your hands after handling the battery, cables or corrosion.
Do not connect a memory saver unless you understand that it keeps parts of the vehicle electrically live. A memory saver can preserve settings, but it also defeats the normal benefit of disconnecting the battery while tools are near positive cables.
Prepare the Seat and Access Panel
- Move the passenger seat before disconnecting power. Slide it fully forward and raise it as high as practical. Tilt the seatback forward enough to improve access from the rear passenger footwell.
- If the battery is completely dead, use the remote posts only for temporary power. Connect an approved 12-volt booster to the marked underhood posts according to Jeep’s jump-starting procedure, move the powered seat, switch the ignition off and disconnect the booster.
- Open the rear passenger door. Remove the rear floor mat and move the carpeted flap or floor covering away from the battery compartment.
- Remove the battery access cover. Release its fasteners or clips with a plastic trim tool. Avoid forcing the cover against seat wiring.
- Inspect before touching cables. Photograph the terminal positions, vent-hose routing, hold-down and any smaller auxiliary battery. Confirm that the replacement matches the installed main battery.
Pro Tip: Move the power seat to its best working position before disconnecting the battery. Restoring power solely to move a seat adds time and creates another opportunity for an incorrect booster connection.
Check for a Stop/Start Auxiliary Battery
Some Stop/Start-equipped Grand Cherokees use a smaller auxiliary battery along with the main battery. It may be mounted in the same under-seat compartment near the main battery. The auxiliary unit supports electrical loads during automatic engine stops and can cause repeated discharge, Stop/Start warnings or no-start symptoms when it becomes weak.
If a second battery is present:
- Test both batteries rather than replacing the main battery automatically.
- Use the exact auxiliary-battery type and factory-compatible vent arrangement.
- Do not assume the positive cable is dead after removing only the main battery’s negative clamp.
- Disconnect every battery negative path before loosening a positive cable.
- Stop if you cannot positively identify the auxiliary cables, intelligent battery sensor or linked ground paths.
Warning: A two-battery system can leave a cable energized after one battery is disconnected. If the wiring differs from the original routing, has aftermarket accessories, or cannot be traced confidently, have a qualified technician isolate and replace the batteries.
Remove the Old Main Battery
- Disconnect the negative terminal first. Use the 10 mm tool to loosen the negative clamp. Lift it straight off the post, move it aside and prevent it from springing back into contact. If a separate auxiliary battery is present, isolate its negative path as described above before touching positive cables.
- Disconnect the positive terminal. Open the protective cover, loosen the positive clamp with the 10 mm tool and lift it from the post. Cover the loose clamp so it cannot touch body metal.
- Detach the battery vent hose. Pull the fitting straight from the battery vent port without crushing or splitting the hose.
- Remove the hold-down. Use the 13 mm deep socket and extension to remove the lower retaining bracket or clamp. Keep the bolt and bracket where they cannot fall beneath the seat.
- Check for attached wiring. Confirm that no sensor connector, cable retainer or vent line remains attached to the battery.
- Lift the battery upright. Attach a battery strap if available, keep your back straight and lift with your legs. Do not tilt the case toward the carpet or seat wiring.
- Inspect the compartment. Check the tray, hold-down, vent hose, terminal clamps and cable insulation for corrosion, cracking, overheating or acid residue.
Clean light terminal corrosion with a battery-approved cleaner and brush. Do not blow dry corrosion dust through the passenger compartment. Replace a damaged vent hose, loose terminal, melted clamp or compromised cable rather than hiding the defect beneath the new battery.
Install the New Battery Correctly
- Compare both batteries. Confirm matching case dimensions, terminal positions, technology, CCA rating, base hold-down shape and vent-port arrangement.
- Place the battery in the tray. Keep it upright and orient the positive and negative posts exactly like the original.
- Install the hold-down. Refit the bracket and tighten it evenly until the battery cannot slide or rock. Do not overtighten the bracket against the plastic case.
- Connect the vent hose. Push the factory hose fully into the correct vent port. Install the supplied plug in the unused opposite-side vent opening when the replacement design requires one.
- Connect the positive terminal first. Seat the clamp fully on the positive post, tighten it securely and close the protective cover.
- Connect the negative terminal last. Seat and tighten the negative clamp. Reconnect any correctly identified auxiliary negative path and intelligent battery-sensor connection in its original arrangement.
- Check the installation by hand. Neither terminal should rotate on its post, and the battery should not move in the tray.
- Reinstall the access cover and carpet. Confirm that the vent hose and cables are not pinched beneath the cover.
- Return the seat to a normal position. Move it through its travel while watching for binding, warning lights or trapped carpet.
The standard safe cable order is negative off first and negative on last. Interstate’s current battery-disconnection guidance explains the same sequence.
An under-seat battery is not fully installed until the hold-down is secure, the positive terminal is covered and the factory vent hose is connected without kinks.
Test and Verify the New Battery

Complete these checks before considering the job finished:
- Switch on the ignition without starting. Confirm that the instrument panel powers up normally and that no cable becomes hot.
- Start the engine. It should crank strongly without repeated clicking, severe dimming or an electrical-burning odor.
- Inspect the battery area. Check for a loose terminal, pinched vent hose, moving battery case or cable touching the seat mechanism.
- Check vehicle functions. Verify the clock, radio presets, seat memory, one-touch windows, liftgate and other personalized functions. Some settings may need to be restored after power loss.
- Review warning messages. A persistent battery, charging-system or Stop/Start warning requires diagnosis rather than another blind battery replacement.
Check Open-Circuit Voltage
For a meaningful engine-off reading, let the battery rest with the vehicle switched off and electrical loads removed. Set the multimeter to DC volts and measure directly across the battery posts:
- About 12.6–12.8 volts: Normally indicates a fully charged rested 12-volt lead-acid battery.
- About 12.4 volts: The battery is partly discharged and should normally be charged before a formal load test.
- Near or below 12.0 volts: The battery is deeply discharged, connected incorrectly or affected by a charging or electrical problem.
A voltage reading alone does not prove battery health. A recently charged weak battery can show normal surface voltage but fail under starter load.
Check Cranking and Charging Performance
Watch the meter while starting the engine. A severe voltage collapse, slow crank or repeated clicking can indicate an undercharged battery, loose cable, poor ground, defective starter, weak auxiliary battery or excessive resistance.
With the engine running, voltage should normally rise above the rested engine-off reading. However, the Grand Cherokee’s charging strategy can vary output with battery state, temperature and electrical demand. Do not condemn the alternator solely because the reading is not fixed at exactly 14.0 volts.
If the battery warning light remains on, the running voltage stays abnormally low, or voltage rises excessively, have the charging system and cable voltage drop tested.
Perform a Load Test Correctly
A new battery does not always require a carbon-pile test, but one can confirm available cranking capacity when performed with the tester manufacturer’s instructions.
- Charge the battery first if its open-circuit voltage is below about 12.4 volts.
- Remove surface charge and allow the battery to stabilize as directed by the tester manufacturer.
- Set the load to one-half of the battery’s labeled CCA rating unless the tester specifies a different method.
- Apply the load for 15 seconds.
- Compare the ending voltage with the tester’s temperature-adjusted chart.
At approximately 70°F or 21°C, the commonly used minimum is 9.6 volts. The acceptable minimum becomes lower as battery temperature drops. A reading below the correct temperature-adjusted threshold is a failed test; there is no valid universal “9.6 to 7.2 volts means potential issues” range.
See the Clore Automotive load-tester manual for charge requirements, test load and the temperature-compensation chart.
Troubleshoot Common Battery Problems
No electrical power after installation:
- Confirm the positive and negative clamps are on the correct posts.
- Check that both clamps are fully seated and cannot rotate.
- Inspect the negative battery-sensor connector and ground cable.
- Look for a disconnected auxiliary-battery lead on Stop/Start models.
- Test the replacement battery’s actual voltage.
- Inspect relevant high-current fuses if a cable was accidentally shorted.
The engine cranks slowly with the new battery:
- Charge and retest the new battery; batteries can lose charge in storage.
- Verify that the CCA rating meets the application requirement.
- Perform voltage-drop tests on the positive cable and ground path.
- Test the auxiliary battery if equipped.
- Check the starter and charging system.
Stop/Start remains unavailable:
- Test both the main and auxiliary batteries.
- Confirm that the intelligent battery-sensor connection is secure.
- Allow the vehicle to complete normal key-off and drive cycles.
- Scan the vehicle if the warning persists; a battery, sensor, wiring or Stop/Start fault may be stored.
The battery keeps going dead:
- Test charging-system output.
- Check for a weak auxiliary battery.
- Inspect aftermarket lights, audio equipment, chargers and remote-start wiring.
- Have a parasitic-current draw test performed after the vehicle’s modules enter sleep mode.
Corrosion returns quickly:
- Check that the terminals are clean and correctly tightened.
- Inspect the case and posts for seepage.
- Verify that the vent hose is attached and the opposite vent is capped correctly.
- Replace damaged clamps instead of repeatedly coating over corrosion.
Warning: Stop using or charging a battery that is swollen, leaking, cracked, frozen or unusually hot. Isolate the area from sparks and arrange professional handling.
Recycle the Old Battery
Keep the removed battery upright in a stable plastic tray and protect its terminals from contact with tools or other metal. Do not place a vehicle battery in household trash or curbside recycling.
Return it to the battery retailer, an automotive repair facility or an authorized lead-acid battery recycler. Many retailers charge a refundable core deposit that is returned when the old battery is surrendered. The U.S. Environmental Protection Agency explains why lead exposure must be controlled, while local solid-waste authorities can identify approved automotive-battery collection sites.
Frequently Asked Questions
Where is the battery in a 2021 Jeep Grand Cherokee?
The main 12-volt battery in the standard two-row 2021 Grand Cherokee WK2 is under the front passenger seat and is accessed from the rear passenger footwell. The three-row 2021 Grand Cherokee L uses a different platform and places its main battery under the driver-front seat.
What tools do I need to change the main WK2 battery?
You normally need a 10 mm socket or wrench for the terminal clamps, a 13 mm deep socket for the hold-down, a ratchet, extensions, a trim tool, a battery strap, terminal-cleaning supplies, gloves and safety glasses. Confirm the hardware because earlier repairs may have changed the fasteners.
What battery type does a 2021 Jeep Grand Cherokee use?
An H7/94R AGM is a common main-battery fitment for the 2021 Grand Cherokee WK2, but the correct battery must be verified by VIN, engine, equipment and the original label. Match the dimensions, CCA, terminal positions, technology, hold-down base and factory vent connection.
Does the Jeep have a second auxiliary battery?
Some Stop/Start-equipped models have a smaller auxiliary battery in addition to the main battery. Test both batteries when the main battery fails, the Stop/Start system becomes unavailable or the replacement battery repeatedly discharges.
How often should the battery be replaced?
Many automotive batteries last about three to five years, but heat, short trips, long storage periods, accessory loads, charging-system problems and a weak auxiliary battery can shorten that range. Test the battery rather than replacing it by age alone.
Can I jump-start the Jeep without removing the battery?
Yes. Use the marked remote positive and negative posts under the hood and follow the Jeep owner’s manual and booster manufacturer’s connection sequence. Do not search beneath the seat merely to perform a normal jump-start.
Will changing the battery reset vehicle settings?
Some stored settings may reset after the battery is disconnected. Check the clock, radio presets, seat memory, one-touch windows, liftgate and other personalized features. The exact effects depend on the vehicle’s equipment and how long power was disconnected.
Does a new battery need to be programmed?
The owner’s manual does not provide a routine owner battery-registration procedure for the 2021 WK2. However, the intelligent battery sensor must remain connected correctly, and persistent charging or Stop/Start faults should be scanned with suitable diagnostic equipment.
Conclusion
Changing the main battery in a two-row 2021 Jeep Grand Cherokee WK2 requires more preparation than an underhood replacement, but the sequence is straightforward once the passenger seat and floor cover are positioned correctly. Verify the vehicle and replacement battery first, isolate every battery negative path, preserve the factory venting, secure the hold-down and test the complete starting and charging system afterward. If the vehicle has unfamiliar dual-battery wiring, acid leakage or damaged cables, professional service is the safer choice.
Sources
- Official 2021 Jeep Grand Cherokee WK Owner’s Manual — confirms the passenger-seat battery location and underhood remote jump posts.
- Official 2021 Jeep Grand Cherokee L Owner’s Manual — confirms the different driver-seat battery location on the Grand Cherokee L.
- Interstate Batteries Grand Cherokee Application Guide — supports model-specific fitment, AGM and auxiliary-battery considerations.
- Interstate Batteries Terminal-Disconnection Guide — supports negative-first removal and negative-last reconnection.
- Clore Automotive Carbon-Pile Tester Manual — supports charge requirements, half-CCA load, 15-second testing and temperature-adjusted voltage limits.
- ATSDR Public Health Statement for Sulfuric Acid — supports eye, skin and battery-residue precautions.







Leave a Reply