
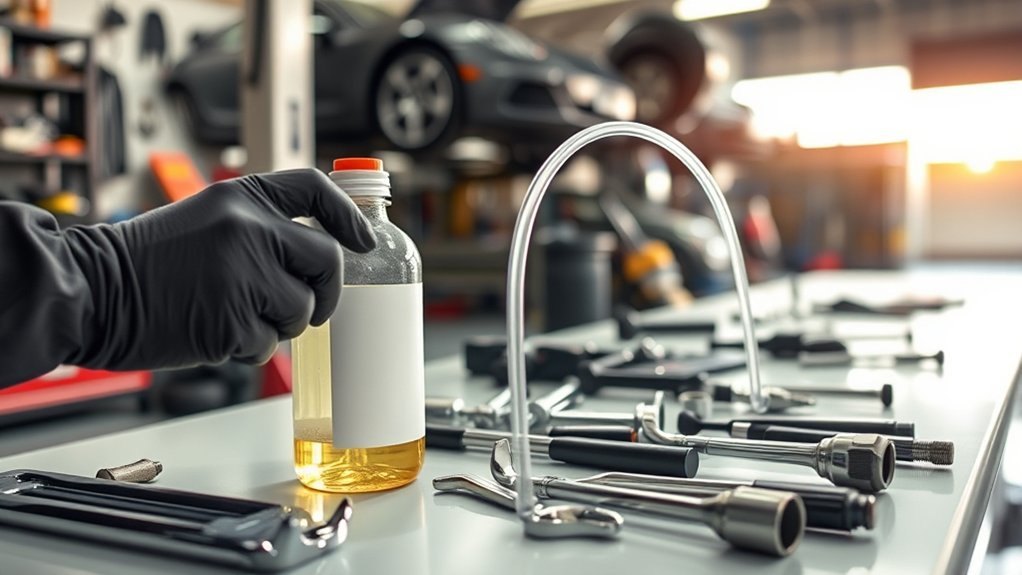
Old or contaminated brake fluid can reduce the heat resistance of a hydraulic braking system and contribute to corrosion over time. A brake fluid flush replaces the aging fluid throughout the system, but the correct fluid, bleeding order, pressure, and electronic service procedure depend on the vehicle. Check the owner’s manual and model-specific service information before opening any bleeder screw.
Quick Answer
To flush brake fluid, verify the manufacturer’s fluid specification and bleeding sequence, safely raise the vehicle, keep the reservoir full, and bleed each circuit until fresh, bubble-free fluid appears. Stop and get professional help if the pedal remains soft, a leak appears, or the ABS system requires a scan-tool procedure.
Key Takeaways
- Use only the brake fluid specification listed for your exact year, make, model, and brake system.
- Do not assume that the wheel farthest from the master cylinder must be bled first; follow the manufacturer’s sequence.
- Never let the master-cylinder reservoir run dry, because that can introduce air into the hydraulic and ABS components.
- Brake fluid can damage paint, and used fluid must be collected for proper recycling or hazardous-waste disposal.
- Do not drive if the pedal is soft, sinking, unusually low, or accompanied by a leak or red brake warning.
At a Glance
| Time Required | About 60–120 minutes for a conventional four-wheel system; longer if bleeders are corroded or an electronic procedure is required |
| Difficulty | Intermediate; advanced or professional service for ABS, brake-by-wire, electro-hydraulic, or scan-tool-controlled systems |
| Tools Needed | Correct brake fluid, bleeder wrench, clear hose, catch bottle, fluid syringe, jack stands, wheel chocks, torque wrench, protective gloves and eyewear, plus any required pressure bleeder or scan tool |
| Cost | DIY supplies vary by fluid and equipment. Professional U.S. service commonly falls around $115–$205 in 2026, before taxes or related repairs. |
Warning: Brakes are a safety-critical system. Do not perform this job without the correct vehicle procedure, secure jack stands, and a way to verify a firm pedal. Do not drive with a fluid leak, an empty reservoir, a sinking or unusually soft pedal, an illuminated red brake warning, or an incomplete ABS bleed.
Why Brake Fluid Maintenance Is Crucial for Your Safety
Brake fluid transfers force from the brake pedal or hydraulic actuator to the calipers and wheel cylinders. Most passenger vehicles use glycol-based DOT 3, DOT 4, or DOT 5.1 fluid. These fluids absorb moisture over time, which can lower their boiling resistance and promote internal corrosion if the fluid remains in service too long.
During repeated hard braking, the calipers and fluid can become very hot. If contaminated fluid boils, vapor can form in the hydraulic circuit. Unlike liquid, vapor compresses, so the pedal may travel farther and braking force can fall. This heat-related condition is commonly called brake fade or vapor lock.
Routine brake-fluid service also removes suspended contamination and gives you an opportunity to inspect hoses, lines, calipers, wheel cylinders, fittings, and bleeder screws. It does not, however, repair worn pads, leaking seals, damaged hoses, a failing master cylinder, or an ABS fault.
A fluid flush is preventive maintenance, not a substitute for diagnosing a soft pedal, hydraulic leak, warning light, or reduced braking response.
What Happens When Brake Fluid Degrades?
Moisture and Lower Boiling Resistance
Federal Motor Vehicle Safety Standard No. 116 establishes minimum dry and wet boiling points for automotive brake fluids. Under the current standard, DOT 3 fluid must have a minimum dry boiling point of 205°C (401°F) and a minimum wet boiling point of 140°C (284°F). DOT 4 minimums are 230°C (446°F) dry and 155°C (311°F) wet. These are minimum classifications; an individual product may exceed them. See the current 49 CFR §571.116 brake-fluid standard.
The “wet” rating represents fluid that has been conditioned with moisture under a standardized test. It shows why fluid condition matters during mountain driving, towing, repeated panic stops, track use, or other high-temperature operation.
Increased Corrosion Risk
Moisture and contamination can contribute to corrosion inside steel lines, calipers, wheel cylinders, valves, and the master cylinder. Corrosion products may restrict small passages or damage seals and moving components. A periodic fluid exchange helps reduce that risk, but any existing leak, seized component, or damaged line still requires repair.
Fresh DOT 3 and DOT 4 fluid is normally clear to amber. Darkening can indicate age or contamination, but color alone cannot measure water content or boiling point. Some fluids darken in normal service, and a clear reservoir does not prove that the fluid at each caliper is healthy.
Spongy Brake Pedal
A spongy or unusually low pedal requires immediate investigation. Common causes include trapped air or vapor, a hydraulic leak, flexible-hose expansion, incorrect rear-brake adjustment, a failing master cylinder, or an incomplete ABS bleeding procedure.
Moisture absorption lowers the fluid’s boiling resistance, but it does not automatically introduce air into the lines. If the pedal suddenly changes, do not assume that a routine flush is the only repair needed.
Brake Fluid Flush vs. Brake Bleeding
A brake fluid flush or exchange replaces old fluid throughout the hydraulic system. Brake bleeding removes trapped air or vapor. The procedures overlap because a fluid exchange normally pushes new fluid through each bleeder, but their goals are different.
- Flush or exchange: Preventive maintenance performed at the manufacturer’s interval or when approved testing shows the fluid should be replaced.
- Bleed: Required after the hydraulic circuit has been opened, a component has been replaced, the reservoir has run dry, or air has entered the system.
- ABS bleed: May require a scan tool to cycle valves or the pump after air enters the ABS hydraulic control unit.
Verify the Vehicle Procedure Before Starting
Before buying fluid or loosening a wheel, identify the exact model year, make, model, engine, trim, brake package, and market. Use the VIN when obtaining service information because vehicles with the same model name can use different braking systems.
Confirm all of the following:
- The required DOT or manufacturer-specific fluid specification
- The total fluid quantity needed for an exchange
- The correct wheel or hydraulic-circuit sequence
- The approved bleeding method and pressure limit
- Whether the ignition must be on or off
- Whether the electronic parking brake needs service mode
- Whether the ABS pump or valves must be activated with a scan tool
- Bleeder-screw and wheel-nut torque specifications
Note: Some manufacturers specify time-based service and special equipment. For example, Honda documents a three-year brake-fluid interval on certain models, while Ford notes that some brake-fluid services require special equipment. Your own vehicle’s documentation takes priority.
Choosing the Right Brake Fluid for Your Vehicle
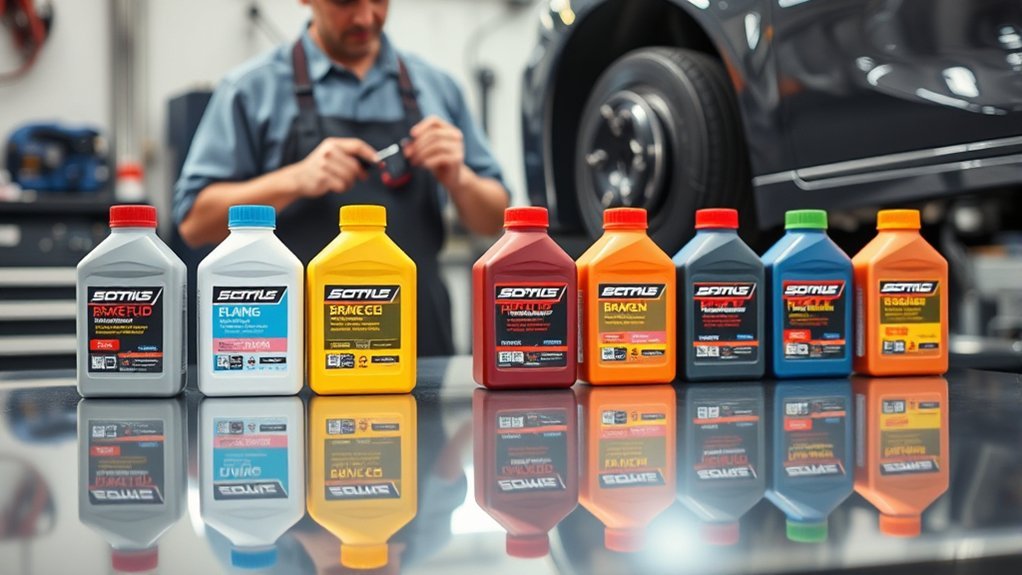
Check the reservoir cap, owner’s manual, and service information before selecting fluid. Do not choose solely by vehicle weight, driving style, or the assumption that a higher DOT number is always an upgrade.
| Fluid Type | Base and Key Point | Use Guidance |
|---|---|---|
| DOT 3 | Usually glycol-based; federal minimum 401°F dry and 284°F wet | Use where the manufacturer specifies DOT 3 or an explicitly approved equivalent. |
| DOT 4 | Usually glycol-based; federal minimum 446°F dry and 311°F wet | Common in many modern vehicles, but the required formulation and viscosity may be manufacturer-specific. |
| DOT 5.1 | Glycol-based despite the “5” name; often formulated for high boiling performance and low-temperature flow | Use only when approved for the vehicle. Do not confuse it with silicone DOT 5. |
| DOT 5 | Silicone-based and chemically different from common glycol fluids | Use only in a system specifically designed for DOT 5. Never add it to a DOT 3, DOT 4, or DOT 5.1 system. |
| Mineral oil | Not a conventional DOT glycol fluid | Use only when the braking system explicitly calls for that exact mineral-oil specification. |
DOT 3, DOT 4, and DOT 5.1 fluids are generally from the glycol family, but that does not make casual mixing a good maintenance practice. Mixing can reduce the final boiling performance to that of the lower-performing fluid and may conflict with a manufacturer-specific viscosity or additive requirement. Use a sealed container of the exact approved specification.
Pro Tip: Buy enough fluid to complete the entire job without reopening an old bottle. Brake fluid absorbs moisture after the seal is broken, so tightly close any remaining fluid and follow the product label for storage or disposal.
Essential Tools for a Brake Fluid Flush
Necessary Tools
- Correct unopened brake fluid in the required quantity
- Vehicle service information or manufacturer procedure
- Wheel chocks
- Floor jack and correctly rated jack stands or a suitable lift
- Socket set and breaker bar for wheel removal
- Torque wrench for wheel fasteners
- Correct six-point bleeder wrench
- Clear brake-bleeding hose that fits tightly over the nipple
- Stable catch bottle or approved waste container
- Clean, dedicated fluid syringe or transfer pump
- Shop towels and absorbent pads
- Brake cleaner approved for exterior brake components
- Flashlight
- Pressure or vacuum bleeder if the approved procedure calls for one
- Compatible diagnostic scan tool if required for ABS or electronic service functions
A clean, dedicated syringe can remove much of the old fluid from the reservoir before fresh fluid is added. Do not use the tool for food or another automotive chemical afterward, and do not empty the reservoir below its outlet ports.
Safety Gear and Work-Area Requirements
- Nitrile gloves
- Safety glasses or splash goggles
- Closed-toe shoes
- Good ventilation
- Painted-surface protection around the reservoir
- Immediate access to clean water for rinsing accidental paint splashes
Park on a hard, level surface. Apply the parking brake when appropriate, place the transmission in Park or in gear, and chock the wheels that remain on the ground. Follow the vehicle’s approved lifting points. Never work beneath a vehicle supported only by a hydraulic jack.
Brake fluid can damage painted or finished surfaces. If it spills on paint, blot excess fluid without spreading it and rinse the area promptly with plenty of clean water. Follow the fluid manufacturer’s safety label for skin or eye exposure.
How to Flush Brake Fluid: Process Overview
The basic goal is to keep the reservoir supplied with fresh fluid while moving old fluid out through each approved bleeder point. The exact sequence and activation steps must come from the model-specific procedure.
| Stage | Action |
|---|---|
| Verify | Confirm the fluid specification, sequence, torque values, pressure limit, and electronic service requirements. |
| Prepare | Securely raise the vehicle, protect painted surfaces, clean the reservoir area, and arrange the tools. |
| Exchange | Keep fresh fluid above the reservoir minimum while bleeding each circuit in the specified order. |
| Verify again | Check fluid level, pedal feel, bleeders, hydraulic lines, warning lights, and leaks before moving the vehicle. |
Step-by-Step Guide: Flushing Brake Fluid Safely
- Read the exact procedure. Confirm the fluid type, bleeding order, bleeder torque, pressure limit, wheel torque, and whether a scan tool or service mode is required. Do not substitute a generic sequence for the manufacturer’s instructions.
- Prepare the work area. Park on a hard, level surface. Chock the wheels, protect the fender and painted areas, and keep children and pets away from the fluid and waste container.
- Loosen and remove the wheels as required. Slightly loosen the wheel fasteners before lifting. Raise the vehicle at approved points, support it with jack stands, and remove the wheels needed for bleeder access.
- Clean the reservoir and cap. Wipe away dirt before opening the system. Contamination with dirt, water, petroleum products, or another fluid can damage the hydraulic components.
- Remove part of the old reservoir fluid. Use a clean, dedicated syringe to remove fluid without exposing the reservoir outlet ports. Do not scrape sediment into the ports and do not empty the reservoir completely.
- Add fresh specified fluid. Fill to the proper level with fluid from a newly opened container. Install a pressure-bleeder adapter if the approved method requires one, and do not exceed the manufacturer’s pressure limit.
- Prepare the first bleeder. Begin at the circuit specified in the service procedure. Clean the bleeder area, place the correct wrench on the screw, attach clear tubing, and route the other end into a stable catch bottle.
- Bleed the circuit. With a two-person method, have the helper press the pedal slowly and hold it. Open the bleeder slightly so fluid can flow, then close the bleeder before the helper releases the pedal. Repeat slowly. Never release the pedal while the bleeder is open.
- Monitor the reservoir constantly. Check the level after every few cycles and keep it safely above the minimum mark and outlet ports. If it runs dry, stop. Air may have entered the master cylinder or ABS unit, and additional procedures may be required.
- Continue until the exchange is complete. Watch for a steady stream without visible bubbles. Fresh fluid may appear lighter, but color alone is not proof that all moisture or contamination has been removed. Use the specified fluid quantity or manufacturer completion criteria.
- Repeat in the approved order. Bleed every required wheel, caliper, wheel cylinder, or hydraulic circuit. Follow any scan-tool prompts exactly if the ABS valves or pump must be cycled.
- Close and torque each bleeder. Tighten the bleeder to the manufacturer’s specification, reinstall its protective cap, and clean residual fluid from the exterior components. Do not overtighten the screw.
- Set the final reservoir level. Bring the fluid to the specified line, install the cap securely, and clean the surrounding area. Do not overfill.
- Reinstall the wheels. Inspect mating surfaces, install the wheels, lower the vehicle safely, and torque the wheel fasteners in the specified pattern and to the specified value.
- Perform stationary and low-speed checks. With the vehicle stationary, apply the pedal several times and hold firm pressure. The pedal should remain firm and stable. Inspect every bleeder, hose, fitting, and caliper for leaks. Only then perform a cautious low-speed test in a clear, controlled area.
Pro Tip: If using the two-person method on an older vehicle, use slow, controlled pedal travel and follow the service procedure. Forcing the pedal repeatedly to the floor may move master-cylinder seals into an area they do not normally travel.
Mistakes to Avoid When Flushing Brake Fluid
- Using the wrong specification: A higher DOT number is not automatically appropriate for the vehicle.
- Confusing DOT 5 with DOT 5.1: DOT 5 is silicone-based; DOT 5.1 is generally glycol-based.
- Using an open, dirty, or unmarked container: Brake fluid must remain clean and dry.
- Letting the reservoir run dry: This can introduce air into the master cylinder and ABS hydraulic unit.
- Following a generic wheel sequence: Hydraulic layouts and manufacturer instructions vary.
- Releasing the pedal with the bleeder open: This can draw air back into the circuit.
- Pumping the pedal rapidly: Fast pumping can create foam or tiny bubbles that are difficult to remove.
- Exceeding pressure-bleeder limits: Too much pressure can damage the reservoir or adapter and cause a spill.
- Using an open-end wrench that rounds the bleeder: Use the correct six-point bleeder wrench.
- Overtightening the bleeder: The screw or caliper can be damaged.
- Ignoring a seized bleeder: Excessive force can break it and turn routine maintenance into a hydraulic repair.
- Skipping the leak check: Every opened bleeder and nearby connection must be inspected.
- Testing immediately on a public road: Confirm a firm pedal and perform the first movement in a controlled area.
- Pouring waste into a drain or onto the ground: Collect it in a sealed compatible container and use an approved disposal program.
How Often Should You Flush Brake Fluid?
There is no single interval for every vehicle. Follow the schedule for the exact model year and market. Some manufacturers specify a time interval, some use an electronic maintenance reminder, and others call for inspection or testing rather than a universal mileage replacement.
For example, Honda’s published Maintenance Minder information for certain models calls for brake-fluid replacement every three years if the maintenance reminder does not appear within that period. Ford also publishes three-year guidance for certain vehicles and notes that the service can require special equipment. These examples do not override another manufacturer’s instructions.
Consider an earlier inspection when the vehicle is used for:
- Frequent mountain driving
- Towing or hauling
- Track events or repeated high-speed braking
- Very humid conditions
- Long-term storage
- Driving after a hydraulic component or line has been opened
A brake-pad or brake-shoe replacement does not automatically create a universal requirement to flush the fluid. It is a good time to inspect the level, condition, service history, hoses, lines, calipers, wheel cylinders, and manufacturer schedule.
When to Check Your Brake Fluid
Regular Maintenance Schedule
Inspect the brake-fluid level and reservoir condition during routine vehicle service and before a long trip. Do not repeatedly top off a falling level without finding the cause. The fluid level can drop slightly as disc-brake pads wear, but a rapid or substantial loss may indicate a leak.
Keep the reservoir cap installed except when the procedure requires access. Before opening it, clean the cap and surrounding area so dirt cannot enter the system.
Signs of Degradation or a Brake-System Problem
- Unknown or overdue service history
- Fluid that is very dark, cloudy, separated, or visibly contaminated
- A soft, spongy, sinking, or unusually low pedal
- Reduced or inconsistent braking response
- Visible wetness around a line, hose, fitting, caliper, wheel cylinder, or master cylinder
- A red brake warning light
- An ABS or stability-control warning that requires diagnostic scanning
- Brake fluid that has been contaminated with oil, fuel, power-steering fluid, or another chemical
Grinding or squeaking noises usually point to friction material, rotors, drums, hardware, shields, or contamination at the wheel rather than fluid age alone. Inspect the complete brake system instead of assuming that a flush will correct the noise.
Essential Post-Flushing Checks for Optimal Brake Performance
Before moving the vehicle, complete every check below:
- Set the reservoir level to the manufacturer’s mark.
- Install and secure the reservoir cap.
- Confirm that every bleeder is closed, correctly tightened, and fitted with its cap.
- Inspect all four corners and every visible hydraulic connection for leakage.
- Press the pedal several times and hold steady pressure for at least 20–30 seconds.
- Confirm that the pedal does not slowly sink.
- Verify that no red brake warning remains illuminated.
- Confirm that any required ABS service function completed successfully.
- Torque the wheel fasteners to specification.
- Perform the first low-speed stop in a clear, controlled area.
Warning: Do not road-test the vehicle if the pedal remains soft or low, slowly sinks under pressure, requires pumping, or if any fluid leak or red brake warning is present. Have the vehicle repaired or transported rather than driven.
Troubleshooting After a Brake Fluid Flush
The Pedal Remains Soft
Stop and recheck the fluid level, bleeding sequence, hose connections, bleeders, and all opened fittings. Air may remain in a caliper, master cylinder, proportioning valve, or ABS hydraulic control unit. A scan-tool bleed or bench-bleeding procedure may be required. A leak, damaged hose, incorrect component installation, or failing master cylinder is also possible.
Bubbles Keep Appearing in the Hose
Make sure the clear hose fits tightly over the bleeder and remains submerged in fluid if the procedure calls for that setup. Air can leak around the bleeder threads or hose connection and appear as bubbles even when the hydraulic circuit is not drawing air. Recheck the approved procedure rather than continuing indefinitely.
A Bleeder Screw Will Not Open
Do not apply uncontrolled force. A rounded or broken bleeder may require caliper or wheel-cylinder repair or replacement. Stop before the screw breaks, especially if you lack the tools to extract it and restore a leak-free seal.
The ABS Light Is On
An ABS light indicates a stored anti-lock or stability-system fault; it does not prove that the fluid is old. Read the diagnostic trouble codes with a compatible scan tool and follow the manufacturer’s test procedure. A conventional fluid exchange may not clear the fault.
The Reservoir Ran Dry
Stop the job. Air may have entered the master cylinder and ABS hydraulic unit. Refill only with the correct fluid, then follow the manufacturer’s recovery and bleeding procedure. Professional service is the safer choice when a scan tool or hydraulic-unit activation is required.
How to Dispose of Used Brake Fluid
Transfer the collected fluid to a clean, sealable, chemically compatible container and label it clearly. Do not mix it with coolant, fuel, solvents, paint, or household chemicals unless your local collection program specifically allows that mixture.
Never pour brake fluid into a sink, storm drain, septic system, gutter, soil, or body of water. The U.S. Environmental Protection Agency identifies brake fluid as motor-vehicle waste that can contaminate groundwater. Use a local automotive-fluid recycler or household hazardous-waste program. See the EPA’s motor-vehicle waste disposal guidance and confirm local acceptance rules before transporting the container.
Frequently Asked Questions
Can I flush brake fluid myself, or should a professional do it?
You can service a conventional hydraulic brake system if you have the exact procedure, proper lifting equipment, correct fluid, suitable bleeding tools, and enough experience to recognize a fault. Use a professional when the vehicle requires an ABS scan-tool bleed, electronic service mode, special pressure equipment, or when a bleeder is seized, the reservoir ran dry, a leak is present, or the pedal remains soft.
How much does a brake fluid flush typically cost?
Current 2026 U.S. consumer estimates commonly place professional brake bleeding or fluid-flush service at roughly $115–$205 before taxes and related repairs. Prices vary by location, vehicle design, fluid specification, shop rate, and whether diagnostic equipment or extra labor is needed.
What are the signs that brake fluid may need service?
An overdue or unknown service history, visibly contaminated fluid, or a manufacturer maintenance reminder can justify inspection or replacement. A soft pedal, fluid loss, warning light, or reduced braking response may indicate a larger hydraulic problem and should be diagnosed rather than treated as proof that a routine flush is the only repair needed.
Is it safe to mix different types of brake fluid?
Use only the specification approved by the vehicle manufacturer. DOT 3, DOT 4, and DOT 5.1 are generally glycol-based, but mixing can lower performance or conflict with a required viscosity. Silicone DOT 5 and hydraulic mineral oil must not be introduced into a conventional glycol-fluid system unless the vehicle was specifically designed for that fluid.
What should I do if I accidentally spill brake fluid?
Wear gloves and eye protection, contain the spill with absorbent material, and keep it away from drains. If fluid lands on vehicle paint, blot the excess and rinse the surface promptly with plenty of clean water. Store contaminated towels and absorbent material as required by local waste rules, and follow the product label for skin or eye exposure.
Can I determine brake fluid condition by its color?
Color is only a screening clue. Very dark, cloudy, separated, or visibly contaminated fluid needs attention, but clear fluid can still contain moisture. Follow the manufacturer’s schedule or an approved test method rather than relying on color alone.
Why is the brake pedal still spongy after bleeding?
Air may remain in the system, the bleeding order may be wrong, or the ABS hydraulic unit may require scan-tool activation. A leak, expanding hose, incorrect rear-brake adjustment, failing master cylinder, or improperly installed component can also cause a soft pedal. Do not drive until the cause is identified and corrected.
Conclusion
A brake fluid flush can help preserve hydraulic-system performance, boiling resistance, and component life, but only when it follows the correct vehicle procedure. Verify the exact fluid and sequence, keep the reservoir full, work on secure supports, protect painted surfaces, inspect for leaks, and confirm a firm pedal before moving the vehicle. When electronic bleeding, special equipment, a leak, or an abnormal pedal is involved, professional service is the safer choice.
Sources
- Electronic Code of Federal Regulations — 49 CFR §571.116 — federal brake-fluid classifications, boiling-point minimums, testing, compatibility, labeling, and contamination warnings
- Honda Maintenance Minder — 2023 Civic Sedan — manufacturer example of a model-specific brake-fluid maintenance interval
- Ford Owner Manual — Brake Fluid Maintenance — manufacturer interval example and special-equipment notice
- U.S. Environmental Protection Agency — Motor Vehicle Waste Disposal Wells — environmental risks from disposing of brake fluid and other automotive waste through drains or subsurface systems
- Ohio Environmental Protection Agency — Hazardous-Waste Disposal — household guidance for safe disposal of brake fluid and other automotive chemicals







Leave a Reply