
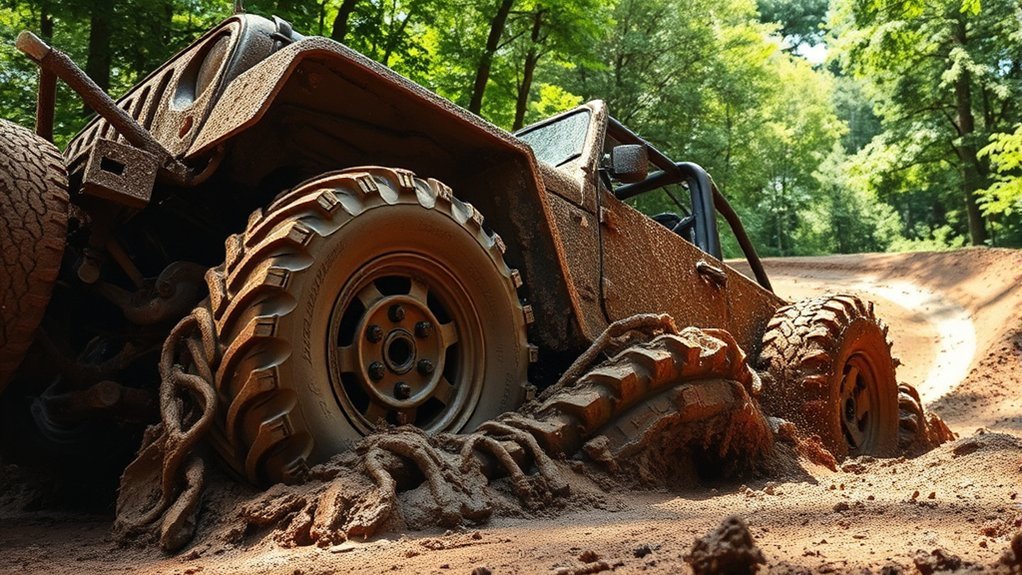
Mud driving can be fun, but it can also damage a vehicle, close a trail, or turn into a dangerous recovery when the route, tires, and equipment are not matched to the conditions. The safest approach is to use a legal, open route, inspect the obstacle before entering, select the correct drive mode early, and keep recovery decisions slow and controlled.
Quick Answer
To drive through mud safely, confirm the trail is open, inspect the mud from firm ground, use the correct four-wheel-drive setting, and carry steady momentum without excessive speed or wheel spin. If you stop moving, stop digging, clear resistance, add traction, and use only rated recovery equipment and attachment points.
Key Takeaways
- Drive only on legal, designated routes that are open for your vehicle type, and avoid saturated trails when the land manager advises doing so.
- Check tire condition, recovery points, ground clearance, fluids, communications, and the exact instructions for your model year before entering mud.
- Use low, smooth inputs and controlled momentum. Speed and prolonged wheel spin usually make a bad situation worse.
- Purpose-built traction boards, a shovel, and rated recovery gear are safer than random materials or unverified tow points.
- After the trip, remove packed mud and inspect the brakes, tires, cooling stack, steering, suspension, breathers, and fluids for signs of damage or contamination.
At a Glance
| Time Required | 15–30 minutes for pre-trip checks; driving and recovery time varies; allow 30–60 minutes for cleaning and inspection afterward. |
| Difficulty | Moderate for shallow, known mud; advanced for deep mud, slopes, water crossings, winching, or kinetic recovery. |
| Tools Needed | Tire gauge, portable compressor, full-size spare, shovel, traction boards, gloves, recovery-point information, rated recovery gear, first-aid kit, phone or radio, and drinking water. |
| Cost | Route planning may cost nothing. Equipment cost varies by vehicle weight, recovery rating, tire setup, and the tools you already own. |
Warning: Mud can hide deep water, drop-offs, rocks, wire, and unstable ground. Do not enter an obstacle you cannot assess, do not drive alone on remote trails, and do not attempt a strap or winch recovery without rated equipment, approved recovery points, and a clear exclusion zone.
Essential Preparations Before Hitting the Mud

Confirm the Route Is Legal and Open
Start with the land manager’s current map, signs, alerts, and seasonal restrictions. On U.S. Forest Service land, a designated route may be open to one vehicle class and closed to another. A track on the ground is not proof that motorized travel is allowed.
Check the weather, recent rainfall, wildfire closures, and local recovery or towing limits before leaving. Tell someone where you are going, who is with you, and when you expect to return. Traveling with another capable vehicle is safer than going alone, but every driver should still carry independent communication and survival supplies.
Assess the Mud Before You Enter
Stop on firm ground and inspect the route without standing in a vehicle’s path. Look for the exit, existing ruts, side slopes, buried rocks, low branches, water, and a safe place to turn around. Use a spotter when the driver cannot see the wheels or the trail edge. Agree on simple hand or radio signals before the vehicle moves.
Do not confuse a muddy trail with a water crossing. Never enter water or opaque mud when you do not know its depth, current, bottom condition, or the vehicle’s published wading limit. A hidden hole can exceed the air-intake, differential-breather, transmission, battery, or cabin-sealing limits even when the surface looks calm.
Check the Vehicle and Tires
Inspect tire tread, sidewalls, valve stems, lug nuts, and the full-size spare. Mud-terrain tires can clear packed mud better than street-oriented tires, but no tire can replace route judgment. Check that the battery is secure, cooling system is full, recovery points are present, and loose cargo is tied down.
Airing down may improve the tire’s footprint and ride on some off-road setups, but there is no universal pressure that is safe for every tire, wheel, load, or vehicle. Follow the tire and vehicle guidance for your exact setup, use a gauge, avoid pressures that risk debeading or sidewall damage, and carry a compressor. Tires aired down for trail use must be reinflated before paved-road driving.
Note: Four-wheel-drive controls, locker rules, traction-control behavior, tire limits, recovery points, and wading limits vary by VIN, model year, trim, and modifications. Verify the exact vehicle in its owner’s manual before the trip.
Pack Recovery and Emergency Gear
At minimum, carry a shovel, purpose-built traction boards, work gloves, a tire gauge, an air source, a spare tire, a first-aid kit, water, lighting, and reliable communication. Recovery straps, kinetic ropes, shackles, winches, and receiver-mounted recovery points must be rated for the vehicle and used according to their instructions.
Know the difference between a shipping tie-down, a road-towing eye, and a rated off-road recovery point. Never guess. A bumper, suspension arm, axle, chain, hitch ball, or unknown loop can fail and become a projectile under recovery load.
Master Key Techniques for Safe Mud Driving
Select the Correct Mode Before Entering
Engage the appropriate four-wheel-drive range, mud mode, locker, or hill-control feature before the obstacle, not after wheel spin starts. The correct setting depends on the vehicle. As one manufacturer example, Land Rover advises using low gears, maintaining momentum, and knowing where the front wheels are pointing in mud. Your owner’s manual takes priority over generic advice.
Low range provides slower vehicle speed and greater torque multiplication, but it does not create grip. Differential locks may improve forward progress while reducing steering ability, and some systems must not be used at speed or on high-traction surfaces.
Use Controlled Momentum, Not Speed
Enter at the lowest speed that preserves forward motion. Keep throttle input smooth and avoid sudden acceleration. Too little momentum may let the vehicle settle into the mud, while too much speed can cause loss of control, impact damage, deep ruts, or mud packed into the radiator and brakes.
Keep both hands on the wheel and make small steering corrections. Follow established ruts when they are stable and safe, but do not let a rut pull the vehicle toward a bank, drop-off, or obstacle. If the tires begin to spin without forward progress, reduce throttle. Continued wheel spin usually digs holes and removes the firm base you need for recovery.
The goal is controlled forward motion. More throttle is not the same as more traction.
Steer, Brake, and Correct a Slide Smoothly
If the vehicle starts to slide, look toward the safe path, ease off the accelerator, and steer smoothly rather than making a sudden correction. Avoid stabbing the brake pedal unless an immediate stop is required. ABS, stability control, terrain modes, and locked differentials can change how the vehicle responds, so use the procedures in the owner’s manual.
Leave extra space between vehicles. Mud reduces visibility and stopping control, and a vehicle ahead may roll backward or stop suddenly. Never follow directly in a recovery line or park where another vehicle could slide into you.
Handle Slopes and Ruts Carefully
Approach a muddy climb straight when possible, select the gear before climbing, and avoid shifting midway. Do not turn across a steep side slope. If the climb fails, stop safely and use the vehicle-specific procedure for backing down under control; do not coast backward in neutral.
Descend slowly in the correct low gear and let engine braking assist. Avoid locking the wheels or sliding sideways. If the route requires a technique beyond your training or the vehicle’s limits, turn around before committing.
Pro Tip: Walk the recovery plan before you drive the obstacle. Identify the exit, where a helper will stand, which recovery points are approved, and where every bystander will move if the vehicle stops.
Stuck in the Mud? Here’s What to Do?
Getting stuck is not automatically an emergency. The first objective is to prevent a minor bog from becoming a buried vehicle, damaged drivetrain, or unsafe recovery.
1. Stop Wheel Spin and Secure the Area
Take your foot off the accelerator as soon as the vehicle stops making useful progress. Keep the vehicle in park or in gear as appropriate, set the parking brake, and shut the engine off before anyone works near the tires or underbody. Move passengers and bystanders away from the vehicle’s travel path and any possible recovery line.
2. Assess What Is Holding the Vehicle
Check whether the tires are buried, the chassis is high-centered, a differential is resting on the ground, or mud is packed in front of the tires. Also check the intended exit: recovering forward into deeper mud is not a solution.
Use a shovel to clear mud from the front and rear of the driven tires and from under low points that are dragging. Create a gradual ramp rather than a vertical wall. Do not crawl under an unsupported vehicle or place any part of your body in front of a tire that may move.
3. Add Traction and Try a Gentle Self-Recovery
Place purpose-built traction boards firmly against the tire in the direction of travel, then apply light, steady throttle. Keep people clear because boards, rocks, sticks, and other materials can be ejected. Rubber floor mats have sometimes been used as improvised traction, but they can be damaged or thrown and are less predictable than recovery boards; use them only as a last resort with everyone well clear.
If your manual permits rocking the vehicle, move gently between forward and reverse, come to a complete stop before changing direction, and stop if the transmission temperature rises or the tires dig deeper. Aggressive back-and-forth shifting can damage the transmission or driveline.
4. Use Rated Recovery Equipment Correctly
When self-recovery fails, use a trained helper or professional recovery service. Attach only to rated recovery points specified for the vehicle. Use gear with an adequate working rating, inspect it for cuts or damage, communicate one plan, and keep everyone outside the danger zone.
Recovery guidance from BFGoodrich warns against attaching a strap to a tow ball or bumper hitch, stepping over a connected line, side-loading recovery points, or using strap recovery on a vehicle deeply buried in mud. Deep suction may require careful digging and controlled winching rather than a harder pull.
Warning: A failed shackle, hook, tow ball, recovery point, strap, or winch line can cause fatal injury. Never stand over, beside, or inside the path of a tensioned line. Follow the equipment manufacturer’s instructions and use a line damper where required.
5. Call for Help Before Conditions Get Worse
Stop and request professional help when the vehicle is near deep or moving water, leaning toward a drop-off, buried to the frame, mechanically damaged, overheating, losing fluid, or beyond the rating of the available equipment. Share your location, vehicle description, condition of the trail, and whether anyone is injured.
Understanding Environmental Impact Before Mudding

Responsible mud driving starts with knowing when not to drive. There is no universal “one-inch sink” test that proves a trail is safe. Soil type, slope, drainage, vegetation, and land-manager rules matter more than a single depth measurement.
Use only open, designated routes and obey temporary closures. The U.S. Forest Service specifically advises riders in some areas to avoid wet, muddy areas and stay on designated routes. A bypass around a puddle can widen the trail, crush vegetation, and create a second drainage path.
Minimize wheel spin, do not create new routes, and drive over—not around—manageable obstacles when doing so is safe. Tread Lightly recommends staying on designated roads and trails, respecting barriers, and crossing streams only at designated fords. If the trail is saturated enough that your vehicle will leave deep ruts, postpone the trip or choose a hardened route.
Pack out trash and recovery debris, including broken traction devices, straps, zip ties, and pieces of floor mat. Remove heavy mud before traveling to another recreation area when local guidance requires cleaning to reduce the movement of soil, seeds, and pests.
Post-Mudding Vehicle Maintenance Tips
Cleaning after mud driving is more than cosmetic. Packed mud can hide damage, hold moisture, unbalance wheels, restrict cooling airflow, and interfere with brakes or moving parts.
Wash Without Damaging Components
- Rinse the body, frame, skid plates, wheel wells, suspension, wheels, and undercarriage with moderate water pressure.
- Soften heavy deposits first instead of forcing a high-pressure jet into seals, boots, bearings, axle breathers, electrical connectors, sensors, or radiator fins.
- Clean the radiator, condenser, and intercooler carefully in the direction recommended by the vehicle manufacturer. Bent fins and trapped mud can reduce airflow.
- For a hybrid or electric vehicle, do not pressure-wash orange high-voltage cables, connectors, the traction-battery enclosure, or damaged underbody components. Arrange an inspection after a hard underbody impact or suspected water intrusion.
Inspect Tires, Brakes, Steering, and the Driveline
- Remove mud packed inside the wheels, then check for cuts, bulges, bent rims, loose valve stems, missing wheel weights, and lug-nut problems.
- Inspect brake rotors, calipers, hoses, parking-brake components, and wheel-speed sensor wiring. Test the brakes at very low speed in a safe area before normal road travel.
- Look for bent steering or suspension parts, torn CV or ball-joint boots, damaged skid plates, loose exhaust shields, leaking shocks, and wrapped vegetation or wire.
- Check driveshafts and universal joints for debris, damage, or unusual play. Service greaseable joints only as specified in the maintenance schedule.
Check for Water or Mud Contamination
Axle, transmission, transfer-case, and engine fluids do not need automatic replacement after every muddy trip. They do need inspection after deep immersion, a failed breather, a damaged seal, or evidence of contamination. Milky fluid, a rising fluid level, unusual noise, warning lights, overheating, or water in the air box calls for prompt professional service.
Inspect accessible axle and drivetrain breathers for damage, disconnection, or blockage. Their job is to equalize pressure; a damaged or submerged breather can allow contamination. Follow the owner’s manual for service intervals and severe-use maintenance rather than changing fluids based on a generic rule.
Note: After cleaning, investigate new vibration, pulling, grinding, brake noise, warning lights, fluid leaks, or overheating before the next trip. Mud hidden inside a wheel or cooling stack can create problems only after road speed increases.
Frequently Asked Questions
What Are the 3 C’s of Driving?
“Control, Caution, and Calmness” can be a useful personal reminder, but it is not a universal or official mud-driving standard. In practice, control means smooth inputs, caution means assessing the route and vehicle limits, and calmness means stopping to make a safe plan instead of adding throttle when progress stops.
How to Drive Through Mud Without Getting Stuck?
Use an open, legal route; inspect the obstacle; select the correct drive mode before entry; keep smooth, controlled momentum; and avoid prolonged wheel spin. Suitable tires, adequate clearance, a safe exit, and recovery equipment matter more than speed. Turn around when depth, water, slope, or the bottom cannot be confirmed.
What Is the 123 Rule in Driving?
There is no broadly recognized “123 Rule” that combines one car length per 10 mph with two seconds of reaction time. For normal on-road driving, the California Driver’s Handbook teaches a three-second following rule and advises creating more space when conditions are poor. Mud and off-road convoys need even more room because stopping and visibility are less predictable.
What Are the 4 R’s of Driving?
“Recognize, React, Regain traction, and Recover” is a helpful made-up mnemonic, not an official standard. Use it cautiously: recognize the hazard before entry, react with smooth inputs, stop wheel spin when traction is lost, and recover only with a planned method and rated equipment.
Should Traction Control Be Turned Off in Mud?
Not automatically. Some vehicles use traction control to reduce useless wheel spin, while dedicated mud modes may allow a controlled amount of slip. Other systems have a partial-off setting for deep terrain. Use the exact procedure for your model year and re-enable normal settings before returning to pavement.
How Much Should You Air Down Tires for Mud?
There is no safe universal PSI. The correct pressure depends on tire construction, wheel width, bead retention, vehicle weight, load, speed, and terrain. Follow vehicle and tire guidance, make small measured changes, avoid sidewall folding or debeading, and reinflate to the specified road pressure before pavement travel.
Can Mud Damage a Vehicle After the Trip?
Yes. Packed mud can hold moisture, unbalance wheels, block cooling airflow, hide torn boots or leaks, and interfere with brakes or sensors. Clean the underbody carefully, test the brakes at low speed, and inspect the tires, cooling stack, suspension, steering, breathers, and fluids when the vehicle entered deep mud or water.
Conclusion
Good mud driving is less about aggression and more about preparation, judgment, and restraint. Confirm the route, know the exact vehicle, keep inputs smooth, and stop before wheel spin buries the tires. When recovery is necessary, clear the area and use a rated method rather than improvising under tension. Finish by cleaning and inspecting the vehicle so a fun trail day does not become a preventable repair—or lasting trail damage.
Sources
- U.S. Forest Service: Angeles National Forest OHV Guidance — designated-route rules and advice to avoid wet, muddy areas.
- Tread Lightly: Overlanding Tips — minimum-impact travel, designated routes, obstacle bypasses, group travel, and designated stream crossings.
- Land Rover: How to Drive Off-Road — low gears, controlled momentum, wheel position, and mud-driving technique.
- BFGoodrich: Off-Road Tire Selection — tire inspection, air equipment, and reinflation before paved-road use.
- BFGoodrich: Recovery Techniques — rated recovery points, traction boards, winching, and strap-recovery hazards.
- California DMV: Safe Driving — the three-second following-distance rule and added space for hazardous conditions.







Leave a Reply