

A weak or dead 12-volt car battery can look like a starter, alternator, wiring, or charging-system problem. The safest approach is to test the battery in the right order, rule out loose or corroded connections, and follow the exact replacement procedure for your vehicle. Modern cars may also require a battery sensor reset, battery registration, or a relearn period after installation.
Quick Answer
Test a rested 12-volt battery at the posts, inspect the cables, and confirm its performance with a conductance or load test before replacing it. Choose the exact size, terminal layout, chemistry, and rating listed for your vehicle. Disconnect negative first, reconnect it last, secure the hold-down and vent tube, then complete any required battery-management reset.
Key Takeaways
- A voltage reading shows state of charge, but it does not prove that a battery can supply enough current to start the engine.
- About 12.6 volts is typical for a fully charged conventional 12-volt starting battery at rest, but battery chemistry, temperature, and surface charge can change the reading.
- A parasitic draw test must be performed after the vehicle’s control modules go to sleep, and the acceptable draw is vehicle-specific.
- Match the replacement battery’s physical size, polarity, chemistry, cold-cranking amps, venting, and battery-management requirements.
- Wear eye protection, keep sparks and flames away, and stop if the battery is swollen, cracked, leaking, frozen, or unusually hot.
At a Glance
| Time Required | 10–20 minutes for basic testing; about 30–60 minutes for a typical replacement; longer for hidden batteries or diagnostic work |
| Difficulty | Beginner for basic voltage and terminal checks; intermediate for replacement or parasitic-draw testing |
| Tools Needed | Safety glasses, gloves, digital multimeter, battery tester, terminal brush, hand tools, battery carrier, and an automatic charger or maintainer when needed |
| Cost | Inspection may cost nothing if you own the tools; battery and labor costs vary widely by vehicle, battery type, access, and programming needs |
Understanding Car Battery Problems

Common warning signs include slow cranking, rapid clicking, dim lights when the engine is off, repeated jump-starts, electrical settings that reset, or a battery warning message. These signs justify testing, but they do not prove that the battery itself has failed.
A no-start condition can also come from a loose ground cable, corroded terminal, failing starter, damaged cable, charging-system fault, key or immobilizer problem, fuel issue, or a module that remains awake after shutdown. Diagnose the system instead of replacing parts based on one symptom.
Battery vs. Starter vs. Alternator Symptoms
- Battery or connection problem: The engine cranks slowly, the lights dim sharply during cranking, or the vehicle starts after a jump but the battery soon goes flat again.
- Starter problem: The battery tests good and is fully charged, but the starter produces one heavy click, turns intermittently, or draws excessive current.
- Charging-system problem: The battery repeatedly discharges while driving, the battery warning lamp appears, or charging voltage and current do not follow the vehicle manufacturer’s specifications.
- Parasitic draw: The vehicle starts normally after driving but goes dead after sitting for hours or days, especially when the battery and charging system test good.
Note: The dashboard battery symbol usually warns about the charging system while the vehicle is running. It does not automatically mean the battery needs replacement.
Battery Safety Before Testing or Replacement
Automotive lead-acid batteries can release explosive gas and contain corrosive electrolyte. Work in a ventilated area, wear safety glasses and gloves, remove metal jewelry, and keep cigarettes, flames, grinders, and other spark sources away from the battery.
Warning: Do not charge, jump-start, test under load, or reuse a battery that is frozen, cracked, leaking, swollen, smoking, or unusually hot. Do not lean over a battery while making the final connection. Have the battery handled by a qualified technician.
This guide covers the low-voltage starting or accessory battery, usually a 12-volt battery. A hybrid or electric vehicle also has a high-voltage traction battery. NHTSA recommends EV-specific high-voltage service by qualified technicians. Do not touch orange cables, high-voltage connectors, service plugs, or a damaged traction battery.
Battery location and access vary. The battery may be under the hood, in the trunk, under a seat, or behind a trim panel. Use the owner’s manual or VIN-specific service information before disconnecting anything. Some vehicles provide remote jump or charging posts that should be used instead of connecting directly to the battery.
Tools for Battery Testing and Replacement
- Safety glasses or a face shield and acid-resistant gloves
- Digital multimeter with intact, fused leads
- Conductance tester or approved load tester
- Automatic charger or maintainer matched to flooded, EFB, AGM, or other specified chemistry
- Terminal brush, clean water, baking soda for external acid residue, shop towels, and battery-terminal protectant
- Correct sockets or wrenches, torque wrench when specifications are available, and a battery lifting strap or carrier
- Vehicle owner’s manual or model-specific service procedure
A basic multimeter is useful for voltage and voltage-drop checks. It cannot measure battery capacity or cold-cranking performance by itself. A conductance or load tester gives a better picture of whether the battery can deliver starting current.
How to Test a Car Battery
1. Prepare the Vehicle and Battery
Park safely, set the parking brake, switch off the ignition and accessories, and keep the key or smart key away from the vehicle if the manufacturer requires it. Close or latch doors so lamps stay off. If the battery was just charged or the engine just ran, let the battery rest or remove surface charge according to the battery tester’s instructions.
Inspect the case, posts, cables, ground points, hold-down, and vent tube before testing. A loose connection can produce a low reading under load even when the battery is usable.
2. Check Open-Circuit Voltage
Set the meter to DC volts. Place the red probe on the positive battery post and the black probe on the negative post. Measure on the lead posts themselves first, not only on the cable clamps.
OPTIMA notes that about 12.6 volts is typical for a fully charged conventional 12-volt battery, although some AGM designs rest higher. Use the battery maker’s specification when available.
| Approximate Rested Voltage | What It Usually Means |
| About 12.6 V or the battery maker’s full-charge value | Near full charge; continue with a performance test if symptoms remain |
| About 12.4 V | Partly discharged; recharge before judging battery health |
| About 12.0 V or lower | Deeply discharged or affected by a fault; charge and retest |
| Around 10.5 V | Possible failed cell or severe discharge; voltage alone is not a final diagnosis |
A low reading tells you the battery is undercharged. It does not tell you why. Charge it with a compatible automatic charger, allow it to rest as directed, and retest. Replace it only after it fails a proper battery test, cannot hold a charge, has physical damage, or meets the vehicle or battery maker’s replacement criteria.
3. Perform a Cranking Voltage Test
Connect the meter across the battery posts and watch the minimum voltage while a helper cranks the engine. Compare the result with the vehicle and battery tester specifications because temperature, engine size, battery chemistry, cable condition, and cranking time affect the reading.
A large voltage drop can come from a weak battery, excessive starter current, or resistance in the cables. If needed, perform voltage-drop tests on the positive and ground sides of the starter circuit rather than replacing the battery immediately.
4. Use a Conductance or Load Test
Enter the battery type and rated CCA into the tester exactly as printed on the label. Test at the battery posts and follow the tester’s instructions. A conductance tester may report measured CCA, state of health, and a charge-and-retest or replace result.
A carbon-pile load test places a heavy load on the battery and requires correct load, time, and temperature compensation. Use an approved procedure and never load-test a damaged, frozen, or poorly charged battery.
Voltage is a state-of-charge clue. A battery can show normal voltage and still fail when the starter demands high current.
5. Check the Charging System
After the battery is known to be charged and serviceable, start the vehicle and inspect charging-system operation. Traditional systems often measure roughly in the 13- to 15-volt range while running, but modern smart-charging systems can vary voltage based on temperature, electrical load, deceleration, battery state, and control strategy.
Do not condemn an alternator from one universal voltage number. Follow the model-specific test, scan for charging-system faults, and check cable voltage drop. A warning lamp, repeated low-battery messages, or charging voltage outside the manufacturer’s commanded range requires further diagnosis.
How to Test for Parasitic Battery Draw
A parasitic draw is current that continues after the vehicle should be asleep. Some draw is normal because security, keyless-entry, telematics, memory, and control modules need standby power. The acceptable amount and sleep time vary by vehicle.
Warning: Never crank the engine, switch on high-current accessories, open a powered door, or turn on the ignition while a multimeter is connected in series for an amperage test. Doing so can blow the meter fuse, damage the meter, create arcing, or interrupt vehicle power.
- Fully charge and test the battery first. A weak battery can confuse the diagnosis.
- Prepare the vehicle for sleep. Switch everything off, remove the key, close or manually latch doors and the hood switch, and wait the manufacturer’s specified time. Some vehicles need 20–60 minutes or longer before all modules sleep.
- Use the safest measuring method available. A suitable low-current clamp meter or a voltage-drop-across-fuses method can avoid opening the circuit. For a series test, start on the meter’s fused high-amperage input and follow the meter instructions.
- Maintain circuit continuity. Use a fused jumper or memory-safe method if the service procedure calls for it, then place the meter in series without waking modules.
- Read the stabilized current. Fluke lists less than 50 mA as a common rule of thumb, but the vehicle’s service specification controls. Some vehicles normally draw more or less.
- Isolate the circuit. Remove one fuse at a time or measure voltage drop across fuses. When the draw falls, use the wiring diagram to identify every component on that circuit.
- Confirm the repair. Reinstall fuses, let the vehicle sleep again, and verify that the draw remains within specification.
Pro Tip: Do not pull fuses randomly before modules sleep. Removing and reinstalling a fuse can wake the network, reset a timer, or hide an intermittent draw. Record the time, current, and each circuit change as you test.
Choosing the Right Replacement Battery
Use the owner’s manual, the original battery label, an OEM parts catalog, or a reputable VIN-based fitment tool. Brand marketing tiers such as silver, gold, or platinum are not universal specifications.
- Group size and dimensions: The battery must fit the tray, cover, insulation, hold-down, and surrounding components.
- Terminal position and polarity: Positive and negative posts must match the cable layout without stretching or crossing cables.
- Battery chemistry: Replace flooded, EFB, AGM, or another specified type with a compatible type. Start-stop and energy-recovery systems often require EFB or AGM. Do not downgrade the chemistry specified by the vehicle maker.
- Cold-cranking amps: Use the vehicle maker’s minimum or specified rating. More CCA does not correct wrong dimensions, polarity, chemistry, or charging compatibility.
- Reserve capacity or amp-hour rating: Match the specification when the vehicle maker lists it, especially on vehicles with high accessory loads or battery-management systems.
- Venting: Batteries mounted in the passenger compartment, trunk, or enclosed areas may require a specific vent port and hose connection.
- Battery sensor or registration: Some vehicles require a reset, relearn, or scan-tool registration after replacement. Ford, for example, uses battery-management logic on supported models, while procedures differ across brands and model years.
Check the exact year, make, model, engine, trim, and installed equipment. Two vehicles with the same badge may use different batteries because of start-stop, hybrid equipment, cold-weather packages, audio systems, or battery location.
How to Replace a Car Battery
The steps below apply to many negative-ground 12-volt systems. Your owner’s manual takes priority. Stop if the battery is difficult to access, the vehicle requires high-voltage disabling, the battery is under a powered seat, or the service information calls for special tools or programming.
Before Disconnecting the Old Battery
- Record radio codes, seat positions, clock settings, and other information that may be lost. Use a memory saver only when the vehicle maker permits it.
- Park, set the parking brake, switch off the ignition and every accessory, remove the key, and wait the specified power-down time.
- Verify the replacement battery’s size, chemistry, terminal orientation, rating, venting, and condition before removing the old battery.
- Put on eye protection and gloves. Keep tools from bridging a battery terminal to the body or the opposite terminal.
Remove the Old Battery
- Disconnect the grounded cable first. On most modern negative-ground vehicles, remove and isolate the negative terminal before the positive terminal. Exide’s battery safety instructions specify earth or negative first during removal.
- Disconnect and isolate the positive terminal. Do not allow the wrench or cable end to contact grounded metal.
- Disconnect the vent hose, battery sensor connector, temperature sensor, cover, or insulation only as directed. Note their routing.
- Remove the hold-down clamp or bracket. Do not pry against the battery case.
- Lift the battery upright with a carrier. Batteries are heavy; use help if the location or weight makes the lift unsafe.
Clean and Inspect the Battery Area
Inspect the tray, hold-down, cables, lugs, and insulation. Replace swollen, cracked, burned, loose, or acid-damaged parts. For external lead-acid residue, neutralize the affected tray or disconnected cable end with a small amount of baking-soda solution, keep the solution out of battery vents and cells, rinse or wipe as appropriate, and dry the area.
Use a terminal brush rather than aggressive sanding that removes excess material. Clean until the mating surfaces are bright and sound. Do not install a new battery on a damaged or badly corroded tray.
Install the New Battery
- Place the new battery in the correct orientation and reinstall the hold-down. The battery should not slide or rock, but do not overtighten and damage the case.
- Reconnect the vent tube, plugs, cover, insulation, and sensors exactly as required. Unused vent openings may need the battery maker’s plug.
- Connect the positive cable first and tighten it to the specified torque.
- Connect the negative cable last and tighten it to the specified torque. Reinstall terminal covers.
- Apply only a thin coat of approved terminal protectant to the outside of the completed connection if recommended. Do not place grease between dirty or loose mating surfaces.
- Confirm that no tools remain in the engine bay and that cables cannot contact belts, fans, exhaust parts, or the hood.
Complete Post-Installation Resets
Start the vehicle and confirm normal operation, then follow the owner’s manual for battery registration, battery sensor reset, idle or transmission relearn, window initialization, steering-angle calibration, clock, radio, and other memory functions.
Do not copy a reset sequence from another model. Procedures can differ by model year even within one brand. Some vehicles require a scan tool; others relearn after a sleep period. Ford owner information, for example, shows model-specific battery sensor reset and relearn procedures rather than one rule for every vehicle.
Battery Maintenance Tips for Longer Life

Many conventional car batteries last about three to five years, but climate, under-hood heat, vibration, deep discharge, short trips, charging faults, and vehicle storage can shorten that range. Interstate Batteries lists three to five years as an average, not a guaranteed replacement schedule.
Inspect Terminals, Cables, and the Hold-Down
At routine service intervals, check for white, blue, or green corrosion; wetness; cracked cable insulation; loose clamps; a damaged vent tube; and movement in the battery tray. A secure hold-down reduces vibration and prevents the case or terminals from contacting nearby parts.
Use the Correct Charger or Maintainer
For a stored or infrequently driven vehicle, use a microprocessor-controlled maintainer that supports the battery chemistry and capacity. A basic unregulated trickle charger can overcharge a battery if left connected. Follow the charger and battery instructions, connect to the vehicle’s designated charging points when required, and provide ventilation.
Short trips may not replace the energy used during starting, especially in cold weather or with heavy accessory use. Charge the battery properly instead of relying on long idling or assuming the alternator will recover a deeply discharged battery.
Limit Heat, Deep Discharge, and Long Storage
Heat speeds battery aging, while cold reduces available starting power and makes the engine harder to crank. Keep factory heat shields, covers, and insulation in place. Repair parasitic draws, switch off aftermarket accessories, and avoid repeated deep discharges.
For long-term storage, follow the vehicle manual. Disconnecting the battery may erase settings or interfere with security and access systems, so an approved maintainer is often the better choice on modern vehicles.
Battery Terminal Care and Corrosion Control
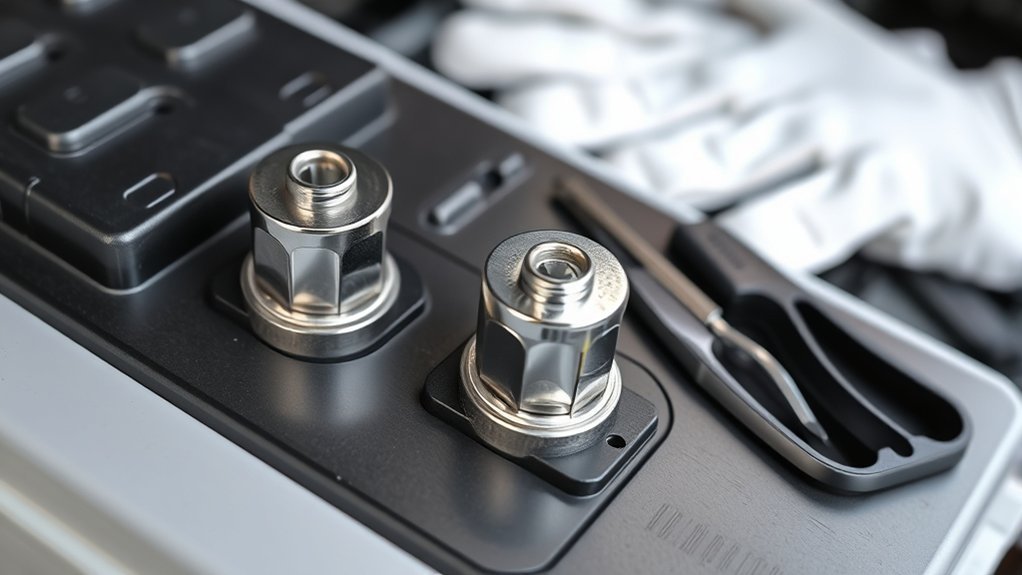
Corrosion increases resistance and can reduce the voltage available to the starter and charging system. Before cleaning, switch the vehicle off and follow the approved disconnect procedure. Wear eye protection and avoid brushing dry corrosion into the air.
- Disconnect negative first and positive second when removal is permitted.
- Apply a small amount of baking-soda solution to external acid residue only. Keep it away from battery cells, vents, connectors, and sensitive electronics.
- Use a terminal brush to clean the posts and inside surfaces of the clamps.
- Dry the parts, inspect for thinning or cracking, and replace damaged cable ends instead of forcing them tight.
- Reconnect positive first and negative last, torque correctly, and apply an approved external protectant if desired.
If corrosion quickly returns, inspect for a leaking case, damaged vent system, overcharging, poor terminal fit, or acid contamination. Repeated cleaning without fixing the cause will not provide a lasting repair.
Common Battery Problems and Fixes
| Problem | Likely Checks | Next Step |
| Slow cranking | State of charge, CCA test, cable voltage drop, starter draw | Charge and retest; repair cables or starter if battery passes |
| Battery dies overnight | Battery capacity, charging system, module sleep, parasitic draw | Find the circuit or component that remains active |
| Battery warning lamp while driving | Belt, alternator command and output, wiring, battery sensor, fault codes | Reduce electrical loads and have the charging system diagnosed promptly |
| Corrosion returns quickly | Case or vent leak, overcharging, loose clamp, damaged cable | Correct the cause and replace damaged parts |
| New battery goes flat | Wrong chemistry or capacity, missing BMS reset, draw, charging fault | Verify fitment and perform model-specific diagnosis |
Old Car Battery Disposal and Recycling
Keep the old battery upright in a sturdy, acid-resistant container so it cannot tip, leak, or short against metal objects. Protect exposed terminals during transport and do not leave the battery in a hot passenger compartment.
The U.S. Environmental Protection Agency says lead-acid vehicle batteries should be returned to a battery retailer or a local household hazardous-waste program. Do not place them in household trash or a curbside recycling bin. Retailers commonly collect the old battery when you purchase a replacement, and local rules may require a core charge or specific handling.
Frequently Asked Questions
How often should I replace my car battery?
Many conventional 12-volt car batteries last about three to five years, but age alone is not a complete test. Begin regular testing as the battery ages and replace it when it fails a performance test, cannot hold a charge, is physically damaged, or meets the vehicle maker’s replacement criteria.
Can extreme temperatures affect battery performance?
Yes. Heat speeds internal aging and water loss in applicable flooded batteries. Cold reduces available cranking power and thickens engine fluids, so a weak battery may fail on the first cold morning even though heat caused much of the earlier damage.
Does 12.6 volts mean the battery is good?
Not by itself. About 12.6 volts often indicates a full charge in a conventional starting battery, but a worn or sulfated battery may still show normal open-circuit voltage and fail under load. Use a conductance or load test and inspect the cables.
Does a 10.5-volt reading prove that a battery has a bad cell?
No. A reading near 10.5 volts can point to a failed cell, but it can also appear with severe discharge or during a specified discharge test. Inspect the battery, charge it safely with compatible equipment, allow it to rest, and perform a proper battery test before deciding.
Do I need to reset the car’s computer after battery replacement?
Possibly. Some vehicles need battery registration, a battery sensor reset, or a sleep-time relearn. Others need windows, steering, throttle, transmission, clock, or radio settings initialized. Follow the exact owner’s manual or service procedure for the model year.
Is it safe to jump-start a car battery?
It can be safe when the owner’s manual permits it and you use the designated connection points and sequence. Never jump a frozen, cracked, leaking, swollen, or smoking battery. Keep the vehicles from touching, confirm voltage compatibility, and make the final ground connection away from the battery when the manual directs it.
Is 50 mA always the maximum acceptable parasitic draw?
No. Less than 50 mA is a common general benchmark after all modules are asleep, but the correct limit and sleep time are vehicle-specific. Telematics, alarms, keyless entry, and other systems can change normal standby current.
Can I replace an AGM battery with a standard flooded battery?
Do not downgrade unless the vehicle manufacturer explicitly approves it. Vehicles designed for AGM or EFB batteries may use start-stop, regenerative charging, heavy cycling, enclosed mounting, or battery-management strategies that a standard flooded battery is not designed to handle.
Conclusion
Good battery service starts with diagnosis, not guesswork. Check the battery’s charge, performance, connections, starter circuit, charging system, and key-off draw before buying parts. When replacement is needed, match the vehicle’s exact specification, work safely, reconnect every hold-down and vent component, and complete the required battery-management procedure. Those steps reduce repeat failures and help keep the vehicle reliable.
Sources
- OPTIMA Batteries: Basic Information on Battery Voltage — rested voltage and battery-chemistry context
- Fluke: How to Find Parasitic Battery Drain With a Multimeter — current-draw testing and the common 50 mA benchmark
- Exide: Flooded Battery Instructions for Use and Safety — protective equipment, disconnect order, installation, venting, and short-circuit precautions
- Ford: Battery Management System — modern vehicle battery-management considerations
- NHTSA: Electric and Hybrid Vehicle Battery and Safety Guidance — high-voltage service precautions
- U.S. EPA: Used Household Batteries — lead-acid battery recycling and disposal guidance







Leave a Reply