
The Blink camera mount 3-pack serves as a practical security upgrade, supporting Indoor, Outdoor, XT2, XT, and original Indoor models while excluding the Mini variant. Each package contains three white brackets with six corrosion-resistant screws, enabling multi-point coverage at reduced per-unit cost. The hardware accommodates 360-degree rotational adjustment, ideal mounting heights of 8-10 feet, and downward angles of 15-30 degrees for facial capture. Installation requires standard tools including a cordless drill and level, with pre-drilling recommended for masonry surfaces. Official mounts retail around $19.99, delivering guaranteed compatibility compared to third-party alternatives priced $8-$15. Proper placement demands positioning under eaves to prevent water accumulation, avoiding direct sunlight for image clarity, and ensuring Wi-Fi signals exceed -70 dBm for reliable performance. Those evaluating their complete mounting strategy will find expanded guidance on model compatibility and surface-specific techniques below.
Key Takeaways
- Official mounts support multiple Blink generations with uniform hardware compatibility.
- Three-pack includes corrosion-resistant screws for cost-effective multi-camera setups.
- 360-degree rotation and 8-10 foot mounting height optimize security coverage angles.
- Pre-drilling pilot holes ensures stable installation on masonry and exterior surfaces.
- Official mounts provide warranty protection superior to cheaper third-party alternatives.
Which Blink Cameras Work With the 3-Pack Mounts?
Wondering which cameras actually fit these mounts? The Blink Camera Mount 3-Pack offers broad camera compatibility, working seamlessly with Blink Indoor, Blink Outdoor, XT2, XT, and original Blink Indoor models.
These mounting brackets do not support the Blink Mini, so confirm your device before purchasing.
For installation tips, note that each bracket accommodates standard screw placement, and the package includes six mounting screws for flexible positioning.
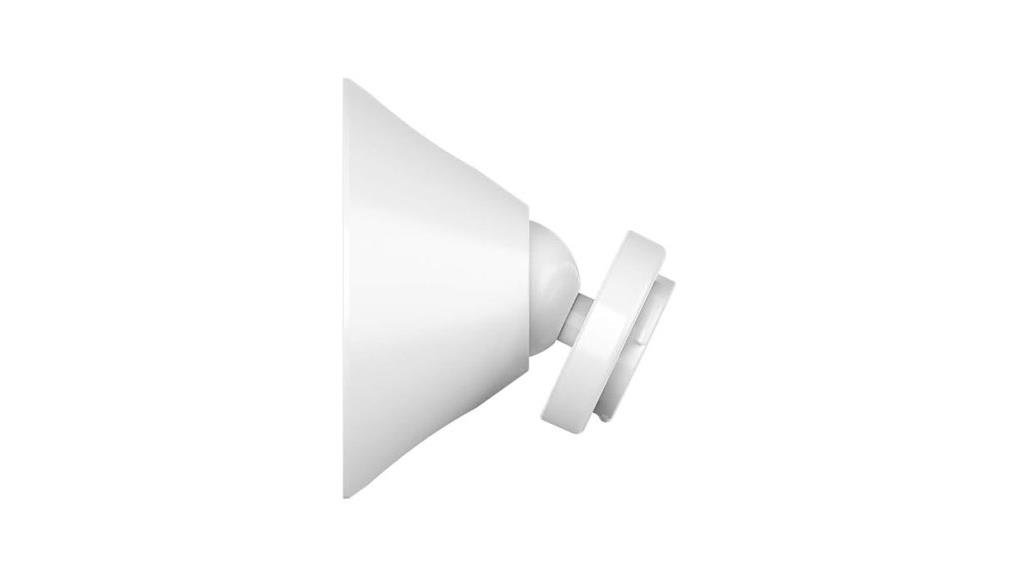
The white finish blends discreetly with most home exteriors.
This compatibility range guarantees existing Blink ecosystem users can expand coverage without adapter purchases, maintaining uniform mounting hardware across multiple camera generations for streamlined home security deployment.
What’s Inside the Box: 3-Pack Contents and Coverage
The Blink Camera Mount 3-Pack delivers practical expansion potential for multi-camera security setups, containing three identical white mounting brackets along with six corrosion-resistant screws for secure attachment.
The mounting benefits become apparent when positioning cameras across multiple entry points, above front doors, garages, and perimeter locations without purchasing individual accessories.
Multi-camera coverage across entry points, doors, and garages—without the hassle of buying accessories one by a time.
Installation tips emphasize pre-drilling pilot holes for masonry surfaces, ensuring level alignment before final tightening, and verifying bracket-to-camera compatibility with Blink Indoor, Outdoor, XT2, XT, and 1st generation models—excluding Blink Mini.
Each bracket supports 360-degree rotational adjustment, enabling precise angle calibration.
The 3-Pack configuration reduces per-unit cost while maintaining identical build quality, construction material, and weather resistance specifications found in single-unit retail packaging.
Best Mounting Locations for Security Coverage
Strategic placement transforms the Blink Camera Mount from simple hardware into an effective security tool, with ideal positioning requiring careful evaluation of sight lines, lighting conditions, and structural integrity.
Optimal camera angles emerge when mounts sit 8-10 feet high, angling downward 15-30 degrees to capture faces while avoiding direct sunlight exposure.
Environmental factors demand consideration: mount under eaves to prevent rain accumulation, avoid areas with extreme temperature fluctuations, and guarantee Wi-Fi signal strength exceeds -70 dBm.
Above front doors, garage approaches, and side gates deliver thorough perimeter coverage, while corner placements maximize field of view without additional hardware.
Step-by-Step Installation for Drywall, Brick, and Wood
Once mounting locations have been selected, proper installation technique determines whether cameras remain secure through seasons of temperature swings and weather exposure.
Drywall Tips: Locate studs with a stud finder, or use hollow-wall anchors rated for 15 pounds minimum.
Brick Techniques: Drill with masonry bits, insert plastic anchors, and secure screws to 1.5-inch depth.
Wood Methods: Pre-drill pilot holes to prevent splitting, then drive screws directly into solid lumber.
Installation Tools: Cordless drill, 3/16-inch and 1/4-inch bits, level, pencil, and safety glasses complete the kit.
Each surface demands specific preparation, but consistent results follow methodical execution.
Official Blink 3-Pack vs. Third-Party Mounts: Which to Buy?
How does a buyer weigh the merits of official Blink hardware against the expanding marketplace of third-party alternatives?
The official mounts, priced at approximately $19.99 for three brackets, guarantee seamless compatibility with Blink Indoor, Outdoor, XT2, XT, and 1st generation models, each measuring 2.8 x 2.8 x 1.2 inches with integrated mounting holes.
Third party options, typically ranging $8-$15, offer expanded flexibility, including adjustable angles, weatherproof metals, and universal adapter plates, though fit precision varies.
Official mounts provide assured stability, while third-party alternatives deliver customization freedom.
For risk-averse installers prioritizing warranty protection, official mounts prevail.
Value-seekers craving installation versatility may find third party options sufficiently capable, provided specifications align.
Frequently Asked Questions
Can Mounts Support Solar Panel Attachments?
These mounts lack solar panel compatibility; they’re designed solely for camera housing. For liberation from battery dependency, seek dedicated solar panel accessories with separate installation tips for compatible Blink camera models.
Are Screws Rust-Resistant for Outdoor Use?
Like a lighthouse standing firm against crashing waves, these screws endure. The package includes six standard mounting screws; for true rust resistance, seekers of liberation should source marine-grade stainless alternatives—essential durability factors and installation tips for unshackled outdoor security.
What’s the Maximum Weight Capacity per Mount?
The manufacturer does not specify a maximum weight capacity, though mount durability accommodates standard Blink cameras reliably. Installation ease allows secure positioning without complex tools, empowering users to place cameras freely throughout their property.
Do Mounts Allow 360-Degree Camera Rotation?
Ironically, full rotation remains elusive. These mounts prioritize mount stability and installation ease over complete freedom, offering fixed positioning that liberates homeowners from complex adjustments while securing their surveillance with straightforward, reliable placement.
Is Wall Damage Visible After Bracket Removal?
Bracket installation requires drilling, leaving small holes upon removal. Wall repair remains minimal—typically simple spackling and paint restore surfaces completely, freeing homeowners to relocate cameras without permanent damage or constraint.
Conclusion
The Blink Camera Mount stands as a sturdy bridge between homeowner intent and surveillance reality, its three-pack configuration offering expandable coverage for compatible systems. While model restrictions create certain boundaries, the included hardware and straightforward installation deliver reliable functionality across standard surfaces. For those building extensive security networks, this official accessory provides predictable compatibility, though third-party alternatives may suit budget-conscious buyers. Ultimately, the mount fulfills its essential purpose: anchoring watchful eyes where protection matters most.


Leave a Reply