
Cleaning leather car seats safely is less about scrubbing harder and more about using the right product, very little moisture, and a gentle technique. Before you begin, confirm what material covers each part of the seat and check your owner’s manual. Genuine leather, coated leather, vinyl, synthetic leather, and textile inserts may require different care.
Quick Answer
Vacuum loose grit, test an owner-approved cleaner in a hidden spot, and apply it to a microfiber cloth rather than directly to the seat. Clean small sections with light pressure, wipe away residue, and let the upholstery dry fully. Apply conditioner only when the vehicle manufacturer permits it.
Key Takeaways
- Check the owner’s manual before choosing a cleaner or conditioner.
- Vacuum sand, crumbs, and grit before wiping the seat.
- Apply cleaner to a cloth or soft brush, not directly to perforations or side-airbag bolsters.
- Use minimal moisture and remove all cleaner residue.
- Do not use steam, bleach, solvents, abrasive pads, or forced heat.
- Condition only when the product is compatible with the upholstery and approved by the vehicle manufacturer.
At a Glance
| Time Required | 30–60 minutes, plus drying time |
| Difficulty | Easy |
| Tools Needed | Vacuum with soft attachment, microfiber cloths, soft detailing brush, approved cleaner, and optional approved conditioner |
| Cost | About $0–$30, depending on the supplies you already own |
Warning: Never spray cleaner directly onto the sides of seats that contain side airbags. Keep liquid away from seat switches, wiring, seams, and ventilation holes. Do not use a steam cleaner or force the seat dry with a hair dryer, heater, or heat gun.
Check the Seat Material Before Cleaning
Do not assume that every panel on a “leather seat” is genuine leather. A vehicle may use leather on the center contact surfaces and vinyl or synthetic material on the bolsters, headrests, or rear panels. Some seats also combine leather with suede-like or textile inserts.
Check the upholstery description in the owner’s manual, original window sticker, trim specification, or manufacturer support information. Volvo, for example, states that its leather-cleaning instructions apply only to genuine leather details and that leather products should not be used on textile surfaces.
Choose a neutral, manufacturer-approved, or leather-specific cleaner that is compatible with the confirmed material. Test it on a concealed area, such as the lower rear edge of the seat, and allow the test area to dry before treating the visible surface.
Note: The instructions in your vehicle’s owner’s manual take priority over generic detailing advice. An approved method for one vehicle may be unsuitable for another seat finish.
Why Cleaning Leather Seats Is Essential for Longevity

Dust, sand, food crumbs, body oils, sunscreen, and clothing dye collect on vehicle seats during normal use. Grit can act like fine sandpaper when it is dragged across the surface, while oils and transferred dye can gradually change the finish.
Routine vacuuming and prompt spill removal reduce abrasion and make deep cleaning easier. Genesis advises owners to vacuum leather periodically to remove dust and sand and to remove contamination as soon as possible.
Cleaning also protects the appearance of seams, bolsters, perforations, and high-contact areas. It cannot repair leather that is already cracked, peeling, or missing its surface coating, but it may slow additional wear when performed correctly.
The safest leather cleaner is not necessarily the strongest one. It is the mildest compatible product that removes the dirt without changing the seat’s color, sheen, or protective finish.
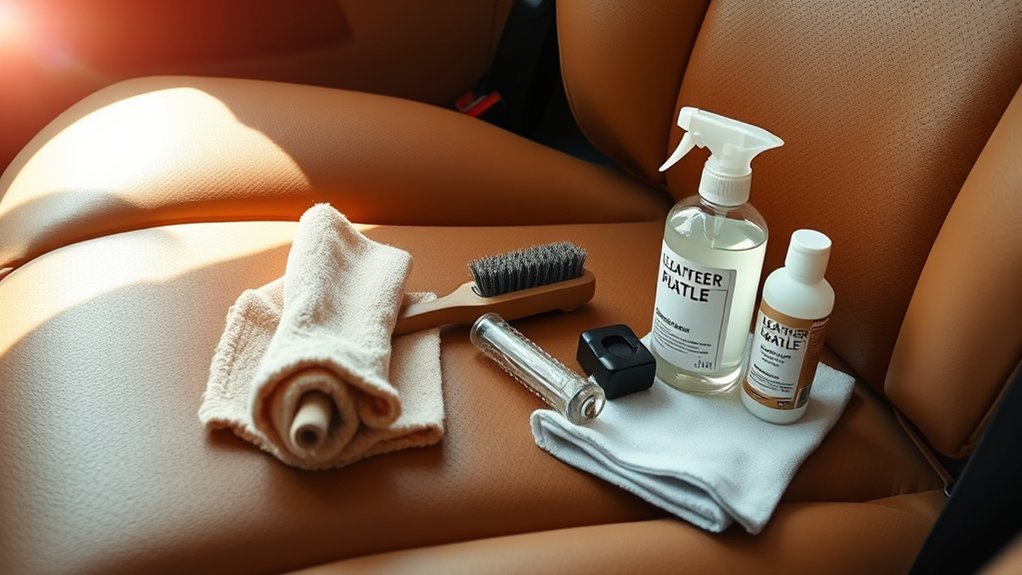
Tools and Materials Needed for Cleaning Leather Seats
- Vacuum cleaner: Use a soft brush or upholstery attachment rather than a hard plastic nozzle.
- Several clean microfiber cloths: Use separate cloths for cleaning, residue removal, drying, and conditioning.
- Soft detailing brush: A soft horsehair or upholstery-safe brush can loosen dirt from grain patterns and seams.
- Approved cleaner: Use the product named in the owner’s manual or a neutral leather cleaner confirmed to be compatible with the material.
- Clean water: Use a lightly dampened cloth to remove cleaner residue when the product instructions call for it.
- Optional conditioner or protectant: Use only when the vehicle manufacturer and product directions permit it.
Avoid stiff brushes, melamine foam, scouring pads, paper towels with rough fibers, household degreasers, glass cleaner, bleach, acetone, paint thinner, gasoline, and high-alcohol disinfectants.
Odor sprays, air fresheners, oils, and homemade mixtures are not necessary for routine cleaning and may leave residue or affect the seat finish. Do not apply olive oil, coconut oil, petroleum jelly, furniture polish, or shoe polish to automotive upholstery.
How to Prepare Leather Seats for Cleaning
- Park in a shaded, ventilated area. The upholstery should be cool to the touch.
- Turn the vehicle off. Switch off seat heat and ventilation and allow the seat to return to room temperature.
- Remove loose items. Take out child-seat protectors, covers, and objects that block seams, when they can be removed safely.
- Inspect the seat. Look for peeling coating, open cracks, loose stitching, punctures, discoloration, and previous repairs.
- Confirm the material. Identify leather, synthetic material, and textile sections before selecting products.
- Test the cleaner. Apply a small amount to a concealed area and check it after it dries.
Warning: Stop if the test cloth picks up seat color, the finish becomes sticky, the sheen changes sharply, or the surface begins to peel. Those signs can indicate a failing coating, incompatible product, or previous repair that needs professional evaluation.
How to Clean Leather Car Seats Step by Step
1. Vacuum the Seat
Use a soft attachment to remove crumbs, sand, hair, and other loose particles. Support the seat material with one hand while opening creases gently with the other. Do not push a hard nozzle into stitching or drag it across the surface.
Pay special attention to the gap between the backrest and cushion, the piping, perforations, and the outside bolster where clothing rubs against the seat.
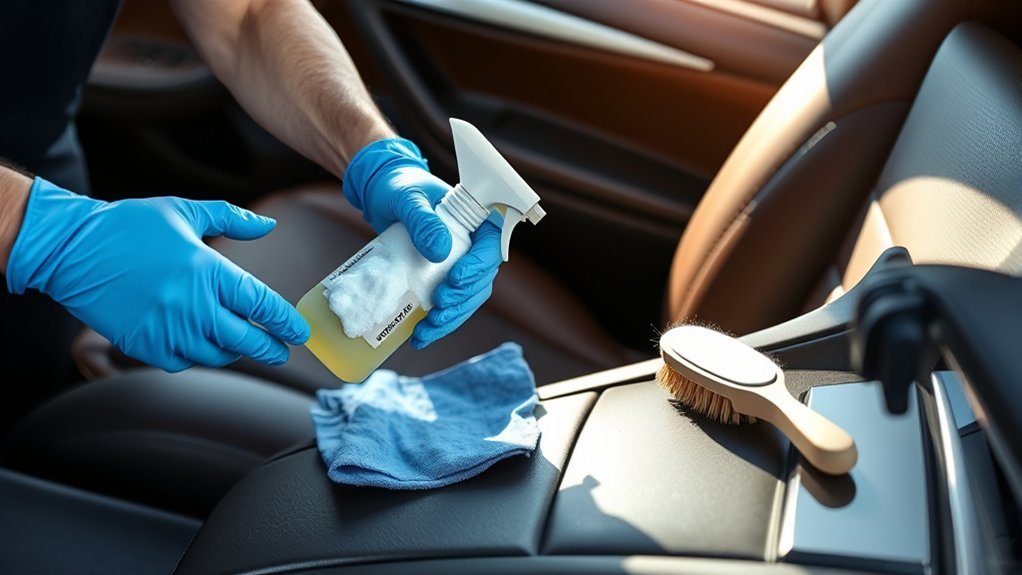
2. Apply Cleaner to the Cloth
Follow the cleaner’s label instructions. In most cases, place a small amount on a clean microfiber cloth or soft brush instead of spraying the seat. The cloth should be lightly damp, not dripping.
Direct application is especially risky around perforations, seat ventilation holes, electrical controls, seams, and side-airbag bolsters.
3. Clean One Small Section at a Time
Work on an area about the size of a sheet of paper. Wipe with gentle overlapping or circular motions. Use only enough pressure to lift the soil; aggressive scrubbing can polish the finish, push dirt into the grain, or damage a weakened coating.
Use a soft detailing brush only where the product and upholstery manufacturer allow it. Agitate the cleaner lightly, then wipe away the loosened dirt before the solution dries.
4. Clean Seams and Perforations Carefully
Use a nearly dry cloth or a soft brush around stitching and perforations. Do not force liquid into the holes. On ventilated seats, excess product can enter the foam or air channels and may leave residue that is difficult to remove.
Clean the seat sides with a lightly dampened cloth. Never spray the area containing a side airbag.
5. Remove Cleaner Residue
Use a separate clean cloth to lift away dirt and remaining product. When the cleaner instructions require rinsing, wipe the surface with a second cloth that is lightly dampened with clean water, then follow with a dry microfiber towel.
Residue left on the surface can create streaks, tackiness, excess shine, or rapid re-soiling.
6. Let the Seat Dry Completely
Leave the doors or windows open in a secure, shaded, well-ventilated location. Allow the seat to dry completely before sitting on it, turning on seat heat or ventilation, or applying a conditioner.
Do not use a steam cleaner, hair dryer, space heater, heat gun, or direct intense sunlight to speed up drying.
7. Inspect the Finish
The clean surface should look even and feel dry rather than oily or sticky. A dramatic increase in gloss often means residue remains or too much product was applied. Buff gently with a clean, dry microfiber cloth.
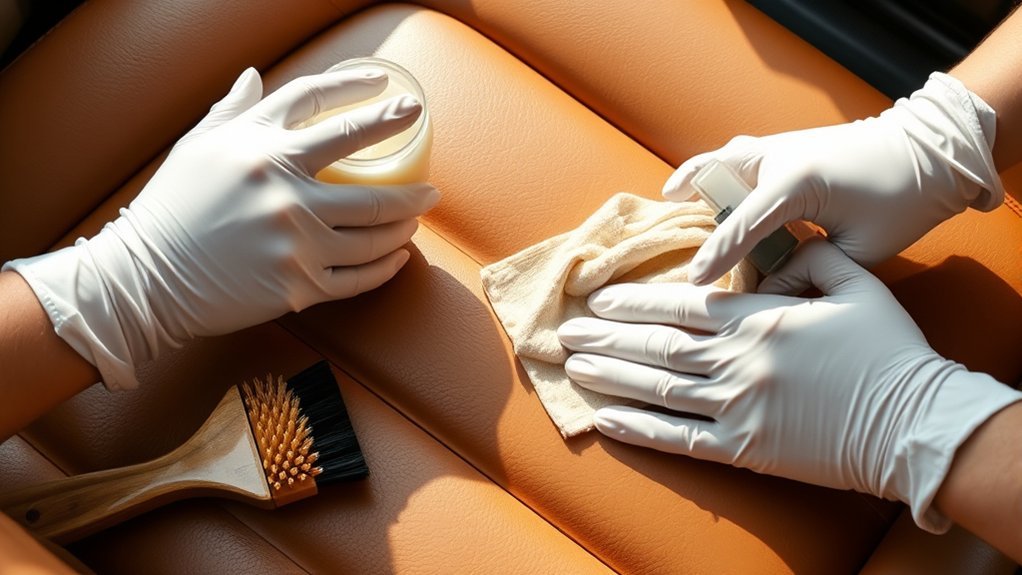
8. Condition Only If Approved
If your owner’s manual permits a leather conditioner or protectant, apply a thin, even layer according to its directions. Keep it out of perforations and stitching, allow the stated dwell time, and buff away all excess.
Pro Tip: Fold each microfiber cloth into quarters. As one surface becomes dirty, turn to a clean side so you do not spread grime across the next section.
How to Remove Common Stains From Leather Seats
Act quickly, but do not panic-scrub. Blot liquids from the outside edge toward the center, use the mildest approved method first, and repeat gentle passes rather than attempting one aggressive treatment.
| Stain | Safe First Response | What to Avoid |
|---|---|---|
| Coffee, soda, or water | Blot immediately, then wipe with a small amount of approved neutral cleaner. Remove residue and dry. | Rubbing the spill outward or soaking perforations. |
| Oil or grease | Lift excess oil with an absorbent cloth, then use a stain remover approved for that upholstery. | Degreasers, solvents, or hard scrubbing. |
| Sunscreen or makeup | Blot fresh residue and clean promptly with the automaker-approved method. | Makeup remover, hand sanitizer, or high-alcohol wipes unless specifically approved. |
| Denim or clothing dye | Use repeated light applications of compatible cleaner. Stop if the seat’s own color transfers. | Magic erasers, bleach, acetone, and abrasive compounds. |
| Chewing gum | Place ice in a sealed bag against the gum, allow it to firm, and lift it gradually with a blunt plastic edge. | Sharp blades, direct ice water, or solvent. |
| Ink or permanent marker | Blot without spreading it and contact a leather-repair professional, especially on light upholstery. | Hairspray, acetone, rubbing alcohol, or repeated aggressive spot treatment. |
Conditioning Leather Seats for Optimal Care
Conditioning is not an automatic final step for every seat. Many automotive leathers have a protective surface finish, while some vehicles use synthetic upholstery that requires a different product or no conditioner at all.
Check the owner’s manual before applying a conditioner, coating, protectant, or softener. Toyota notes that conditioner may be used for added protection according to the product instructions, while Volvo directs owners to use recommended vehicle-care products.
When conditioning is approved:
- Use a product intended for the exact upholstery material.
- Test it in a hidden location and allow it to dry.
- Apply a very thin layer with a clean applicator.
- Keep the product out of perforations, seams, and airbag areas.
- Allow the recommended absorption time.
- Buff away every trace of excess product.
Applying too much conditioner can leave the seat slick, glossy, sticky, or more likely to attract dust. A matte or satin factory finish should not become oily after treatment.
What Not to Do When Cleaning Leather Seats
- Do not skip vacuuming. Dirt and sand can scratch or abrade the finish while you wipe.
- Do not soak the seat. Excess liquid can enter seams, perforations, foam, ventilation passages, and electrical areas.
- Do not spray side-airbag bolsters. Apply a suitable product to a cloth instead.
- Do not use steam. Volvo specifically advises against steam cleaning leather upholstery.
- Do not scrub with abrasive materials. Stiff brushes, scouring pads, and melamine foam can change the grain and sheen.
- Do not use solvents. Avoid acetone, paint thinner, gasoline, adhesive remover, and similar chemicals.
- Do not use strong acidic or alkaline cleaners. They can discolor or strip the finish.
- Do not assume every alcohol-containing formula is identical. Avoid high-alcohol and unapproved products; follow the manufacturer’s limits.
- Do not use household oils or furniture polish. These products may leave residue and are not substitutes for an approved leather treatment.
- Do not force-dry the upholstery. Heat can harden, shrink, discolor, or otherwise damage some leather finishes.
| Avoid | Use Instead | Reason |
|---|---|---|
| Bleach or strong disinfectant | Manufacturer-approved neutral cleaner | Strong chemicals can fade or strip the finish. |
| Glass cleaner or household degreaser | Cleaner labeled for the confirmed upholstery | General cleaners may contain incompatible solvents or alkalinity. |
| Vinegar or baking-soda mixture | Tested, material-specific cleaner | Homemade concentrations are inconsistent and may affect the finish. |
| Steam cleaner | Lightly damp microfiber cloth | Steam adds heat and moisture that the upholstery may not tolerate. |
| Magic eraser or stiff brush | Soft microfiber or approved soft brush | Abrasives can polish, thin, or remove the protective coating. |
Long-Term Leather Seat Care
There is no single cleaning interval that suits every vehicle. Light-colored seats, daily-use vehicles, work trucks, rideshare cars, and vehicles carrying children or pets usually need attention more often than lightly used vehicles.
| Care Task | Practical Baseline |
|---|---|
| Remove spills | Immediately, using the vehicle-maker-approved method |
| Vacuum grit and crumbs | Every one to four weeks, or whenever debris is visible |
| Wipe high-contact areas | As needed when body oils, sunscreen, or dye transfer appear |
| Full gentle cleaning | When visibly soiled; often two to four times per year for normal use |
| Condition or protect | Only at the interval allowed by the owner’s manual and product directions |
Reduce sun and heat exposure by parking in shade, using a windshield sunshade, and avoiding long periods of intense heat when practical. Genesis notes that excessive sunlight and heat can fade, dry, wrinkle, and discolor some Nappa leather.
Watch for dye transfer from dark denim, belts, jackets, and child-seat accessories, especially on beige, cream, white, or light-gray leather. Clean transfer early before it becomes harder to remove.
Keep sharp keys, metal fasteners, tools, and hook-and-loop closures away from the seat. Cleaning cannot reverse a cut or repair a coating that has already worn through.
Troubleshooting Leather Seat Cleaning Problems
The Seat Looks Streaky
Cleaner residue or uneven drying is the most likely cause. Wipe the whole panel evenly with a clean, lightly damp microfiber cloth, then dry and buff it. Avoid spot-polishing one small area because that can create a different sheen.
The Seat Feels Sticky
Too much cleaner, conditioner, or protectant may remain on the surface. Wipe away the residue using the removal method listed by the product manufacturer. Stop adding products until the seat feels dry and even.
The Seat Became Too Shiny
Shine can come from body oils, residue, aggressive rubbing, or a coating that has been polished by wear. Perform one gentle cleaning pass. If the gloss remains after the surface dries, further scrubbing may worsen it.
The Cloth Is Picking Up Seat Color
Stop immediately. Color transfer from the seat itself may indicate an incompatible cleaner, damaged topcoat, redyed leather, or a failing repair. Allow the surface to dry and contact an automotive leather specialist.
The Leather Is Cracked or Peeling
Cleaner and conditioner cannot replace missing finish or repair structural cracks. A professional may need to clean, fill, recolor, and reseal the affected panel. Severe damage may require panel replacement.
The Stain Will Not Come Out
Do not keep escalating to stronger household chemicals. Persistent ink, dye transfer, oil, mold-like growth, or unknown stains should be evaluated by a professional before the finish is permanently damaged.
Frequently Asked Questions
How do you clean leather car seats properly?
Confirm the upholstery material, vacuum loose grit, test an approved cleaner in a hidden area, and apply a small amount to a microfiber cloth. Clean gently in small sections, wipe away residue, and let the seat dry completely. Apply conditioner only when the vehicle manufacturer allows it.
What do professional car detailers use to clean leather seats?
Professionals typically use a cleaner matched to the upholstery finish, clean microfiber towels, soft brushes, controlled moisture, and strong lighting that reveals remaining dirt. The most important professional habit is testing compatibility and stopping when the coating shows signs of damage.
Can I use Dawn dish soap on leather car seats?
Do not use it by default. Some manufacturers permit a carefully diluted mild soap solution, but that does not mean every dish detergent, concentration, fragrance, or additive is safe for every leather finish. Use the method in your owner’s manual or a compatible automotive leather cleaner.
What should you not clean leather seats with?
Avoid bleach, acetone, paint thinner, gasoline, strong degreasers, abrasive pads, magic erasers, steam cleaners, furniture polish, household oils, and high-alcohol or strongly acidic or alkaline cleaners unless the vehicle manufacturer specifically approves the product.
How often should leather car seats be cleaned and conditioned?
Vacuum whenever grit is visible and remove spills immediately. A full gentle cleaning may be needed several times a year, but high-use or light-colored seats may need more frequent care. Condition only at the interval permitted by the owner’s manual and conditioner instructions.
How do you clean perforated or ventilated leather seats?
Vacuum the holes gently and apply cleaner to a nearly dry cloth rather than spraying the seat. Work with minimal product, keep liquid out of the perforations, wipe residue promptly, and let the seat dry fully before turning the ventilation or heat back on.
Can cleaning repair cracked or peeling leather?
No. Cleaning removes soil but cannot replace a missing coating, close deep cracks, or rebuild damaged leather. Stop aggressive cleaning and consult an automotive upholstery or leather-repair professional for recoloring, refinishing, panel repair, or replacement.
Conclusion
Clean leather car seats with the least aggressive method that safely removes the dirt. Verify the upholstery, follow the owner’s manual, vacuum before wiping, use very little moisture, and keep cleaner away from side-airbag areas and perforations. Dry the seat fully and condition it only when approved. Prompt, gentle care is far safer than waiting for heavy soil and trying to remove it with strong chemicals.
Sources
- Ford: How Do I Clean the Leather Seats in My Vehicle? — supports routine vacuuming and mild, vehicle-appropriate cleaning guidance.
- Toyota: How to Clean Your Car’s Interior — supports vacuuming, soft-cloth cleaning, optional conditioning, and following product directions.
- Genesis 2026 Owner’s Manual: Interior Care — supports neutral cleaners, low-alcohol limits, prompt stain removal, periodic vacuuming, sunlight precautions, and contaminant-specific care.
- Volvo: Cleaning Leather and Vinyl — supports material-specific care, gentle cleaning, full drying, avoiding steam, and side-airbag spray precautions.


Leave a Reply