
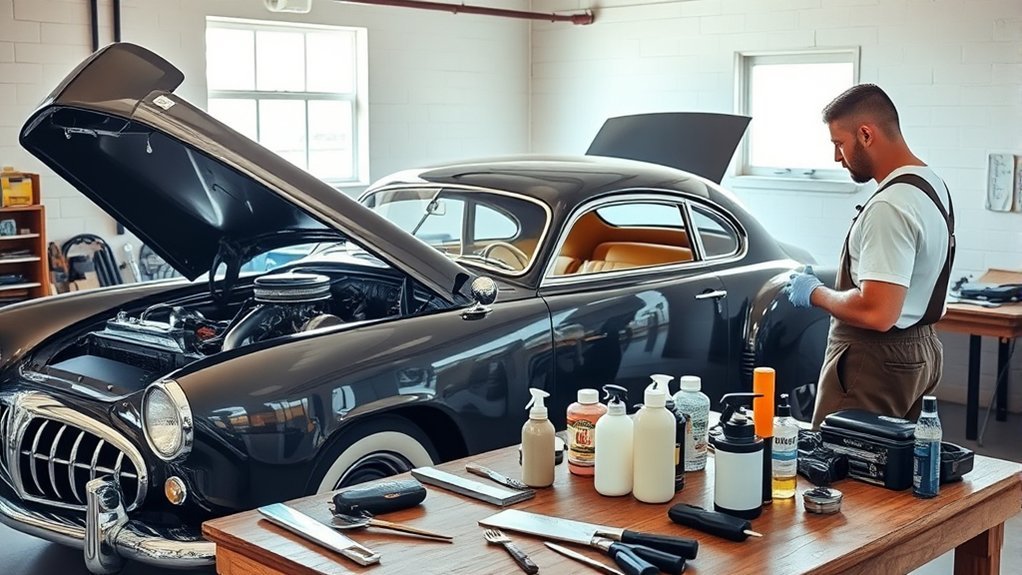
Preparing a classic car for storage takes more than parking it under a cover. A careful plan protects the paint, fuel system, cooling system, battery, tires, brakes, seals, and interior while the vehicle sits. Because classic cars differ widely in age, materials, electrical polarity, fuel systems, and lubrication needs, use this guide with the owner’s or factory service manual for your exact model.
Quick Answer
Before storing a classic car, wash and dry it, change contaminated oil if due, stabilize fresh fuel when appropriate, verify coolant and brake fluid condition, protect the battery, set tires to the correct pressure, control moisture and pests, and inspect the car regularly. Always follow model-specific service guidance.
Key Takeaways
- Clean and dry the car completely before covering it; trapped dirt and moisture encourage staining, mold, and corrosion.
- Use only the oil, coolant, fuel treatment, charger, and tire pressure appropriate for the specific vehicle.
- Do not overinflate tires beyond the vehicle or tire maker’s guidance, and never rely on a hydraulic jack to support a stored car.
- Control humidity, sunlight, pests, and battery discharge throughout storage.
- Inspect the car about once a month and complete a full safety check before returning it to the road.
At a Glance
| Time Required | About 3–6 hours, plus drying time and any repairs |
| Difficulty | Moderate; advanced fluid, brake, fuel, or electrical work may require a specialist |
| Tools Needed | Wash supplies, microfiber towels, vacuum, tire gauge, wheel chocks, fluid-check tools, breathable cover, and a vehicle-compatible battery maintainer |
| Cost | Varies by vehicle and supplies; storage rent and repair work are additional |
Why Classic Car Maintenance Is Essential Before Storage
Storage slows wear from driving, but it creates different risks. Old oil can contain moisture and combustion byproducts, fuel can lose volatility, batteries can discharge, tires can develop temporary flat spots, brake parts can stick, and high humidity can speed corrosion. Dirt, road salt, food crumbs, and damp upholstery can also attract pests or promote mold.
A strong storage plan starts with the vehicle’s own manual. A prewar car with a six-volt positive-ground system, a carbureted 1960s model, and a fuel-injected 1990s collector car may need different oil, battery, fuel, and restart procedures. Manufacturer guidance should take priority over generic advice.
The goal is not simply to keep the car clean. It is to prevent moisture, contamination, discharge, deformation, and corrosion while preserving the vehicle’s original materials.
Step-By-Step Process for Cleaning Your Classic Car
Clean the vehicle before storage so contaminants are not trapped against the finish or underbody for weeks or months.
- Wash from the top down. Use a pH-balanced automotive wash and clean mitts. Avoid household detergent, which may strip wax or dry trim.
- Clean the wheel wells and underbody. Remove mud, salt, insect residue, and oily grime. Be gentle around old coatings, exposed wiring, and fragile underseal.
- Rinse and dry thoroughly. Blow or wick water from seams, trim, weatherstripping, mirrors, and drain channels. Do not cover the car while any area remains damp.
- Protect the finish. Apply a suitable wax or paint sealant after the surface is clean. Reapply later only when inspection shows the protection has failed or the car has been washed again; a fixed five-week schedule is unnecessary for a clean indoor vehicle.
- Clean the interior. Vacuum carpets, seats, trunk, and storage pockets. Remove food, paper, and anything that may attract rodents or hold moisture.
- Treat materials correctly. Use products made for the car’s leather, vinyl, wood, fabric, and rubber. Test delicate or original surfaces in an inconspicuous area first.
Pro Tip: Photograph the paint, interior, engine bay, underbody, tire sidewalls, and odometer before storage. The images create a useful baseline for monthly inspections and future maintenance records.
Key Fluid Checks and Maintenance Tips Before Storing
Check every serviceable fluid for the correct level, condition, and specification. Look for leaks before storage, because a slow seep may become a major loss while the car is unattended.
Essential Fluid Levels Check
- Engine oil: Change the oil and filter if the oil is due, contaminated, fuel-diluted, or the manufacturer recommends a pre-storage change.
- Coolant: Verify the level only when the engine is cold. Confirm freeze protection and use a coolant compatible with the engine’s metals, seals, and service history.
- Brake and clutch fluid: Inspect the reservoirs and look for leaks. A falling level or dark, contaminated fluid needs diagnosis, not a simple top-off.
- Transmission and differential fluids: Check them according to the service manual, especially if there are known leaks.
- Power-steering fluid: Check the level and hoses on cars equipped with hydraulic steering.
- Washer fluid: Use a product suitable for the expected storage temperature.
Warning: Never remove a radiator or expansion-tank cap from a hot engine. Hot coolant and steam can cause severe burns. If coolant type, concentration, or system condition is uncertain, have the cooling system tested by a qualified technician.
Oil Change Importance
Fresh oil can reduce the time contaminants remain in contact with internal engine parts. However, oil choice must match the engine design, clearances, climate, and manufacturer specification. Some older flat-tappet engines use oils formulated with higher anti-wear additive levels, but zinc or ZDDP does not fix blow-by and does not determine viscosity by itself.
Do not select oil only because the label says “classic.” For example, Mobil states that its Classic Car 10W-30 is intended for certain older flathead and overhead-valve engines and is not suitable for most post-1996 gasoline engines. Use the exact viscosity and performance category required for your engine, or consult an engine builder familiar with that design.
Battery Maintenance Tips
Classic cars may use six-volt or 12-volt batteries, positive or negative ground, flooded lead-acid, AGM, gel, or another chemistry. Confirm voltage, polarity, and battery type before connecting any charger or maintainer.
- Inspect and clean. Look for cracks, bulging, leakage, loose hold-downs, and corrosion. Wear eye protection and gloves.
- Choose one storage method. Disconnect the battery as the vehicle manual directs, remove it to a suitable storage location, or connect a smart maintainer approved for the battery type and voltage.
- Check flooded batteries only when applicable. If the battery has removable caps, follow the battery maker’s instructions and use only distilled water when topping up is permitted. Never open a sealed battery.
- Expect memory loss on newer classics. Disconnecting power may erase radio codes, clock settings, adaptive values, alarms, or other stored information.
Chevrolet recommends removing the negative cable or using a trickle charger for extended storage and warns that charging should take place in a well-ventilated area away from flames and flammable materials.
Warning: Battery charging can release flammable gas, and incorrect polarity can damage wiring or start a fire. Use a charger that matches the battery voltage, chemistry, and ground configuration, and follow the charger and vehicle instructions exactly.
Preparing Your Classic Car for Long-Term Storage
For storage lasting 30 days or more, work through the following checklist after completing any overdue repairs.
- Choose a dry, ventilated location. Protect the car from direct sunlight, roof leaks, standing water, fertilizer, solvents, and other corrosive chemicals.
- Wash, dry, and protect the car. Clean the exterior, underbody, wheel wells, interior, and trunk, then wax suitable painted and bright-metal surfaces.
- Service fluids. Change or test fluids as required by the manual and maintenance history. Record the product, quantity, and date.
- Prepare the fuel system. For gasoline storage, use fresh fuel and a compatible stabilizer when the vehicle and product directions call for it. Do not add stabilizer to badly aged fuel and expect it to become fresh again.
- Circulate treated fuel safely. Follow the product label. Gold Eagle’s STA-BIL Storage directions call for fresh fuel, a tank about 95% full, and five minutes of engine operation after treatment. Other products may differ.
- Protect the battery. Disconnect, remove, or maintain it with equipment matched to the car’s voltage, polarity, and battery chemistry.
- Set the tires correctly. Inflate cold tires to the vehicle placard, manual, or tire maker’s storage recommendation. Inspect tread, sidewalls, valve stems, and date codes.
- Secure the vehicle. On a level surface, place the transmission in the position specified by the manual and use wheel chocks. For very long storage, ask a specialist whether the parking brake should remain released to reduce sticking risk on that brake design.
- Control pests. Remove food and nesting material, seal building entry points, and use traps where appropriate. If breathable plugs are placed in the intake or exhaust, attach a large reminder to the steering wheel so every plug is removed before starting.
- Cover and document. Fit a clean, breathable indoor cover, record the odometer and preparation date, and leave a checklist with the keys.
Note: Advice about periodic engine starting varies by manufacturer. Follow the model-specific manual. Avoid starting the engine only for a few minutes; a short idle may not fully warm the oil, exhaust, transmission, brakes, or driveline.
How to Pick the Best Storage Spot for Your Classic Car?
The best storage space is clean, dry, secure, ventilated, and stable. Climate control is helpful, but humidity control and the prevention of condensation matter more than hitting one universal temperature.
- Moisture control: Check for roof leaks, sweating pipes, damp floors, and condensation. Use a hygrometer to track relative humidity.
- Temperature stability: Avoid rapid temperature swings and direct sunlight. Cooler temperatures can slow deterioration, but cold storage without dehumidification may raise relative humidity.
- Ventilation: The area should not trap fuel vapors, battery gases, or damp air.
- Floor condition: Use a clean, level, hard surface. A vapor barrier beneath the car may help on damp concrete, but it must not create a trip hazard or trap water.
- Security: Look for controlled access, lighting, alarms, cameras, and a written plan for fire, water, and power failures.
- Access: Leave enough space to inspect all sides, open the hood and doors, check the floor for leaks, and service the battery.
The Canadian Conservation Institute advises keeping relative humidity below 70% to reduce rapid corrosion, while also noting that some vehicles with wood or restrained leather may need humidity above 30%. Its guidance shows why a rigid “40–50% for every classic” rule is too simplistic. Review the full preventive conservation guidance for vehicle collections when preserving rare original materials.
Best Practices for Covering and Protecting Your Vehicle
A cover should protect the finish without trapping moisture or rubbing abrasive dirt against the paint. Cover only a clean, fully dry vehicle.
Choosing the Right Cover
- Use a breathable indoor cover for a dry enclosed space. Choose a soft inner surface that is compatible with the paint.
- Choose a close fit that does not drag across the floor or flap against sharp trim.
- Avoid loose plastic sheeting directly on the car. It can trap condensation and may abrade or stain finishes.
- Use an outdoor-rated system only when necessary. Outdoor storage adds risks from wind, ultraviolet light, water, animals, and falling debris, so follow the cover maker’s ventilation and tie-down instructions.
Regular Cover Maintenance Tips
Inspect the cover and the vehicle beneath it during every storage check. Never place a gritty or wet cover back on the paint.
| Task | Suggested Frequency | What to Check |
|---|---|---|
| Inspect for pests | Monthly | Droppings, nesting, chewed fabric, wiring damage, or disturbed plugs |
| Check for moisture | Monthly and after severe weather | Condensation, damp carpet, musty odor, water marks, or floor moisture |
| Clean the cover | As needed under the maker’s instructions | Dust, grit, stains, mildew, torn seams, or damaged elastic |
| Check fit and contact points | Every inspection | Rubbing at mirrors, antennas, emblems, hood ornaments, and sharp trim |
Why Regular Inspections Matter During Storage
A monthly inspection is a practical baseline for most indoor storage situations. Check more often when the building is damp, unheated, newly rented, exposed to storms, or known to have pests.
- Look under the car: Note the color, location, and amount of any fluid. Do not assume every drip is harmless.
- Check tires: Measure cold pressure and inspect for cracks, bulges, flat spots, or contact with chemicals.
- Check the battery: Confirm the maintainer is operating normally, cables are secure, and there is no heat, odor, swelling, or leakage.
- Inspect the body and interior: Look for condensation, rust blooms, mold, staining, pest activity, and cover abrasion.
- Check the storage space: Confirm that ventilation, dehumidification, alarms, cameras, and drainage still work.
- Update the log: Record humidity, tire pressure, battery status, leaks, pest signs, and any corrective work.
Common Classic Car Storage Mistakes to Avoid
- Covering a wet or dirty car.
- Using a charger without confirming six- or 12-volt operation, polarity, and battery chemistry.
- Overinflating tires or ignoring old, cracked, or damaged tires.
- Leaving food, cardboard, cloth, or loose insulation where rodents can nest.
- Starting the engine briefly without bringing the full vehicle to operating condition.
- Using the parking brake for months without considering whether the specific brake design may stick.
- Leaving the car on a hydraulic jack or placing stands under unapproved points.
- Filling the tank beyond the first automatic shutoff or product instructions.
- Assuming fuel stabilizer will restore old fuel.
- Skipping insurance, access, fire, flood, and theft planning for an off-site facility.
Warning: If the vehicle must be raised, use the factory lift points, a level solid surface, properly rated stands, and wheel chocks. Never work under or store a vehicle supported only by a hydraulic jack.
Common Issues to Look For Before Seeking Professional Help for Classic Car Maintenance
Before arranging professional service, document what you see, smell, hear, and feel. Clear notes help a technician diagnose problems without guesswork.
- Rust or corrosion: Inspect the underbody, wheel wells, brake lines, fuel lines, battery tray, seams, and drain areas.
- Fluid leaks: Check oil, coolant, brake fluid, fuel, transmission fluid, differential oil, and power-steering fluid. Fuel odor or wet fuel-system parts require immediate attention.
- Tire damage: Look for sidewall cracking, bulges, exposed cords, severe flat spots, or persistent vibration.
- Brake problems: Watch for a stuck parking brake, seized wheel, soft pedal, fluid loss, or heavy corrosion.
- Pest damage: Check wiring, upholstery, insulation, intake openings, air cleaners, and exhaust outlets.
- Electrical faults: Inspect brittle insulation, loose grounds, corroded terminals, blown fuses, hot wiring, or a charger that shows an error.
- Fuel deterioration: Sour odor, varnish deposits, leaks, or hard starting may require tank, line, pump, or carburetor service.
Stop and call a qualified classic-car technician if you find fuel leakage, brake failure, damaged tires, severe corrosion, rodent-damaged wiring, coolant contamination, a swollen or leaking battery, or an engine that will not build oil pressure.
Preparing Your Classic Car for a Safe Return to the Road
Do not treat the first start as a routine departure. Remove the cover and every intake, exhaust, or pest plug, then inspect the vehicle in good light.
- Review the storage log. Confirm what fluids, treatments, battery steps, and plugs were used.
- Inspect underneath. Identify leaks before moving the car.
- Check tires and wheels. Set cold pressure to the correct road-use specification, inspect sidewalls and tread, and torque wheel fasteners to the proper specification when service has been performed.
- Inspect brakes and steering. Check fluid levels, pedal feel, parking-brake release, visible hoses and lines, and steering movement.
- Check belts, hoses, wiring, and nests. Remove debris around the fan, pulleys, exhaust, air intake, and engine.
- Reconnect or install the battery correctly. Verify polarity before making connections. Follow any relearn or radio-code procedure.
- Verify fluids. Check engine oil, coolant, brake fluid, clutch fluid, transmission fluid, and fuel condition as applicable.
- Prime or pre-lubricate only when required. Engines stored for a very long period, freshly rebuilt engines, and engines with known oil-drainback issues may need a model-specific pre-oiling procedure from a specialist.
- Start in a ventilated area. Watch oil pressure, charging, temperature, warning lights, exhaust, and leaks. Shut down immediately for knocking, no oil pressure, fuel leakage, overheating, smoke from wiring, or a strong burning smell.
- Begin with a slow test. Check brakes at walking speed, then take a short low-speed drive. Reinspect for leaks, loose parts, abnormal heat, and persistent tire vibration before normal road use.
Michelin advises keeping stored tires at placard pressure rather than overinflating them. Temporary flat-spot vibration often eases as tires warm, but persistent vibration requires professional inspection.
Frequently Asked Questions
How often should I check on my car during storage?
Check it about once a month as a practical baseline. Inspect more often after storms, temperature swings, power failures, signs of pests, or changes in humidity. Record tire pressure, battery status, leaks, odors, moisture, and corrosion.
Can I store my classic car in a garage with other vehicles?
Yes, provided the garage is dry, ventilated, secure, and spacious enough for inspection. Keep the classic away from dripping vehicles, battery charging hazards, paint overspray, fertilizers, solvents, and door-contact risks.
Should I use a fuel stabilizer before storage?
A compatible stabilizer is often useful for gasoline vehicles stored 30 days or longer, but follow the vehicle and product instructions. Add it to fresh fuel at the labeled dose and circulate it as directed. It will not restore stale or contaminated fuel.
Is it necessary to disconnect the battery every time?
Not always. Depending on the vehicle, you may disconnect the battery, remove it, or use a compatible smart maintainer. Confirm voltage, polarity, battery chemistry, alarm needs, and memory-reset procedures before choosing a method.
What are the best practices for maintaining tires while stored?
Set cold pressure to the vehicle or tire maker’s recommendation, keep the tires away from heat and chemicals, and inspect them monthly. Do not overinflate them. For very long storage, ask a tire specialist about cradles, storage tires, or safely unloading the tires for that vehicle.
Should I start the engine every month?
Follow the vehicle maker’s storage instructions. A brief idle may create moisture without fully warming the engine, exhaust, transmission, brakes, and driveline. If periodic operation is required, complete the full procedure specified for that model.
Should I leave the parking brake on during long-term storage?
That depends on the brake design and storage surface. In many long-term situations, owners use wheel chocks and leave the parking brake released to reduce sticking risk, but the owner’s manual or a marque specialist should guide the final choice.
Conclusion
Proper classic car maintenance before storage protects much more than appearance. Clean and dry the vehicle, use model-correct fluids and charging equipment, prepare fresh fuel carefully, maintain safe tire pressure, control moisture and pests, and keep a written inspection log. When storage ends, complete a slow, safety-first recommissioning process before normal driving. Thoughtful preparation now can prevent corrosion, breakdowns, and avoidable repair costs later.
Sources
- Ford — Long-Term Gas-Powered Vehicle Storage — cleaning, oil, fuel, battery, ventilation, and storage preparation.
- Chevrolet — Basic Battery Care Tips — extended-storage battery options and charging safety.
- Michelin — Tire Flat Spotting — placard pressure, overinflation, storage, and persistent vibration.
- Gold Eagle — STA-BIL Storage Fuel Stabilizer Directions — fresh-fuel treatment, tank level, dosage, and circulation guidance.
- Mobil — Mobil 1 Classic Car 10W-30 — intended engine designs, zinc content, and application limits.
- Canadian Conservation Institute — Caring for Vehicles — temperature, humidity, corrosion, and material-preservation guidance.







Leave a Reply