
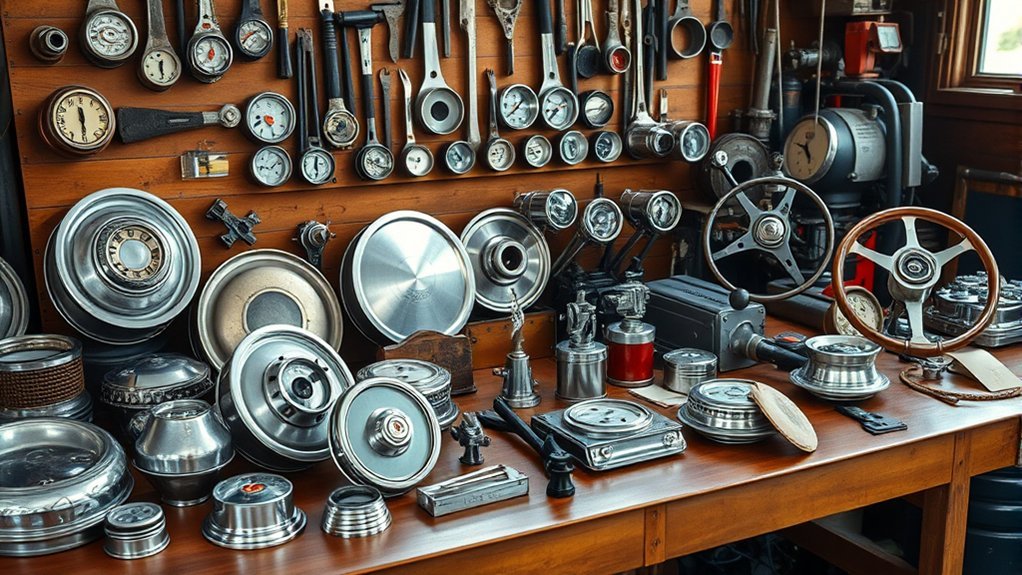
Finding the right classic car parts takes more than locating a component that looks similar. The correct part must match the vehicle’s year, build date, body style, engine, transmission, options, and restoration goal. Before buying, compare numbers and measurements, inspect the condition, check the seller’s terms, and decide whether originality or dependable road use matters most.
Quick Answer
To source classic car parts, identify the vehicle and its factory configuration, find the original or superseded part number, compare markings and dimensions, request detailed seller photos, inspect the part’s condition, and confirm shipping and return terms. Use new or professionally rebuilt parts when age or wear could affect safety.
Key Takeaways
- Start with the vehicle’s exact year, build date, body style, engine, transmission, trim, plant, and option codes.
- Do not treat OEM, NOS, NORS, used original, remanufactured, licensed reproduction, and aftermarket parts as interchangeable terms.
- A matching logo or casting number helps, but it does not prove that a part fits your exact vehicle.
- Ask for clear photos, measurements, date codes, damage details, included hardware, and the seller’s return policy before paying.
- Choose safe, standards-compliant replacements for aged tires, hoses, friction materials, steering parts, and other critical components.
At a Glance
| Time Required | About 30–90 minutes to research and verify each candidate part; rare parts may require a longer search |
| Difficulty | Easy to moderate, depending on the vehicle’s age, rarity, and documentation |
| Tools Needed | Factory parts book or archive, vehicle identification records, tape measure or caliper, flashlight, inspection mirror, multimeter, camera, and written checklist |
| Cost | Varies widely by rarity, condition, completeness, rebuildability, shipping size, and whether a core charge applies |
Define Your Restoration Goal Before Buying Parts
The best part for a judged restoration may not be the best part for a car that will be driven every week. Set the project goal before you begin shopping:
- Preservation: Retain as much serviceable original material as possible and repair parts instead of replacing them when practical.
- Factory-correct restoration: Match the vehicle’s original configuration, materials, finishes, markings, and production period as closely as possible.
- Reliable driver: Preserve the car’s appearance while using dependable replacement or upgraded parts where they improve safety and serviceability.
- Period-correct build: Use parts and modifications that were available during the vehicle’s era, even if they were not installed at the factory.
- Restomod: Combine a classic body and appearance with modern brakes, steering, suspension, powertrain, wiring, or comfort features.
Your goal affects the acceptable part type, condition, finish, price, and level of documentation. A visible date-coded component may matter on a concours car, while a hidden modern replacement may be the better choice for a regularly driven vehicle.
Why Genuine Used Car Parts Matter for Classic Car Restoration
Genuine used parts can preserve factory casting shapes, stampings, textures, fasteners, and finishes that are difficult to reproduce. They are especially useful for trim, brackets, housings, wheels, interior hardware, body panels, and rebuildable mechanical cores.
However, an original part is not automatically the correct part or a safe part. Manufacturers changed components during a production year, used more than one supplier, issued superseded service parts, and built different versions for specific engines, plants, trim levels, or option packages.
The National Corvette Restorers Society terminology guide explains an important distinction: an NOS part may match an assembly-line part, while a new old replacement stock part may have been produced as a later service replacement and may differ from what the factory installed.
Classic Car Parts Terminology
| Part Type | What It Means | Best Use |
| Factory-installed original | A component believed to have been installed when the vehicle was built | Preservation and highly authentic restorations when the part remains serviceable |
| Used original | A period component removed from another vehicle | Original trim, castings, brackets, cores, and hard-to-reproduce details |
| NOS | New old stock that may match the production component, subject to verification | Appearance-sensitive or date-sensitive restorations |
| NORS or service replacement | A later replacement supplied for service use, sometimes with changed construction or markings | Repairs where function matters more than assembly-line appearance |
| Remanufactured | A used core rebuilt with repaired or replaced internal components | Starters, alternators, carburetors, steering gears, brake boosters, and similar assemblies |
| Licensed reproduction | A newly made reproduction authorized through a manufacturer licensing program | Unavailable originals, especially trim, emblems, body parts, upholstery, and hardware |
| Aftermarket | A non-factory replacement or upgrade made by another company | Drivers, restomods, performance builds, and applications where a correct original is unavailable |
Note: “OEM” identifies an original-equipment manufacturer or supply relationship; it does not prove that every part carrying that description matches the component installed on your exact car.
How to Identify Your Classic Car Before Ordering
Fitment begins with the vehicle, not the catalog listing. Record every identifier you can find before searching for parts:
- Model year and assembly date
- Make, model, series, and body style
- Assembly plant
- Engine family, displacement, and casting numbers
- Transmission type and identification numbers
- Trim, paint, axle, and option codes
- Air conditioning, power steering, power brakes, and other major options
- Original or replacement drivetrain status
- Existing part number, casting number, date code, dimensions, connector type, and mounting pattern
For vehicles from model year 1981 onward, the NHTSA VIN decoder can help identify manufacturer-reported information. Earlier vehicles may use shorter or make-specific serial numbers, so consult the factory parts book, service literature, body tag, build sheet, club records, or marque-specific reference guides.
Manufacturer archives can help establish original equipment and production details. The GM Heritage Archive provides downloadable vehicle information kits, while the Ford Heritage Vault contains brochures, manuals, photographs, and other historical material.
Pro Tip: Photograph the original part before removal. Capture its mounting position, fasteners, wiring route, hose orientation, stamped numbers, casting marks, finishes, and any spacers or shims.
Seven-Step Process for Sourcing Classic Car Parts
1. Document the Vehicle
Create a record of the car’s identifiers, options, production date, modifications, and current components. Do not assume that the installed part is original; previous owners may have used later replacements or parts from another model.
2. Find the Correct Part Number
Use a factory parts book, assembly manual, service bulletin, manufacturer archive, or recognized marque reference. Check for superseded numbers and production-date breaks. Also confirm whether the number refers to a complete assembly, a subcomponent, or a service kit.
3. Compare the Physical Details
Compare length, width, bolt spacing, shaft diameter, spline count, electrical terminals, hose size, port orientation, bracket shape, and left- or right-hand placement. For appearance-sensitive parts, compare grain, finish, lettering, plating, seams, and fastener style.
4. Request Seller Evidence
Ask for current, well-lit photos rather than catalog images. Request close-ups of the part number, casting marks, date code, mounting points, damaged areas, connector ends, and included hardware. For an electrical or mechanical part, ask whether it has been tested and what the test covered.
5. Inspect Condition and Rebuildability
Check for cracks, bends, corrosion, pitting, stripped threads, elongated holes, seized movement, missing pieces, damaged connectors, water intrusion, weld repairs, and previous machining. A rebuildable core should have usable castings and mounting surfaces, not just a recognizable shape.
6. Confirm the Complete Transaction
Before paying, confirm the total price, tax, shipping, insurance, packaging method, core charge, return deadline, restocking fee, warranty, and who pays return freight. Ask whether installing, painting, plating, disassembling, or modifying the part ends the return right.
7. Document the Purchase and Installation
Save the listing, seller messages, invoice, packaging, test results, and photographs. Record any restoration or rebuilding work, replacement materials, date codes, and measurements. This file can help with future repairs, judging questions, insurance documentation, and resale.
Trusted Suppliers for Classic Car Parts
No source is ideal for every make, model, and component. Treat the following as places to search, not blanket endorsements. Confirm fitment, condition, seller history, return terms, and current inventory before buying.
- Used-parts networks: Trinity Used Car Parts markets recycled OEM components across a broad range of vehicles. It may help locate discontinued assemblies, but buyers should ask whether the donor vehicle and exact part identifiers are known.
- Restoration catalogs: MAC’s Antique Auto Parts is represented through National Parts Depot and offers model-specific restoration inventory. Search by exact application rather than assuming every part fits an entire vehicle generation.
- Multi-make classic parts: Kanter Auto supplies components for many domestic vehicles from the 1930s through the 1980s, including brake, suspension, engine, and cooling-system parts.
- Manufacturer-licensed reproductions: Chevrolet maintains an official directory for Chevrolet Performance licensed products and GM restoration parts. Licensing supports brand authorization, but the buyer must still confirm the exact application.
- Directories and research leads: The Classic Car Database includes specifications and a directory of parts and services. A directory entry is a starting point and should not replace independent seller checks.
- Marque clubs and local communities: Owners’ clubs often know which suppliers, rebuilders, salvage yards, and reproduction parts work well for a specific model. The Antique Automobile Club of America region and chapter directory can help locate nearby enthusiasts.
Other useful sources include established salvage yards, swap meets, restoration shops, specialist rebuilders, manufacturer-authorized vendors, club classifieds, and owners who are parting out a known donor vehicle.
How to Vet a Classic Car Parts Seller
- Check how long the business or account has been active.
- Read recent reviews, especially reports about inaccurate descriptions, packaging, returns, and refunds.
- Confirm that the seller can answer application-specific questions.
- Ask whether the photographs show the exact item being sold.
- Request a written description of defects and missing pieces.
- Use a payment method with buyer protection when practical.
- Be cautious when a rare part is priced far below comparable examples or when the seller pressures you to pay outside the platform.
Essential Factors to Consider When Sourcing Vintage Car Parts
Fitment and Production Variations
Match more than the year and model. A component may vary with engine size, transmission, body style, wheelbase, air conditioning, power accessories, assembly plant, emissions package, or build date. Look for notes such as “first design,” “second design,” “before serial number,” or “after production date.”
A part number starts the verification process; it does not replace checking the vehicle’s build details, dimensions, mounting points, and production changes.
Condition and Hidden Damage
Rust on a decorative bracket may be repairable. Rust in a brake, suspension, steering, wheel, or structural component can be far more serious. Check machined surfaces, sealing areas, threads, bearing seats, splines, bolt holes, and attachment points. Use dye penetrant, magnetic-particle inspection, pressure testing, or professional measurement when the part’s failure could cause injury or major damage.
Completeness
Rare assemblies often become expensive because small related pieces are missing. Confirm whether the sale includes brackets, clips, spacers, pulleys, linkages, switches, trim rings, fasteners, wiring pigtails, covers, and mounting hardware. Compare the item with an exploded factory diagram when available.
Price and Total Cost
Compare parts with the same number, condition, completeness, and test status. Active asking prices do not prove market value, so review completed sales when possible. Add rebuilding, plating, machining, missing hardware, shipping, insurance, taxes, and core charges before deciding which listing costs less overall.
Returns, Warranties, and Core Charges
Warranty coverage varies. Used, electrical, installed, altered, painted, special-order, and clearance parts may have different rules. Obtain the terms in writing and inspect the shipment immediately. Do not discard the box, label, or packing materials until fitment and condition are confirmed.
How to Spot Authentic Classic Car Parts
Authentication is based on several clues that agree with one another. A logo alone is not enough because packaging can be reused, markings can be copied, and genuine service replacements may differ from assembly-line parts.
Check Part and Casting Numbers
Compare every number with a reliable parts book or marque-specific reference. Determine whether it identifies the finished part, the raw casting, a subassembly, or the package. Check prefixes, suffixes, revision letters, font, character spacing, and number location.
Review Date and Production Codes
Date codes should make sense for the vehicle’s assembly period, allowing for normal supplier and inventory lead time. A component produced years later may be a valid service replacement but not factory-installed original equipment.
Compare Materials and Construction
Inspect metal thickness, casting texture, weld style, seams, plating, paint, grain, fastener type, connector shape, and molded lettering. Compare the candidate part with unrestored examples, factory photographs, judging references, or known originals.
Evaluate Packaging and Provenance
Original packaging, labels, invoices, and ownership history can support a claim, but they are not conclusive by themselves. Make sure the number on the package matches the item inside and that the part’s construction matches the claimed period.
Seek Model-Specific Expertise
Ask a marque club, experienced judge, recognized rebuilder, or restoration shop when the part is expensive or difficult to authenticate. Specialists often know subtle differences in castings, finishes, suppliers, and production changes that a general catalog does not show.
Pro Tip: Keep photographs of the part beside a ruler or caliper and save close-ups of every number and marking. This creates evidence if the item differs from the listing or must be authenticated later.
Used Classic Car Part Inspection Checklist
- Body and trim: Check rust-through, stretched mounting holes, cracked pot metal, missing studs, warped panels, poor filler work, and damaged clips.
- Castings: Check cracks, freeze damage, corrosion, repaired ears, damaged threads, excessive machining, and distorted gasket surfaces.
- Rotating parts: Check shaft play, rough bearings, damaged splines, bent pulleys, worn keyways, and signs of overheating.
- Electrical parts: Check terminal damage, melted insulation, corrosion, moisture, continuity, resistance, and evidence of incorrect voltage.
- Interior pieces: Check brittle plastic, sun damage, broken mounting points, shrinkage, stains, odors, and missing trim.
- Glass: Check chips, scratches, edge damage, delamination, correct curvature, tint, thickness, and required safety markings.
- Chrome and stainless trim: Check pits, waves, cracks, thin edges, prior grinding, missing studs, and whether repair will erase important details.
- Rebuildable cores: Confirm that the main housing, mounting areas, bores, shafts, and hard-to-replace pieces remain usable.
Safety-Critical Parts Require Extra Care
Warning: Do not select tires, brake hoses, fuel hoses, steering parts, suspension parts, wheels, structural components, or restraint hardware only because they are original. Age, corrosion, fatigue, hidden damage, and outdated materials can make an authentic part unsafe.
Tires
Do not judge an old tire by tread depth alone. NHTSA states that tires become more prone to failure as they age and notes that some manufacturers recommend replacement after six to ten years regardless of treadwear. Check the DOT tire identification number and follow the tire and vehicle manufacturer’s guidance. See NHTSA TireWise for current tire-safety information.
Brakes, Steering, and Suspension
Use parts from a known source and inspect them professionally before road use. New replacement brake hoses sold in the United States are subject to federal performance and labeling requirements under FMVSS No. 106. Do not reuse cracked hoses, heavily corroded hydraulic parts, distorted wheels, damaged steering arms, or questionable fasteners merely to preserve originality.
Brake and Clutch Dust
Some older brake and clutch friction material may contain asbestos, and it cannot be identified safely by sight. Do not use compressed air, dry brushing, or an ordinary shop vacuum to clean unknown dust. Follow the EPA’s brake and clutch asbestos guidance or have the work handled by an equipped professional.
Fuel and Cooling Systems
Replace cracked, hardened, swollen, or unknown fuel hoses with material rated for the fuel being used. Pressure-test repaired tanks and cooling components when appropriate. Never open a hot cooling system, and dispose of fuel, coolant, oil, and solvents according to local requirements.
Air-Conditioning Refrigerant
Many older vehicles were built with CFC-12 refrigerant. Do not vent refrigerant or assume another product is a universal drop-in substitute. The EPA’s CFC-12 retrofit guidance explains approved refrigerants, recovery, fittings, labeling, and retrofit conditions. Refrigerant work should be completed with appropriate equipment and training.
Final Roadworthiness Check
After installing brake, steering, suspension, wheel, tire, fuel, or drivetrain parts, have the complete system checked before normal road use. Test first in a controlled setting and recheck fluid levels, fastener torque, leaks, wheel clearance, hose routing, alignment, and unusual noises.
Common Parts Needed for Classic Car Restoration Projects
Most restorations require a mix of original, rebuilt, reproduction, and new replacement components. The right mix depends on the project goal and the condition of the car.
- Engine and fuel system: Cylinder heads, manifolds, carburetors, fuel pumps, brackets, pulleys, linkages, mounts, gaskets, and hoses.
- Cooling system: Radiators, heater cores, water pumps, fan shrouds, thermostats, caps, clamps, and hoses.
- Transmission and driveline: Gears, synchronizers, clutches, torque converters, shifters, driveshafts, universal joints, seals, and mounts.
- Brakes: Master cylinders, boosters, wheel cylinders, calipers, drums, rotors, shoes, pads, lines, hoses, springs, and hardware.
- Steering and suspension: Steering gears, linkages, control arms, ball joints, bushings, springs, shocks, spindles, bearings, and fasteners.
- Electrical system: Wiring harnesses, switches, relays, gauges, senders, starters, alternators or generators, lamps, and connectors.
- Body and exterior trim: Sheet metal, bumpers, grilles, emblems, moldings, mirrors, handles, glass, weatherstripping, and mounting clips.
- Interior: Seats, upholstery, carpet, dashboards, steering wheels, knobs, consoles, door panels, headliners, and hardware.
Do not order every part at the beginning of the project. Disassemble and document one system at a time, inspect what can be repaired, and build a verified list. This reduces duplicate purchases and makes it easier to compare the replacement with the original component.
What to Do If a Classic Car Part Does Not Fit
- Stop before modifying it. Grinding, drilling, painting, wiring, or pressing the part together may end your return rights.
- Compare the ordered number with the invoice and packaging. Confirm that the correct item was shipped.
- Recheck the vehicle identification. Look for production-date breaks, body-style differences, engine changes, or previous modifications.
- Measure the old and new parts. Photograph the mismatch, mounting points, connectors, and labels.
- Contact the seller promptly. Provide the order number, vehicle details, measurements, and clear photos.
- Keep all packaging. Large or fragile parts may require the original packing method for an insured return.
- Record the resolution. Note the correct number or application so the same error is not repeated later.
Frequently Asked Questions
What tools are necessary for classic car restoration projects?
A basic restoration kit includes quality sockets and wrenches, screwdrivers, pliers, a torque wrench, jack stands, a multimeter, inspection lights, measuring tools, penetrating oil, labeled storage bags, and a camera. Specialized work may require pullers, presses, welding equipment, scan or test equipment, and model-specific tools. Use properly rated lifting equipment and obtain professional help for work beyond your training or tools.
How do I determine the value of classic car parts?
Compare completed sales for the same part number, application, condition, date code, and completeness. Adjust for testing, rebuilding, missing hardware, damage, shipping, and rarity. Asking prices alone do not establish value. Marque clubs, swap-meet vendors, specialist rebuilders, and experienced restorers can help when few comparable sales exist.
Are there warranties on classic car parts?
Some new, reproduction, rebuilt, and used parts include limited coverage, but the terms vary. Electrical parts, installed parts, special orders, used components, cores, and modified items may have extra restrictions. Read the written policy before buying and confirm the return deadline, restocking fee, labor exclusions, shipping responsibility, and actions that void coverage.
What are the common restoration mistakes to avoid?
Common mistakes include buying before documenting the vehicle, assuming the installed part is original, disassembling too much at once, discarding reusable cores, losing small hardware, relying on one catalog, ignoring production-date changes, modifying parts before checking fit, and choosing appearance over safety. Photograph, label, measure, research, and test each system as the project moves forward.
How can I find local classic car clubs or communities?
Search the AACA region and chapter directory, look for a national club dedicated to your vehicle’s make or model, attend local shows and swap meets, and ask established restoration shops about nearby groups. A marque-specific club is often the best source for production details, trusted rebuilders, rare-part leads, and honest feedback about reproduction quality.
Are reproduction parts bad for a classic car?
No. Quality varies, but a well-made reproduction may be more available, safer, and easier to service than an aged original. For a judged restoration, compare its configuration, finish, markings, and materials with factory documentation. For a driver, prioritize safe fit and dependable operation while preserving visible original details where practical.
Can I use a VIN decoder for a pre-1981 classic car?
Usually not with the same results as a modern 17-character VIN. Pre-1981 formats varied by manufacturer and model. Use make-specific serial-number references, body and trim tags, engine and transmission numbers, factory parts books, build sheets, historical archives, and knowledgeable marque clubs.
Conclusion
Successful classic car restoration depends on verification, not labels or assumptions. Identify the vehicle’s exact configuration, research the correct number, compare physical details, inspect condition, and obtain clear transaction terms before buying. Preserve original components when they are correct and serviceable, but use safe, high-quality replacements when age or wear could place the vehicle or its occupants at risk. Finally, document every part and repair so the next decision is easier and the car’s history remains clear.
Sources
- National Highway Traffic Safety Administration VIN Decoder — modern VIN identification and manufacturer-reported vehicle information
- GM Heritage Archive Vehicle Information Kits — factory historical and specification research
- Ford Heritage Vault — historical brochures, manuals, photographs, and vehicle records
- National Corvette Restorers Society Lingo Defined — distinctions among OEM, NOS, NORS, and original parts
- NHTSA TireWise — tire inspection, age, maintenance, and replacement guidance
- U.S. EPA Brake and Clutch Asbestos Guidance — safe practices for uncertain friction-material dust







Leave a Reply